

SV105 camera for Solar imaging?!

SV105 camera for Solar imaging?!
Grant took really nice amazing solar images with his SV105 camera I talked with him last week and he was very kind to make his SV105 using experience in this review. 
1. Introduction
Greetings fellow astronomers. Almost a year ago after getting back into Astronomy after 25 years I bought Svbony SV105 eyepiece camera along few cheap telescopes in early spring of 2021. I was really was on a tight budget and this camera costs only $50. Excited to learn about new things at the time I began exploring the wonderful world of astronomy using a few cheap eyepieces and the SV105 camera to record what I saw in the heavens above. Well what can I say the last year with this camera has opened my eyes to so many beautiful wonders in the universe. I have used this camera with several telescopes (long and short focal lengths and everything in between) to image the Moon and several planets like Jupiter and Saturn. I have acquired some really nice images from it considering what it costs.
Attached are some of the images I have taken with the Svbony SV105 camera:

Figure 1: The Moon captured with a Meade ETX60 refractor at FL 400mm
Keep in mind the shots of Jupiter and Saturn seen below were imaged with a reflector with a bird jones design which means there is a built in barlow in the focuser that causes some optical abberations. This design is well known to create some focus issues as you cannot a real sharp image and you also get some color abberations. This camera will do a better job with a MAK telescope for sure which does not have such limitations. I am still very happy with them.


Figure 2 and 3: Jupiter and Saturn captured with Celestron 114GT reflector at FL 1000mm
But here is the question and the subject of todays review. How well does the SV105 work with imaging the Sun? Lately I have spent several days using the Svbony SV105 eyepiece camera to image the Sun and every time I have used it I have been getting better and better results. What is amazing is how well the SV105 camera works with the Android USB Camera App which I use pretty much use all the time along with several astroprocessing apps (which I will get into later down in the review). For solar imaging I deliberately used the shortest focal length telescope I own to get the widest field of view possible as I needed to get the whole disk of the sun in the SV105 camera view. Like most budget cameras keep in mind the SV105 has a very small field of view due to it's small sensor size. So I pulled out my trusty little tabletop Celestron 76mm Firstscope (with a focal length of 350mm) along with a Bard Solar filter I had lying around, a Svbony Variable Polarizing Filter (I used half of one) along with a orange colored filter which seems to work well to bring out the sunspot details nicely. Of course i had to adjust out the orange color out and for this I used the built in hue adjustment control in USB Camera app to alter the color and make the sun less orange and more natural looking.
2. Equipment Used:


Figure 4, 5, and 6: Equipment Used

Figure 7: USB Camera App for Android
3. Processing the Sun:

Figure 8: Unprocessed Single image capture in JPG format
So with the videos being produced by the usb camera app I used PIPP to convert the AVI files into SER video files which are of a better quality format that can be stacked in Autostakkert. I next used Autostakkert to stack and capture a good image from the video files captured. Finally, I used Registax to adjust the histogram light settings and sharpen all the images (including the single capture images like above i might add). Registax is great for pulling out the sunspots and making them stand out out better in the image and improving contrast.
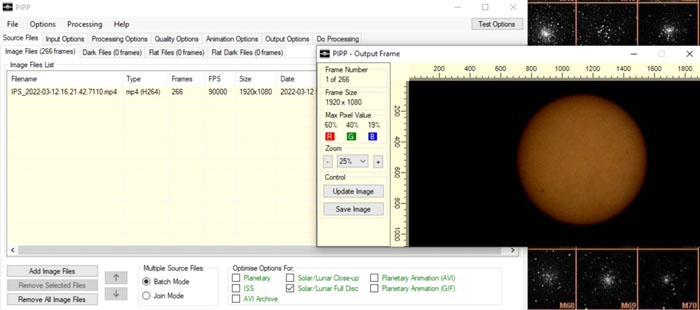
Figure 9: Processing in PIPP
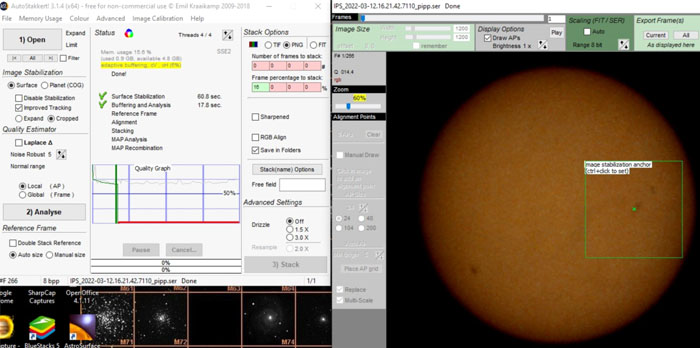
Figure 10: Processing in AutoStakkert
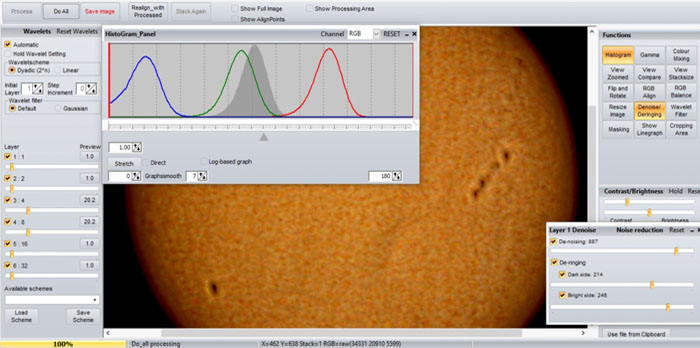
Figure 11: Processing in Registax
4. The Final Results:
So how well did the Svbony SV105 camera work on capturing Solar images? Take a look at the results below and you decide for yourself!


Figures 12, 13, 14 and 15: Final Processed Solar Images
5. Conclusion
In my opinion with the cheap budget equipment I have and use I think this camera really is an excellent value and I am sure astronomers with better equipment than mine can even get much better results out of this little gem of a camera from Svbony. Keep in mind this camera costs around $50 only! Seems like a steal of a deal to me. I think it is great entry level astrophotography camera for astronomers starting out for sure and I have personally have enjoyed a lot. I hope you enjoyed this article on the SV105 and its solar imaging capabilties. Give it a try and be careful! Never ever look at the Sun directly without a proper sun filter or with your eyes directly!
The SVBONY SV105 camera:


