
Table of Contents
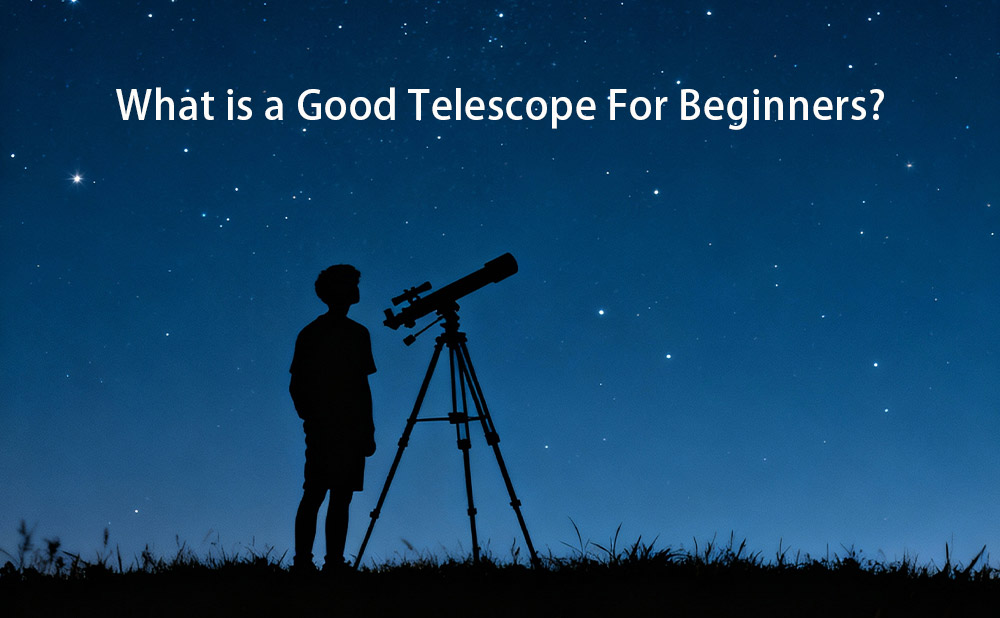
What is a Good Telescope For Beginners?
Have you ever looked up at the night sky, wondered what it would be like to get a closer look at the moon’s craters, Saturn’s rings, or distant galaxies?Have you been wanting a telescope but have no idea where to start? Are you feeling overwhelmed with the wealth of information and options out there?If so,here is a telescope beginner's guide!
Types of Telescopes for Beginners: Which One Is Right for You?
Refractor Telescopes
Refractor telescopes are the ones you probably picture when you think of a telescope. They’re a popular choice for beginners because they’re simple, low-maintenance, and great for viewing bright objects like the moon, planets, and double stars.
One of the biggest advantages of refractor telescopes for beginners is their durability. Since the lens is sealed inside the tube, they’re less prone to dust, moisture, or alignment issues (called “collimation”) than other types. They also provide sharp, high-contrast views, which makes them perfect for observing details on the moon or Jupiter’s moons.
On the downside, refractor telescopes can be more expensive per inch of aperture compared to other types. Larger refractors (with bigger lenses) also tend to be heavy and cumbersome, which might not be ideal if portability is a priority. But for beginners who want a reliable, easy-to-use telescope for stargazing, a small to medium-sized refractor is a fantastic option.
Reflector Telescopes
Reflector telescopes use a mirror at the back of the tube to gather and focus light, rather than a lens. They offer more aperture for your money - meaning you can get a larger, more light-gathering telescope at a lower price than a refractor of the same size.
For beginners interested in viewing deeper-sky objects like galaxies, nebulae, and star clusters, reflectors are an excellent choice. Their large apertures allow them to capture more light.They’re also generally lighter and more portable than refractors of the same aperture.
The main downside of reflectors is that they require occasional collimation (aligning the mirrors) to maintain sharp views. While this sounds intimidating, it’s actually a simple process that takes just a few minutes once you get the hang of it.
Compound (Catadioptric) Telescopes
Catadioptric telescopes combine lenses and mirrors to offer the best of both refractors and reflectors. They’re compact, portable, and versatile - making them a great choice for beginners who want to observe both planets and deep-sky objects.The two most common types of compound telescopes are Schmidt-Cassegrain (SCT) and Maksutov-Cassegrain (Mak-Cass).
Compound telescopes are ideal for beginners who want a “do-it-all” telescope but don’t want to sacrifice portability. They’re also a good option if you’re interested in beginner astrophotography.
The primary drawback is that their price is typically higher than that of entry-level refractors or reflectors of a similar class. Additionally, they have characteristics such as slower thermal stabilization and a narrower field of view at their native focal ratio, which beginners need to adapt to.
How to Choose a Telescope for Beginners: Key Factors to Consider
With so many telescopes for beginners on the market, it can be tough to decide which one is right for you. To help you make an informed choice, let’s break down the key factors to consider when shopping for a good beginner telescope.
Aperture: The Most Important Feature
Aperture is the size of the telescope’s main lens or mirror - and it’s the single most important factor in determining the quality of your views. The larger the aperture, the more light the telescope can gather, which means brighter, clearer images of faint objects.
For beginners, a good aperture range is between 70mm and 130mm (2.8 inches to 5.1 inches). Telescopes with apertures smaller than 70mm might struggle to show detail on planets or deep-sky objects, while apertures larger than 130mm can be heavy, expensive, and harder to handle for new stargazers.
Portability: Can You Actually Take It Outside?
A telescope that’s too heavy will rarely get used. When shopping for telescopes for beginners, consider where you’ll be using it. If you plan to stargaze in your backyard, a slightly heavier model might be okay. But if you want to take it on trips, camping, or to dark-sky locations, portability is key.Look for telescopes that weigh less than 30 pounds (including the mount and tripod) if you’ll be carrying it regularly.
Budget: How Much Should You Spend?
You don't need to spend a fortune. A decent entry-level telescope can be purchased for $300 to $500.
While it’s tempting to go for the cheapest option, keep in mind that you get what you pay for. Telescopes under $150 might have poor optical quality, be flimsy, or unclear instructions - all of which can ruin your stargazing experience. Investing a bit more in a mid-range model will give you better views, a more durable telescope, and a smoother learning curve.
Mount Type: Alt-Azimuth vs. Equatorial
The mount is the part of the telescope that holds it in place and allows you to aim it at the sky. There are two main types of mounts: alt-azimuth and equatorial.
Alt-azimuth mounts are the simplest and most intuitive. They move up/down (altitude) and left/right (azimuth), just like a camera tripod. They’re easy to use and great for casual stargazing.

Equatorial mounts are designed to track the sky’s rotation. They have one axis aligned with the Earth’s north pole, which allows them to follow celestial objects as they move across the sky with a single adjustment. Equatorial mounts are great for deep-sky observing and astrophotography, but they can be more complex to set up (you’ll need to align them with the north star) and are often heavier than alt-azimuth mounts.
For most beginners, an alt-azimuth mount is the best choice-especially if you’re just starting out and want to keep things simple. If you’re interested in astrophotography or plan to observe deep-sky objects for long periods, an equatorial mount might be worth the extra effort.
Top Rated Telescopes for Beginners: Our Picks
Now that you understand the different types of telescopes for beginners, let’s dive into our top recommendations!
MK127 Maksutov-Cassegrain Telescope:The All-Around Beginner Telescope
For beginners, the SVBONY MK127 is an entry-level telescope that strikes a balance between optical performance and functional versatility. Its 127mm aperture and 1500mm focal length Maksutov-Cassegrain design give it inherent advantages for planetary observation. It delivers high-contrast, sharp-detailed images of the Moon, Jupiter, and Saturn, making it an ideal "planetary telescope."

However, the core advantage of the MK127 lies in its "dual-purpose" capability achieved with an optional 0.65× focal reducer. When the reducer is attached, the system's focal length is reduced to approximately 975mm, and the focal ratio is optimized to around f/7.7. This modification significantly widens the field of view and increases image brightness, transforming the telescope from a specialized planetary instrument into one capable of comfortably observing many bright deep-sky objects, such as the Orion Nebula (M42) or the Andromeda Galaxy (M31), greatly expanding its range of observable targets.
For beginners, this means there is no need to make a difficult choice between planetary and deep-sky observation. The MK127 offers a cost-effective solution that combines the enjoyment of two major types of astronomical observation.
SV550 80mm APO Refractor Telescope:Ultimate Picture Quality
The SV550 80mm APO is a triple-element apochromatic refractor delivering exceptional optical performance. Its core advantage lies in the combination of an 80mm aperture with triple ED (Extra-low Dispersion) glass elements, providing near-perfect chromatic aberration correction and outstanding resolution.

As a native f/6 telescope, the SV550 ensures fast exposure times while its Triplet APO structure renders star points exceptionally tight and sharp. This guarantees outstanding imaging from the center to the edges of the frame, delivering the highest quality raw material for post-processing. While a field flattener is recommended to unlock its full potential, it provides an indisputable optical foundation for its top-tier image quality.
For advanced beginners with clear goals, ample budget, and a desire to get it right the first time, the SV550 is an investment that won't disappoint.
SV503 70mm Flat-Field Refractor Telescope: High Cost-Effectiveness
The SV503 70mm is a high-value solution tailor-made for beginners in astrophotography. It employs a two-element optical design that includes ED glass and a native flat-field capability, delivering sharp stars from the center to the very edge of the frame, significantly simplifying the initial learning curve.

Its core value lies in this flat-field performance and its highly competitive price. You can enjoy wide-field imaging, far surpassing that of standard achromatic telescopes, without the need to purchase an additional field flattener - effortlessly capturing large celestial targets like the Orion Nebula.
For enthusiasts seeking a professional starting point in photography with minimal initial investment, the SV503 70mm provides the optimal entry path.
How to Set Up a Telescope: Step-by-Step Guide
Once you’ve chosen your perfect telescope, the next step is setting it up. Don’t worry - setting up a beginner telescope is easier than you think! Follow these simple steps to get started:
Choose a Good Location
Find a spot in your backyard (or elsewhere) with a clear view of the sky. Avoid areas with streetlights, trees, or buildings that block your view. The darker the location, the better your views will be.
Assemble the Tripod
Extend the legs to a comfortable height (you should be able to look through the eyepiece without bending over too much) and lock them in place. Make sure the tripod is level - this will help with aiming and tracking.
Attach the Telescope to the Mount
Follow the instructions to attach the telescope tube to the mount. This is usually a simple process that involves tightening a few screws or clips.
Install the Eyepiece
Choose a suitable eyepiece and insert it into the diagonal. Tighten the set screw gently to hold it in place.
Align the Finder Scope
The finder scope is a small, low-magnification scope on top of the main telescope that helps you locate objects. To align it, point the main telescope at a bright object (like the moon) and focus it. Then, adjust the finder scope’s knobs so that the same object is centered in the finder scope’s crosshairs. Now, when you aim the finder scope at an object, the main telescope will be pointed at it too!
Start Stargazing
If you have a computerized mount, follow the instructions to input your location and align the telescope (this usually involves pointing it at two bright stars). If you have a manual mount, use the finder scope to locate an object, then look through the main telescope and adjust the focus knob until the image is sharp.
That's it! Setting up a beginner telescope takes just a few minutes once you get the hang of it. Don’t be discouraged if it takes a couple of tries to align the finder scope or focus - practice makes perfect.
How to Use a Telescope for Beginners
Setting up your telescope is half the battle. Even the best beginner telescopes won’t give great results if you don’t know a few key tricks. Let’s break down how to use a telescope for beginners, step by step.
Start with Bright, Easy-to-Find Objects
When you first start using your telescope, don’t jump straight to faint galaxies or distant nebulae - start with bright, easy-to-locate objects like the moon or Jupiter. The moon is the perfect first target: it’s bright, large, and visible most nights, so you won’t waste time searching for it.
Jupiter is another great beginner target. It’s one of the brightest objects in the night sky (second only to the moon and Venus), and you can often see its four largest moons (Io, Europa, Ganymede, and Callisto) with even a small entry level telescope. Saturn is also a crowd-pleaser - its iconic rings are visible with most good beginner telescopes, and seeing them for the first time is a moment you’ll never forget!
Master the Focus Knob
Focusing your telescope is crucial for sharp views. Here’s a pro tip: start with the lowest magnification eyepiece (like a 20mm or 24mm) because it has a wider field of view and is easier to focus. Once the object is sharp with the low-magnification eyepiece, you can switch to a higher-magnification eyepiece (like a 10mm or 6mm) for a closer look.
When focusing, turn the knob slowly - telescopes have a narrow focus range, so even a small turn can make a big difference. If the image looks blurry, try focusing past the point of sharpness and then back again - this helps you find the exact sweet spot. Also, avoid touching the telescope tube while focusing, as even a small bump can throw off the view.
Deal with Atmospheric Turbulence

Ever noticed how stars twinkle? That’s due to atmospheric turbulence - layers of warm and cold air in the Earth’s atmosphere that bend light, making images look shaky or blurry. This is normal, but it can be frustrating for beginners. Here’s how to minimize its effects:
Wait for darker skies: Turbulence is often worse shortly after sunset when the ground is still warm. Wait an hour or two after sunset for the air to cool down, and you’ll notice clearer views.
Avoid low-altitude targets: Objects near the horizon pass through more atmosphere, so they’re more affected by turbulence. Stick to objects that are at least 30 degrees above the horizon (about the height of your fist held at arm’s length) for better views.
Be patient: Sometimes turbulence comes and goes in waves. If the image is blurry, wait a minute or two - you might get a few seconds of sharp view when the air calms down.
Use Red Light to Protect Your Night Vision
Your eyes take about 20–30 minutes to adjust to dark conditions (this is called “dark adaptation”), and even a small amount of white light (like from a phone or flashlight) can ruin this adjustment. To protect your night vision while using your telescope, use a red light. You can buy a red flashlight at most astronomy stores, or you can cover a regular flashlight with red cellophane.
Red light doesn’t affect your dark adaptation as much as white light, so you’ll be able to see faint objects better. Just avoid shining the red light directly into the telescope’s eyepiece or at other stargazers - even red light can be distracting if it’s too bright.
Keep a Stargazing Log
Keeping a stargazing log is a fun and helpful habit for beginners. Write down the date, time, location, and objects you viewed, along with notes about the conditions (like how clear the sky was) and what you saw (e.g., “Jupiter’s moons were visible; Saturn’s rings looked bright”). Not only will this help you track your progress as a stargazer, but it’s also a great way to remember your favorite stargazing moments.
FAQ
Q1:Are planets visible all year?
A:No,planets are not visible all year round because both the planets and Earth are orbiting the Sun. Due to their different orbital speeds and paths, the relative positions of the planets and the Sun in our sky are constantly changing from our viewpoint on Earth. When a planet moves into the same direction in the sky as the Sun (an alignment called "conjunction"), it becomes completely lost in the Sun's glare and is invisible. We can only observe it in the pre-dawn or post-sunset sky once it has moved far enough away from the Sun to achieve sufficient angular separation.
Similarly, deep-sky objects have specific seasonal viewing windows, but the reason for this is Earth's orbit around the Sun. As Earth moves to different points in its orbit, the portion of the night sky facing us changes. This means that specific deep-sky objects (such as a particular galaxy or nebula) only rise into the evening sky during certain seasons of the year, while they remain hidden below the horizon and unobservable during others. For example, the beautiful Orion Nebula is a hallmark of the winter sky; during summer nights in the Northern Hemisphere, it is located below the horizon and cannot be observed.
Q2:What is telescope collimation?
A:In simple terms, collimation is the process of aligning all the optical components of your telescope so that they are perfectly centered and pointing in the same direction.
This primarily applies to reflector telescopes (like Newtonians), as they are the most sensitive to misalignment. However, Schmidt-Cassegrains and other compound telescopes also require occasional collimation.
Q3:Are there mobile apps that can help you find your objects?
A:Yes! There are many. For example, SkySafari. You can point your phone at the sky, and it will tell you which star/planet/DSO you are looking at.
The night sky is waiting for you - with the right telescope and a little practice, you’ll be exploring the moon’s craters, Jupiter’s moons, and distant galaxies in no time. Happy stargazing!
Q4:Is higher magnification always better?
It depends on what you are observing. The smaller the millimeter value of an eyepiece, the higher the magnification. However, higher magnification also makes objects appear dimmer. Therefore, for very faint deep-sky objects (DSOs), you should avoid excessive magnification. Lower magnification allows your eyes to capture more light, making DSOs appear brighter and easier to distinguish. On the other hand, since planets are very bright, they require higher magnification to bring them as close as possible and resolve more details.
Q5:Can a telescope make distant objects appear larger?
The primary purpose of a telescope is to gather light. The eyepiece determines the effective magnification of the telescope. To calculate the effective magnification, divide the telescope's focal length by the focal length of the eyepiece. For example, a telescope with a focal length of 1200mm equipped with a 25mm eyepiece will provide a magnification of 48x. All else being equal, for visual astronomical observation, a larger aperture is always better.
The night sky is waiting for you - with the right telescope and a little practice, you’ll be exploring the moon’s craters, Jupiter’s moons, and distant galaxies in no time. Happy stargazing!
There are no customer reviews yet . Leave a Reply !