
Table of Contents
A Guide to Digiscoping
Digiscoping, a combination of "Digital" and "Spotting Scope," refers to taking photos using a digital camera or mobile phone through the eyepiece of a scope (spotting scope, binoculars, astronomical telescope).
The principle is simple: the scope brings distant objects closer, creating a magnified virtual image, and your phone's camera is then pointed at this virtual image to take a picture. It's equivalent to adding a super telephoto lens to your phone.
For most users, a mobile phone is perfectly adequate. This article will primarily focus on mobile phones for explanation.
What Do you Need to Prepare for Digiscoping?
Essential Gear
- Smartphone - Any modern smartphone with a decent camera will work.
- Spotting Scope - Any spotting scope, riflescope, or even binoculars can work. Spotting scopes are ideal because they're designed for high magnification and typically have a tripod mount.
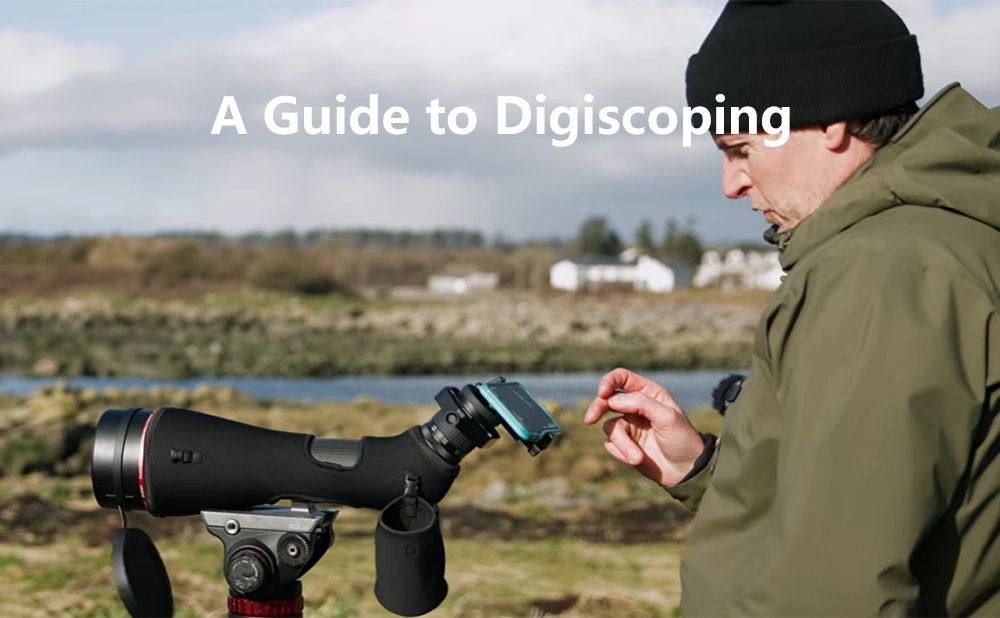
- Phone Adapter / Digiscoping Mount - This is the most critical piece of gear. It holds your phone securely in position behind the eyepiece.
Types of phone adapters:- Clamp-style: Grips both the eyepiece and phone. Most common and versatile.
- Sleeve-style: Slides over the eyepiece with a phone cradle. More secure but often fits specific eyepiece sizes.
- Magnetic: Uses magnetic rings attached to the eyepiece; phone snaps on. Convenient but less stable.
For beginners, I recommend starting with a clip-on universal stand, as it's sufficient and has good compatibility.
Optional Accessories
- Bluetooth shutter remote: Avoid touching the screen, reducing shake
- Tripod: Essential for stable scope positioning
- Microfiber cloth: Keep eyepiece and phone lens clean
Steps for Digiscoping
Step 1: Set Up Your Spotting Scope
- Mount your spotting scope on a sturdy tripod
- Adjust tripod height so the eyepiece is at a comfortable viewing height
- Find your target and focus the scope until the image is sharp through the eyepiece
The scope itself must be absolutely stable. Any vibration will show up as blur in your photos.
Step 2: Attach the Phone Adapter
- Secure the adapter's eyepiece clamp around your scope's eyepiece. Tighten gently-don't overtighten
- Place your phone into the adapter's phone clamp
- Open your camera app and slide the phone position until the camera lens is centered over the eyepiece
If the smartphone camera is not aligned with the center of the eyepiece, the image will appear dark, have dark corners, and have blurry edges.
How to check for proper alignment: The image displayed on the smartphone screen should be a complete, bright circle with no dark corners and sharp edges.
Step 3: Focus
You need to focus both the scope and the phone:
- Scope focus: Look through the eyepiece with your eye and focus until the target is sharp
- Phone focus: Tap the screen on your target to let the phone auto-focus
- Fine-tune: Slightly adjust the scope's focus wheel while watching the phone screen. You'll often find the optimal focus point differs slightly from what looks best to your eye
Some phones let you lock focus by tapping and holding on the screen. Use this once you've found the sweet spot.
Step 4: Take the Shot
- Use a Bluetooth remote or headphone cable as a shutter trigger to avoid touching the screen
- If no remote, use the self-timer (3-second delay) so you can pull your hands away before the shutter fires
- Take multiple shots-vary focus slightly, try different angles
Step 5: Post-Processing
Your raw digiscoped images will often look a bit flat or dark. Simple editing makes a huge difference:
Quick edits:
- Crop: Remove any remaining vignetting, center your subject
- Brightness: Increase exposure slightly
- Contrast: Add a touch to make the subject pop
- Sharpness: Apply light sharpening (don't overdo it)
FAQ
Q1: My phone adapter keeps slipping. What do I do?
- Check that the eyepiece clamp fits your eyepiece diameter (most adapters fit 30-50mm)
- Try adding a rubber band for extra grip
- Consider upgrading to a better adapter-this is one place where spending a little more pays off
Q2: Can I digiscope with binoculars?
Yes, but it's harder. Binoculars have two eyepieces (you'll use only one) and usually no tripod mount. If you want to try:
- Use a monopod or brace against something solid
- Aim to use only one eyepiece
- Accept that results won't match a spotting scope setup
Q3: Why do I see purple or green fringing?
That's chromatic aberration, a result of how lenses bend different colors of light. To minimize:
- Lower magnification (aberrations are worse at high zoom)
- Keep your subject centered (edges show more aberration)
- Use editing software to reduce chromatic aberration
Q4: What spotting scope features are best for digiscoping
- ED/HD glass: Reduces chromatic aberration for sharper images
- Long eye relief: Easier to position a phone adapter
- Angled eyepiece: More comfortable shooting position, less likely to bump the tripod
- Smooth focus wheel: Fine adjustments matter
Q5: My video is shaky. How can I stabilize it?
- Make sure your tripod is sturdy (hang a bag on it for weight if windy)
- Use your phone's built-in video stabilization
Summary
What makes digiscoping truly special is that it transforms "seeing" into "sharing."You're no longer just the person who witnessed a breathtaking moment alone. You can share that kingfisher diving for fish, that moon rising over the mountains, that eagle perched on a distant cliff. Your photos become memories you can revisit and stories you can tell.
Now grab your scope, mount your phone, and start exploring the world up close. The distant beauty waiting out there deserves to be seen-and shared.
There are no customer reviews yet . Leave a Reply !