

Table of Contents
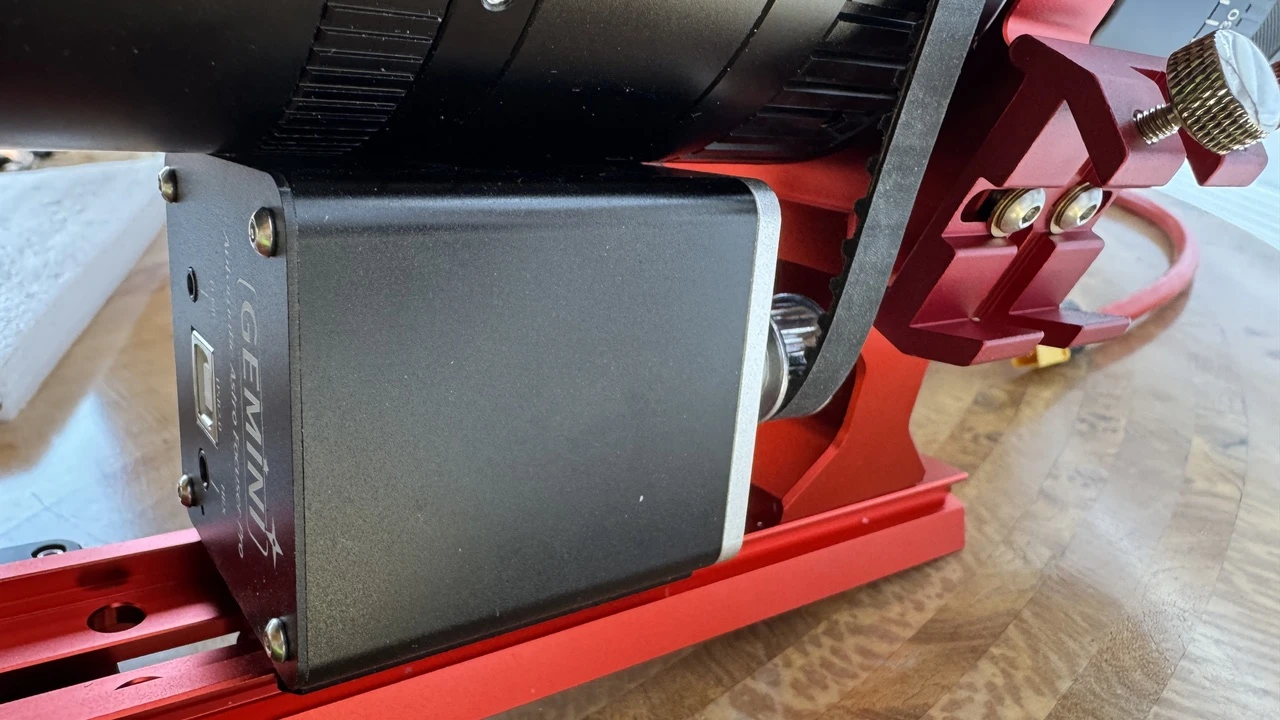
Making the Gemini EAF Fit: My DIY Modification for the SVBONY SV555
One of the best things about buying SVBONY equipment is that the products almost always come complete right out of the box. You rarely have to hunt down expensive, necessary add-on parts. For instance, including an EAF mounting kit natively with the SVBONY SV555 is a fantastic touch—full marks for that!
However, every piece of gear has its little quirks. While the included kit is designed to work seamlessly with ZWO electronic automatic focusers, things get a bit more adventurous if you use alternative brands—specifically, a Gemini EAF.
Here is my honest journey, the challenges I ran into, and how a little DIY spirit solved them completely.
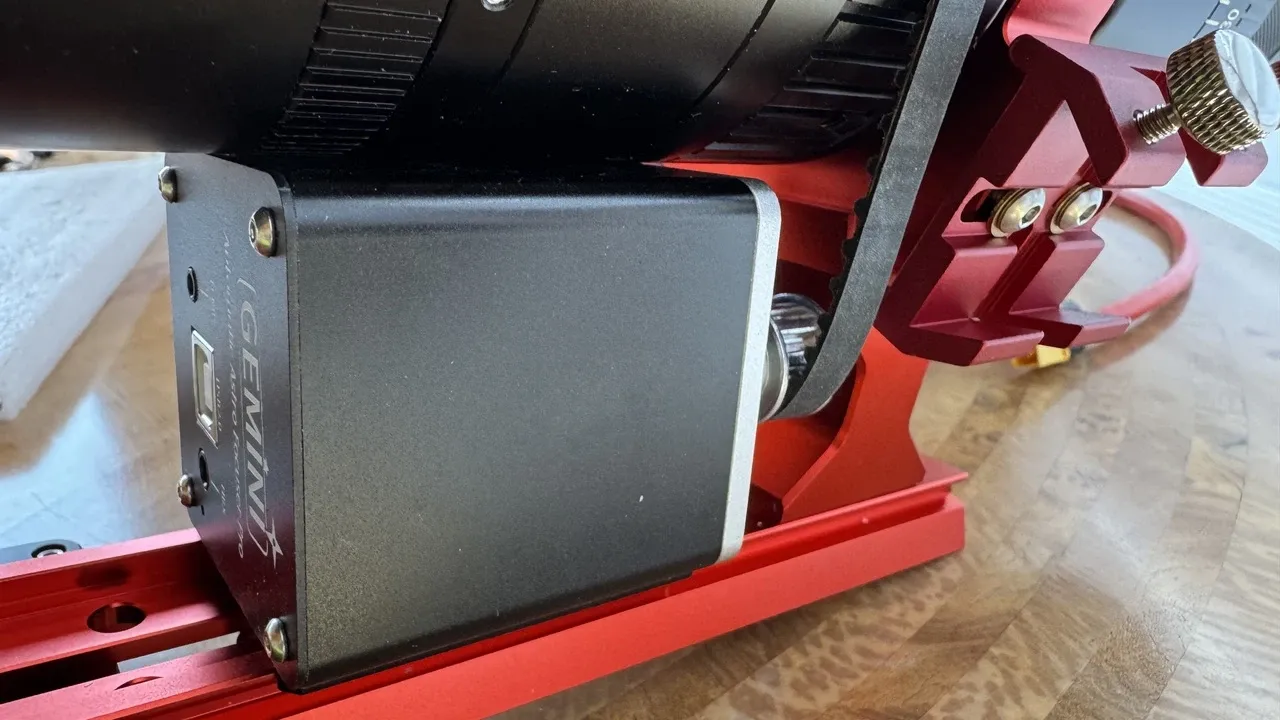
Challenge 1: Height and Clearance with the Gemini EAF
The first thing you notice is that a Gemini EAF is physically much taller than a ZWO EAF. Trying to mount it using the stock kit on the dovetail under the SV555 requires very specific positioning:
Positioning is Critical: You must mount the EAF as far back as possible. If you try to mount it too close to the front (underneath the dew shield), it simply will not fit because the shield’s diameter is too large.
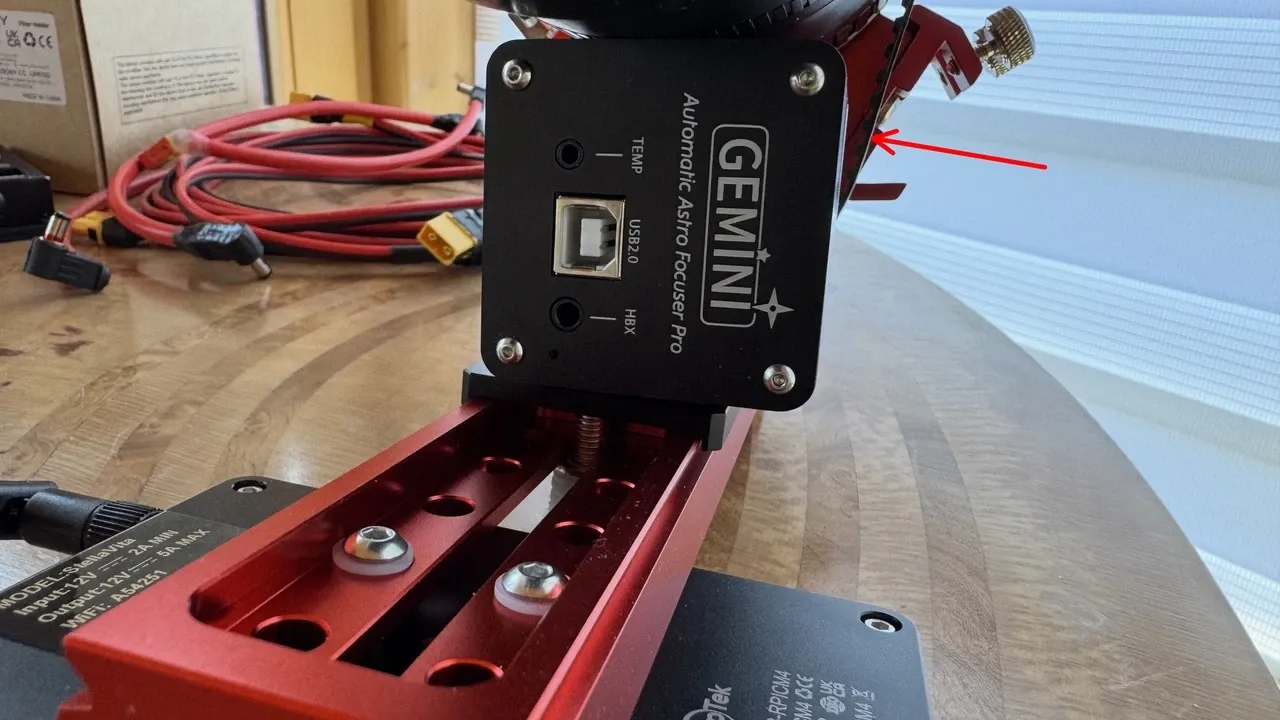
The Clearance Test: Positioned as far back as possible, the bottom button of the EAF grazes the ground-plate of the mounting kit, while the top leaves a mere 1mm of clearance to the SV555 scope body. It’s a tight squeeze, but it does clear the scope without touching!
Challenge 2: The Loose Tooth-Belt Dilemma
Once installed, the next hurdle appears: the tooth-belt is too loose, causing it to skip teeth when turned by the EAF motor.
On the stock mount, you cannot fix this by lowering the EAF (like you would with a lower ZWO model) because it is already resting completely at the bottom. Furthermore, the original mounting kit only features vertical adjustment slots, meaning lateral (left-to-right) movement is completely blocked.
The Solution? Shift it sideways.
The only way to properly tension the tooth-belt is to shift the EAF over to the left side of the dovetail. Doing this pulls the belt tight so it functions smoothly and stops skipping teeth entirely.
The DIY Fix: Modifying the EAF Mounting Kit
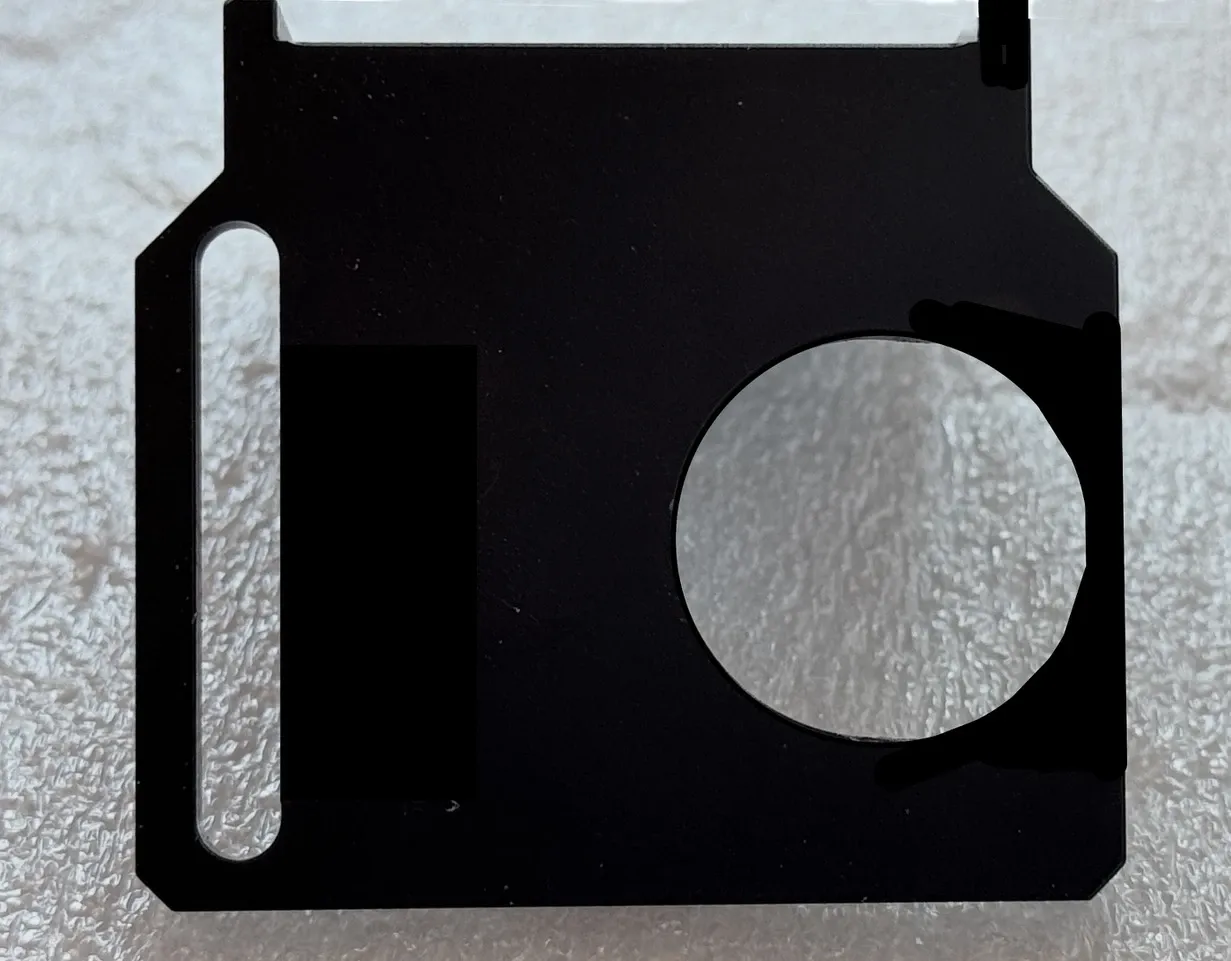
Because the original bracket only allows vertical movement and has a restrictive clearance hole for the gearwheel, I decided to modify the stock part.
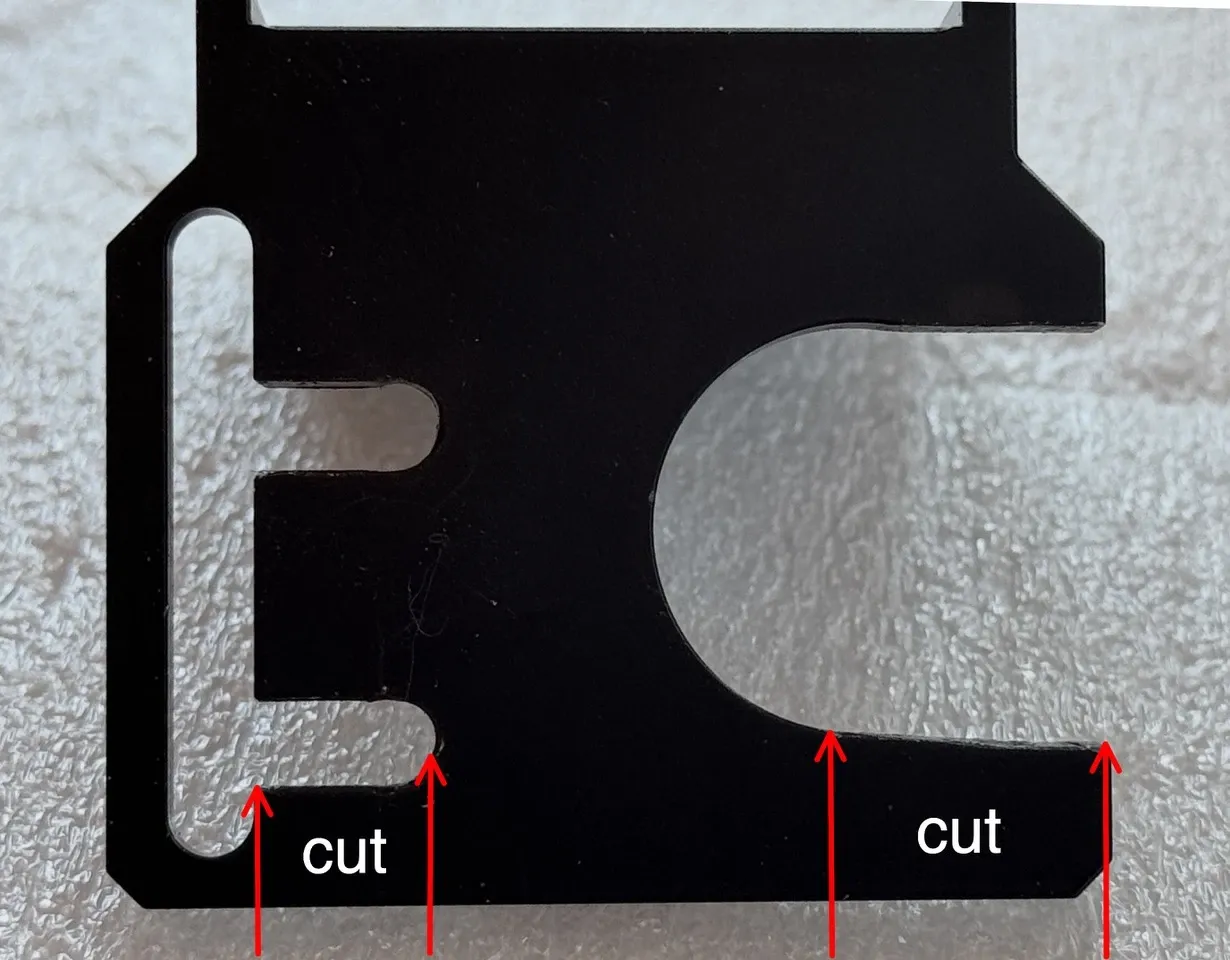
Good News: The material of the EAF mounting kit is very thick and sturdy, meaning you can modify it safely without sacrificing structural stability!
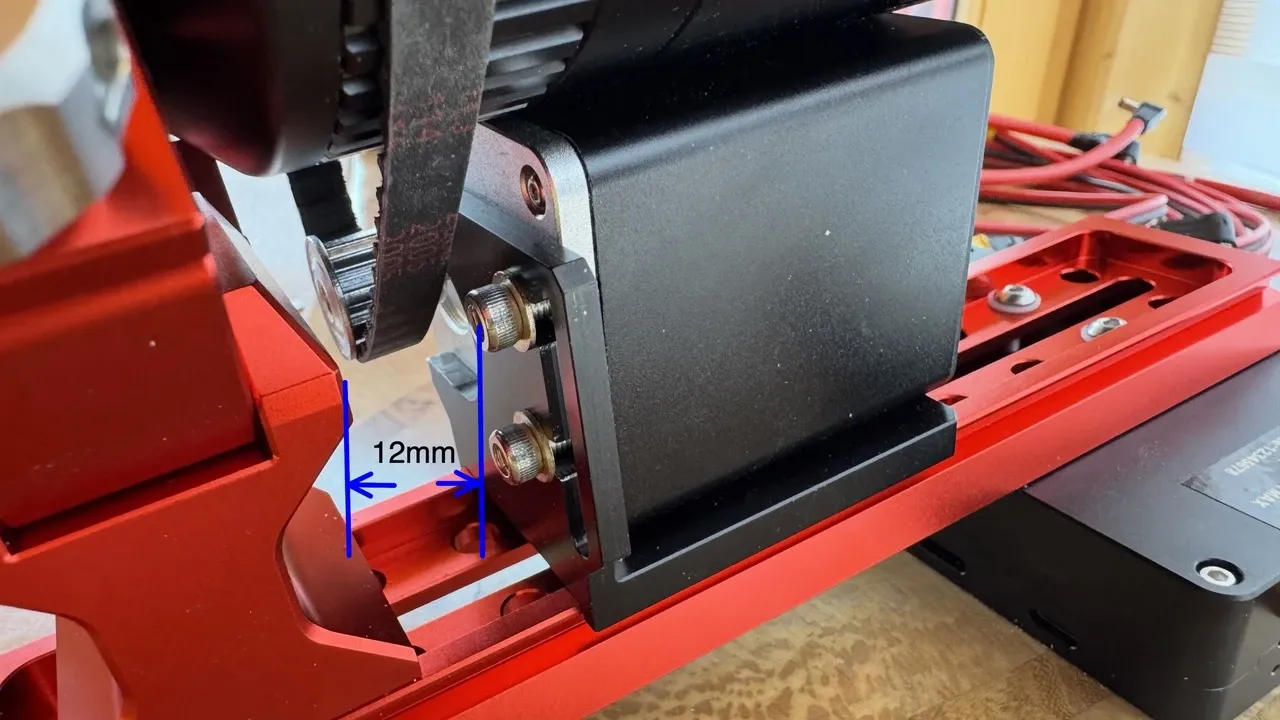
Here is what I did:
Created Horizontal Slots: I cut two new horizontal slots (each about 12mm long) into the bracket. This allows the EAF to be secured with two screws while sliding horizontally to the left.
Opened the Gear Hole: I cut open the right side of the main clearance hole so it is completely open on one side, allowing the gearwheel to slip out easily to the left.
With these modifications, the Gemini EAF can slide cleanly to the left until the tooth-belt achieves ideal tension.
One Last Trick: The Modified Allen Key
Moving the EAF introduces one final minor puzzle: accessibility.
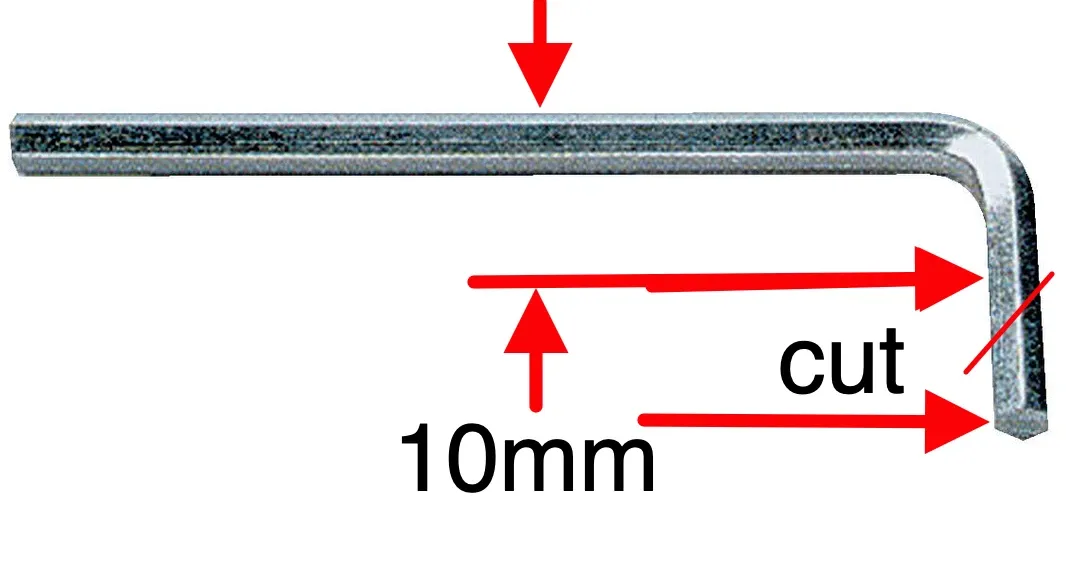
Because the screws fixing the EAF to the lower part of the bracket sit so close to the base (leaving only about 12mm of space), a standard long allen key won’t fit into the upper hex-hole.
The Fix: I modified and cut down a standard allen key so that its short arm is only about 10mm long.
Final Thoughts
While I haven't tested other third-party EAF brands to see if they share these exact dimensions, this workaround successfully brought my Gemini EAF and SV555 setup into perfect harmony.
The SV555 is a wonderful scope, and with a tiny bit of DIY modification to the mounting bracket, third-party users can achieve a rock-solid, slip-free electronic focusing setup!
 Google
 Amazon
There are no customer reviews yet . Leave a Reply !