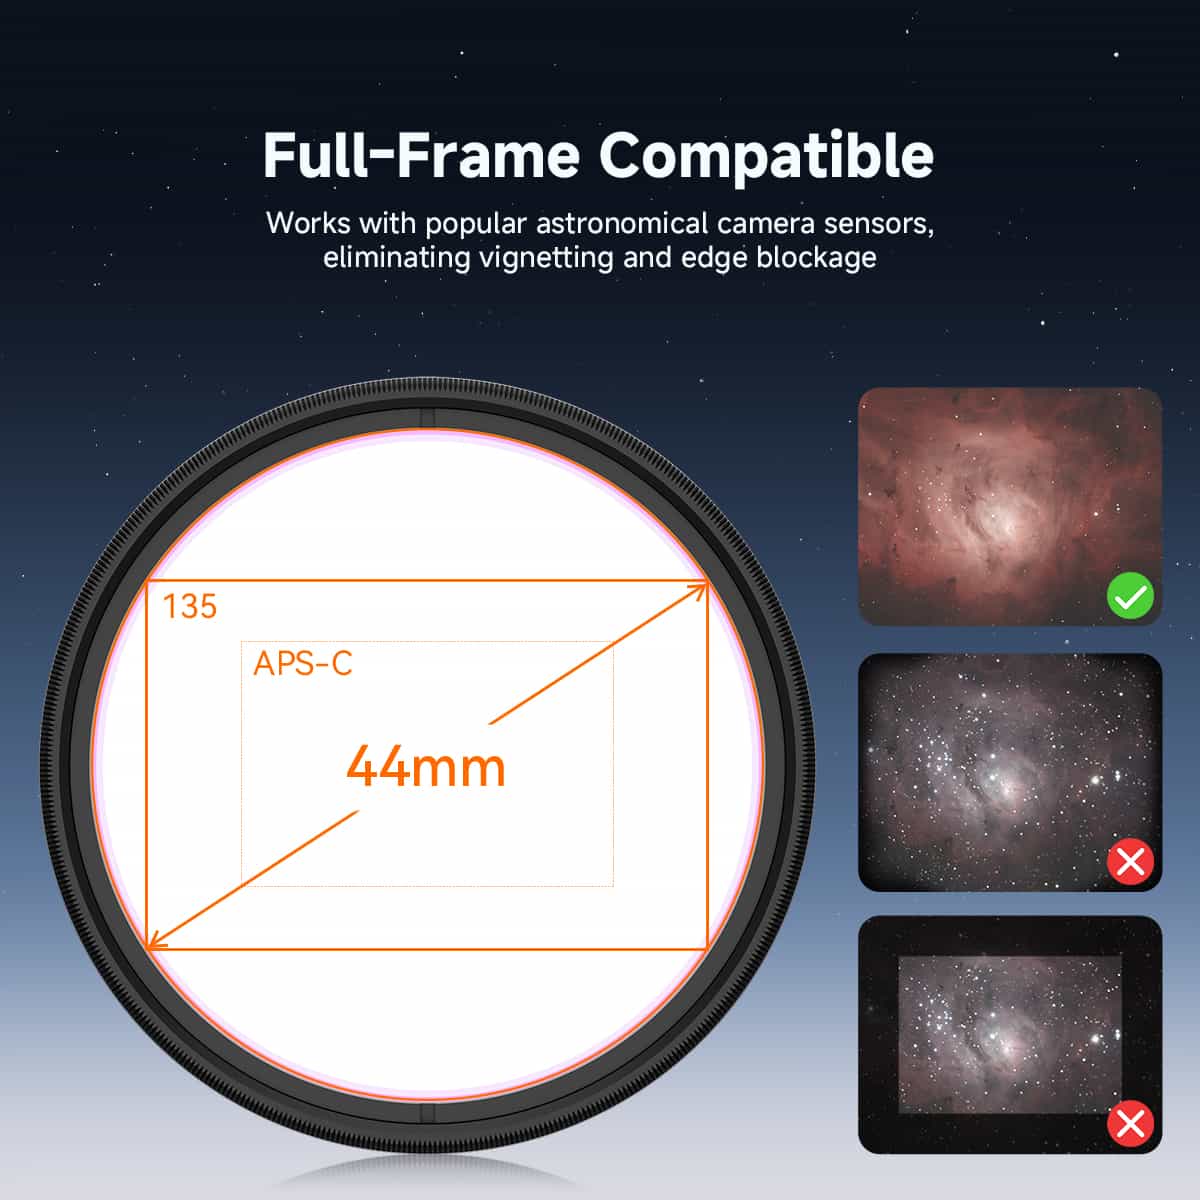
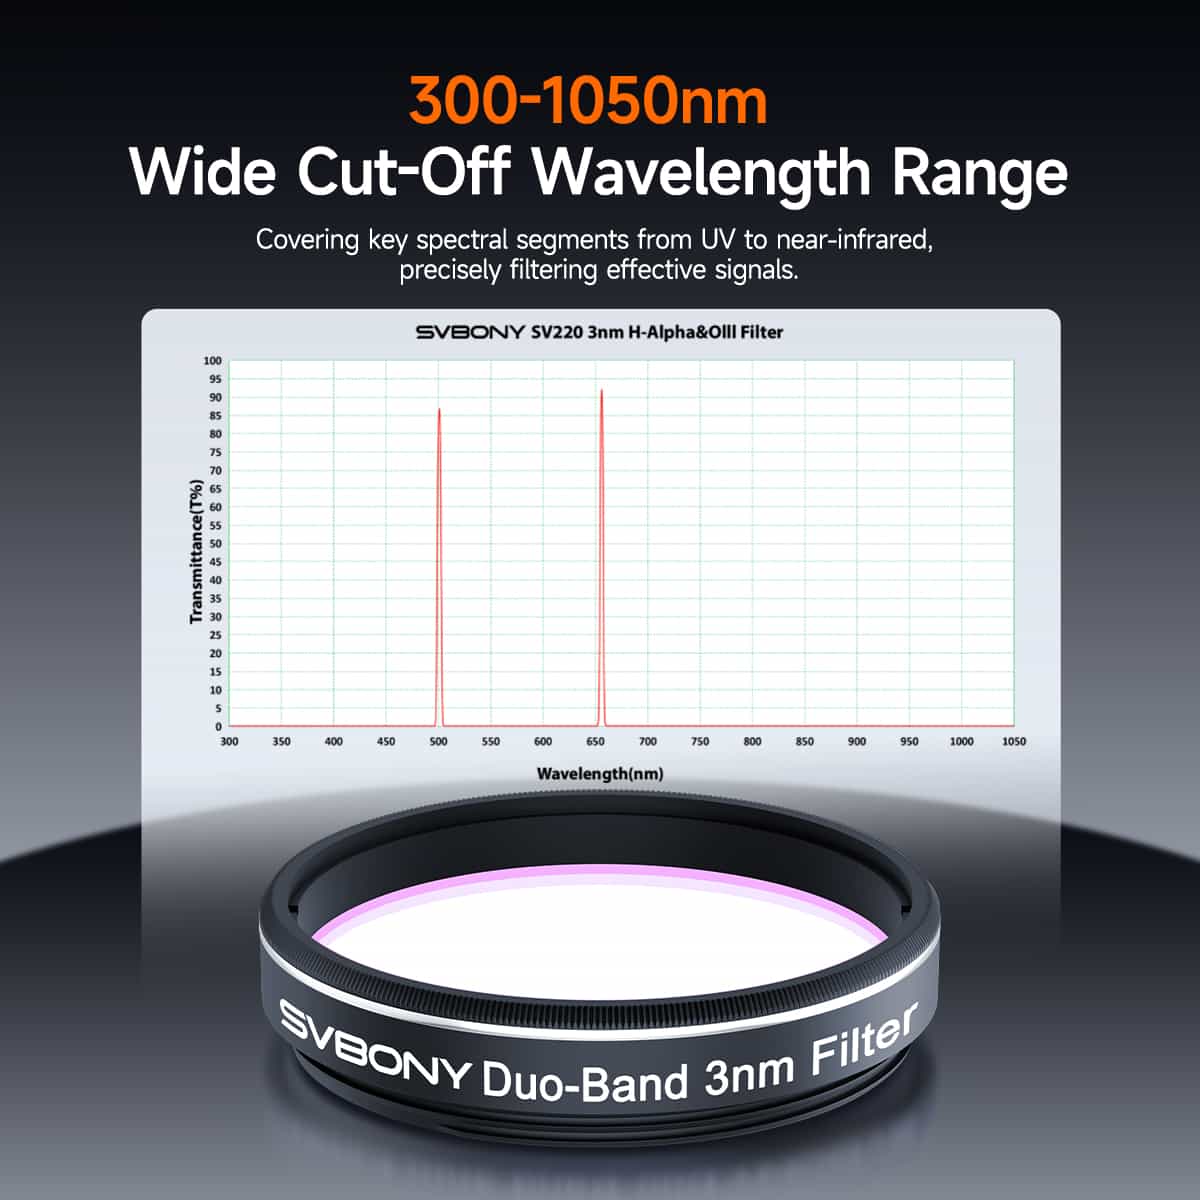
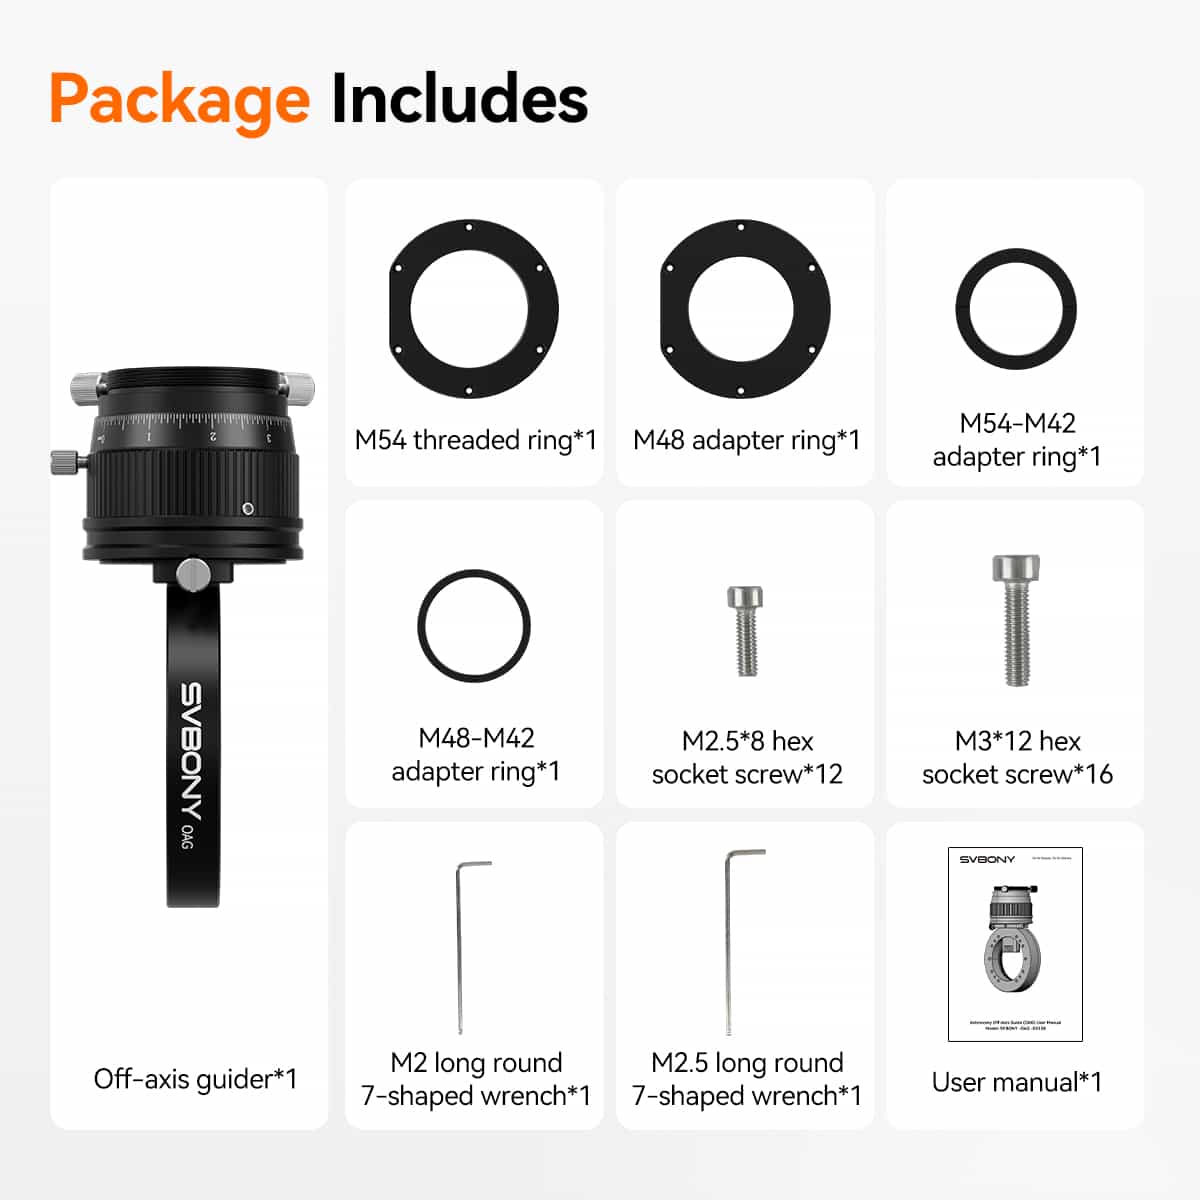
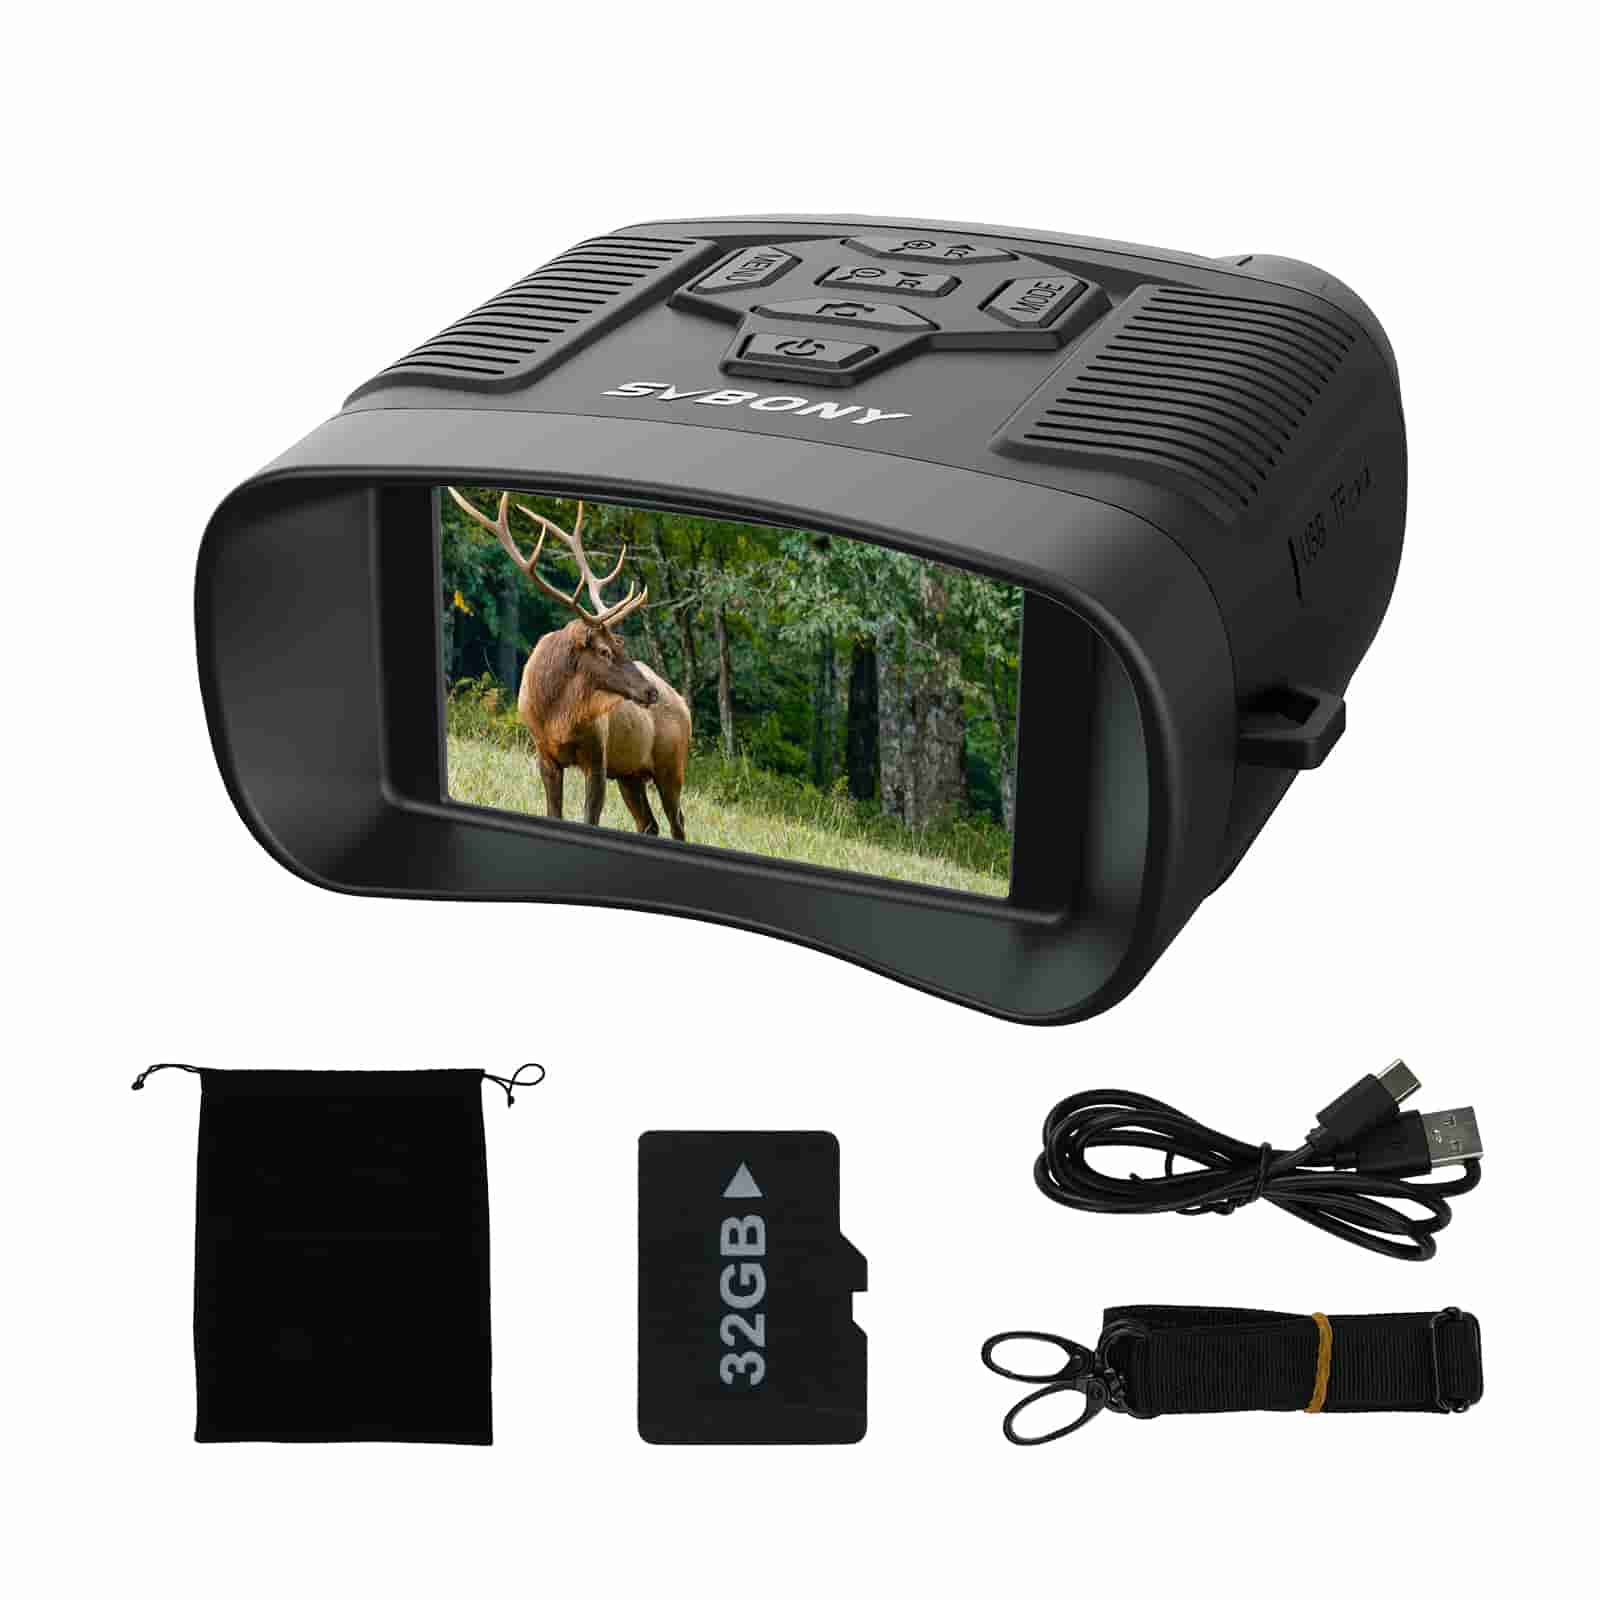
Product Detail
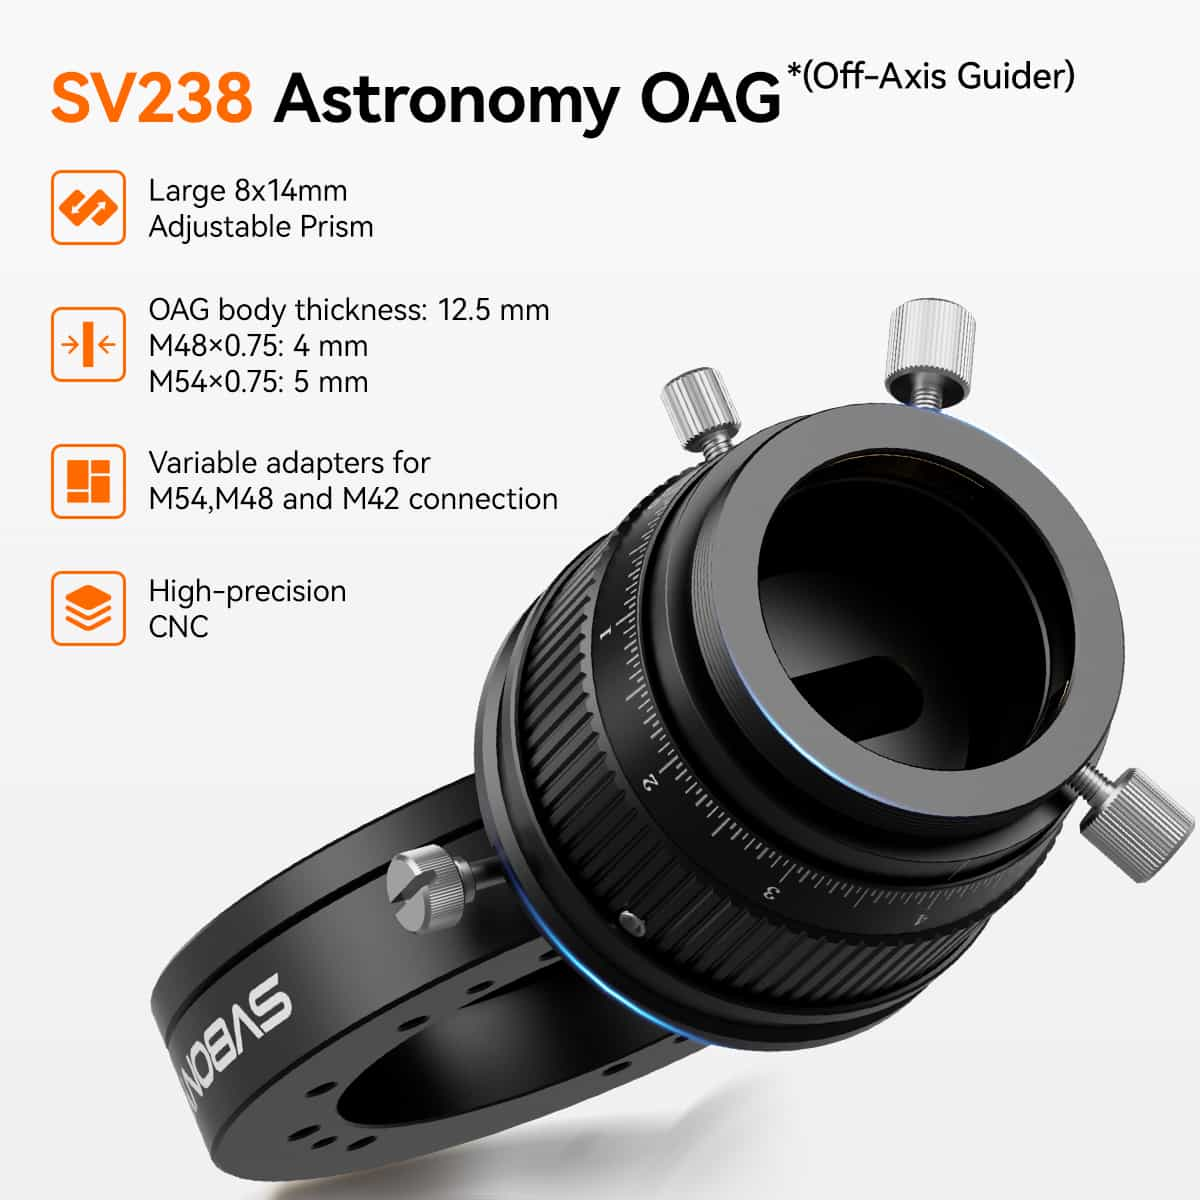
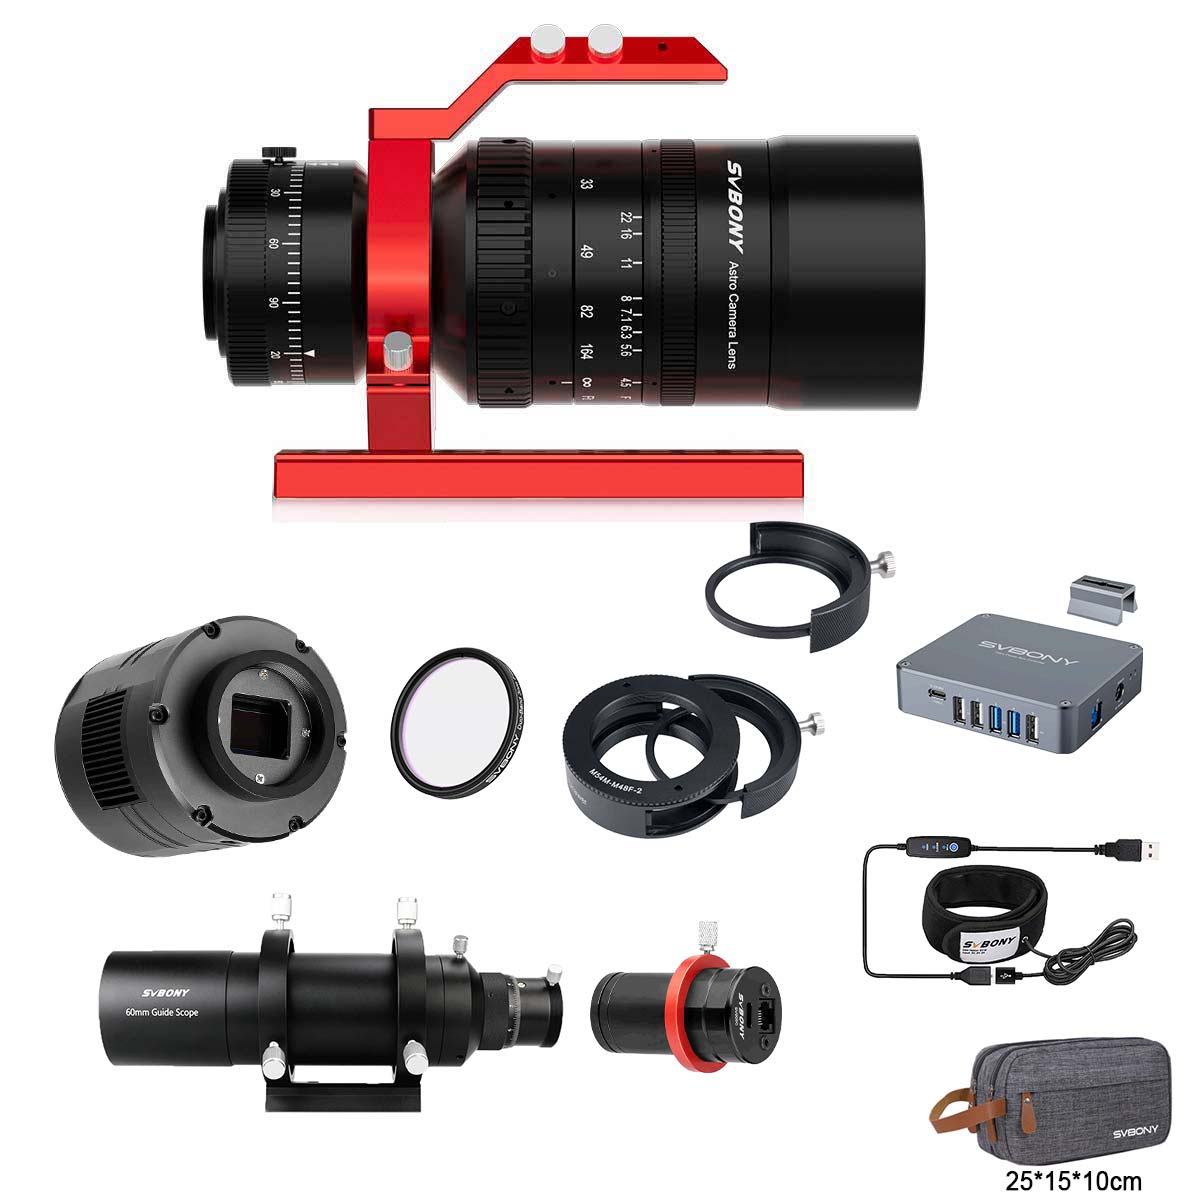
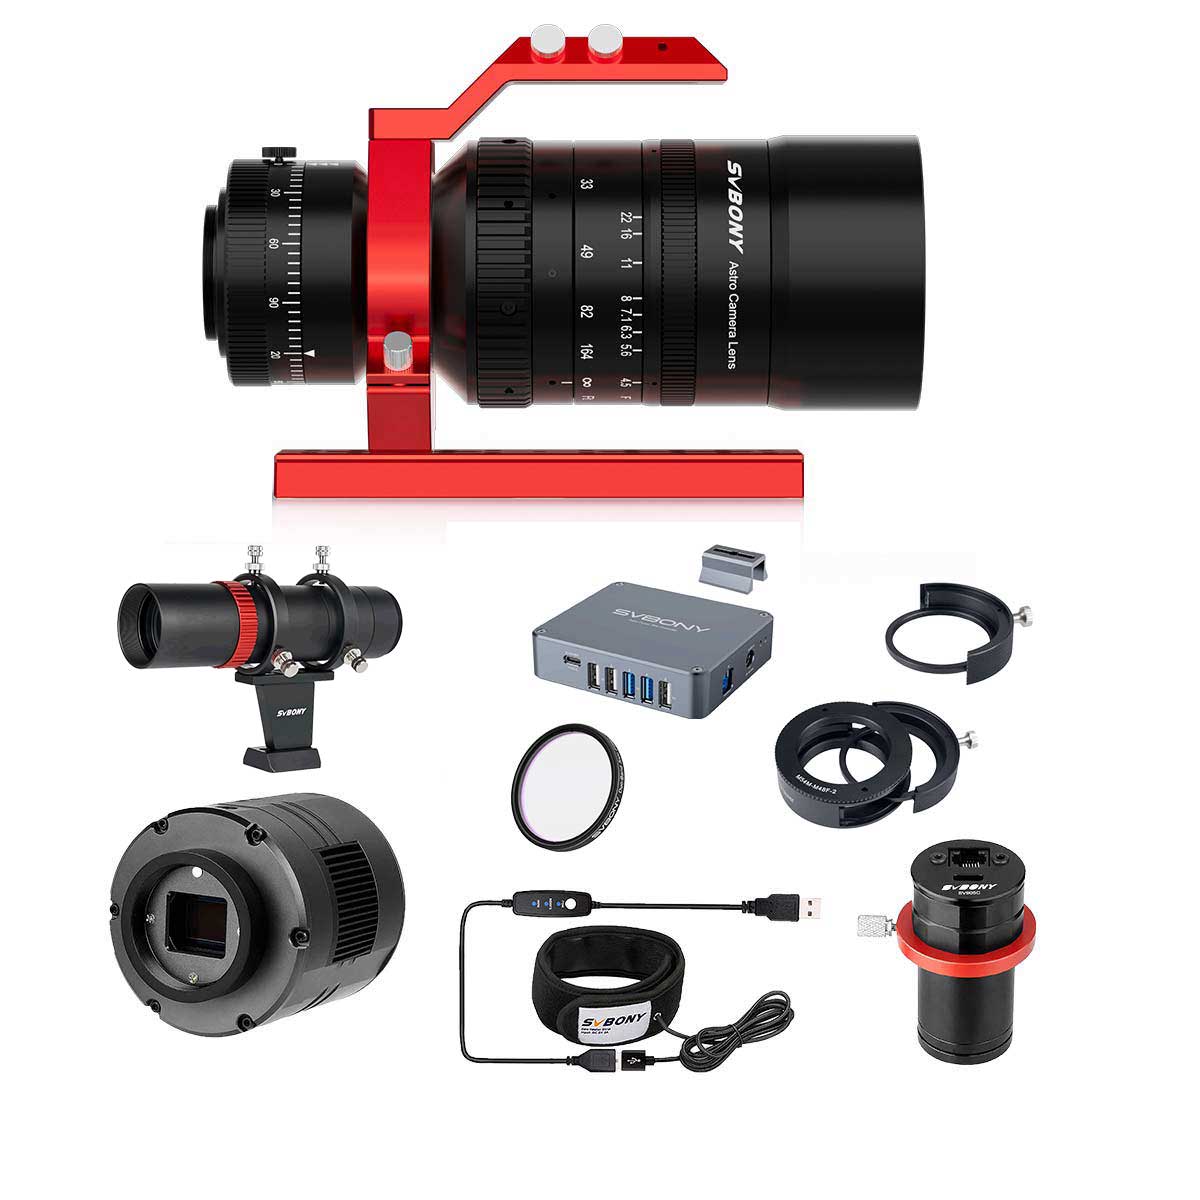
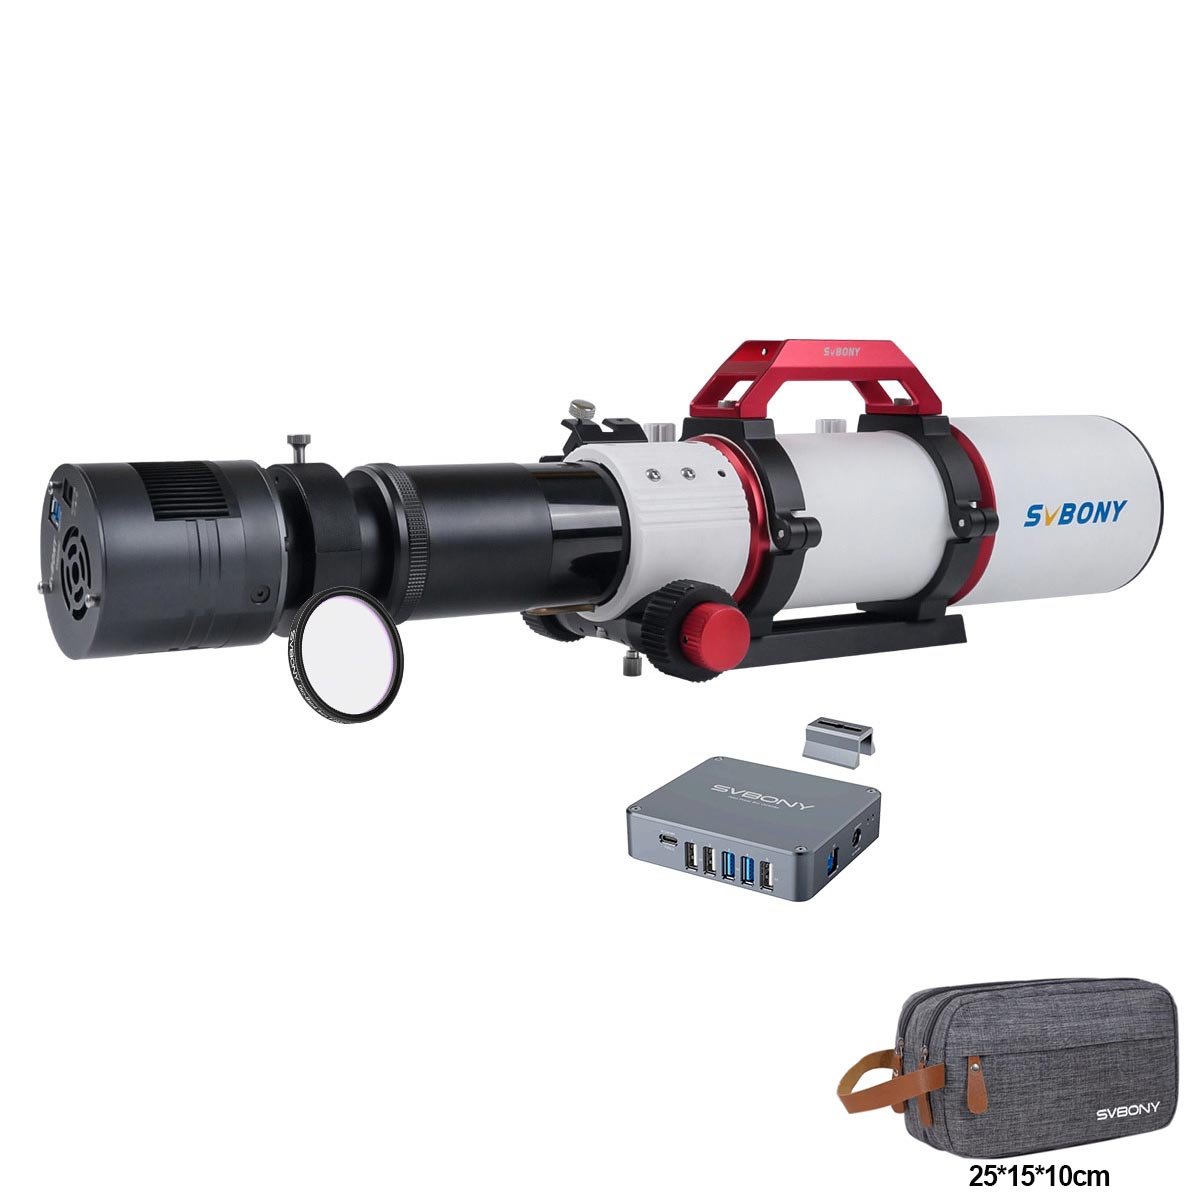
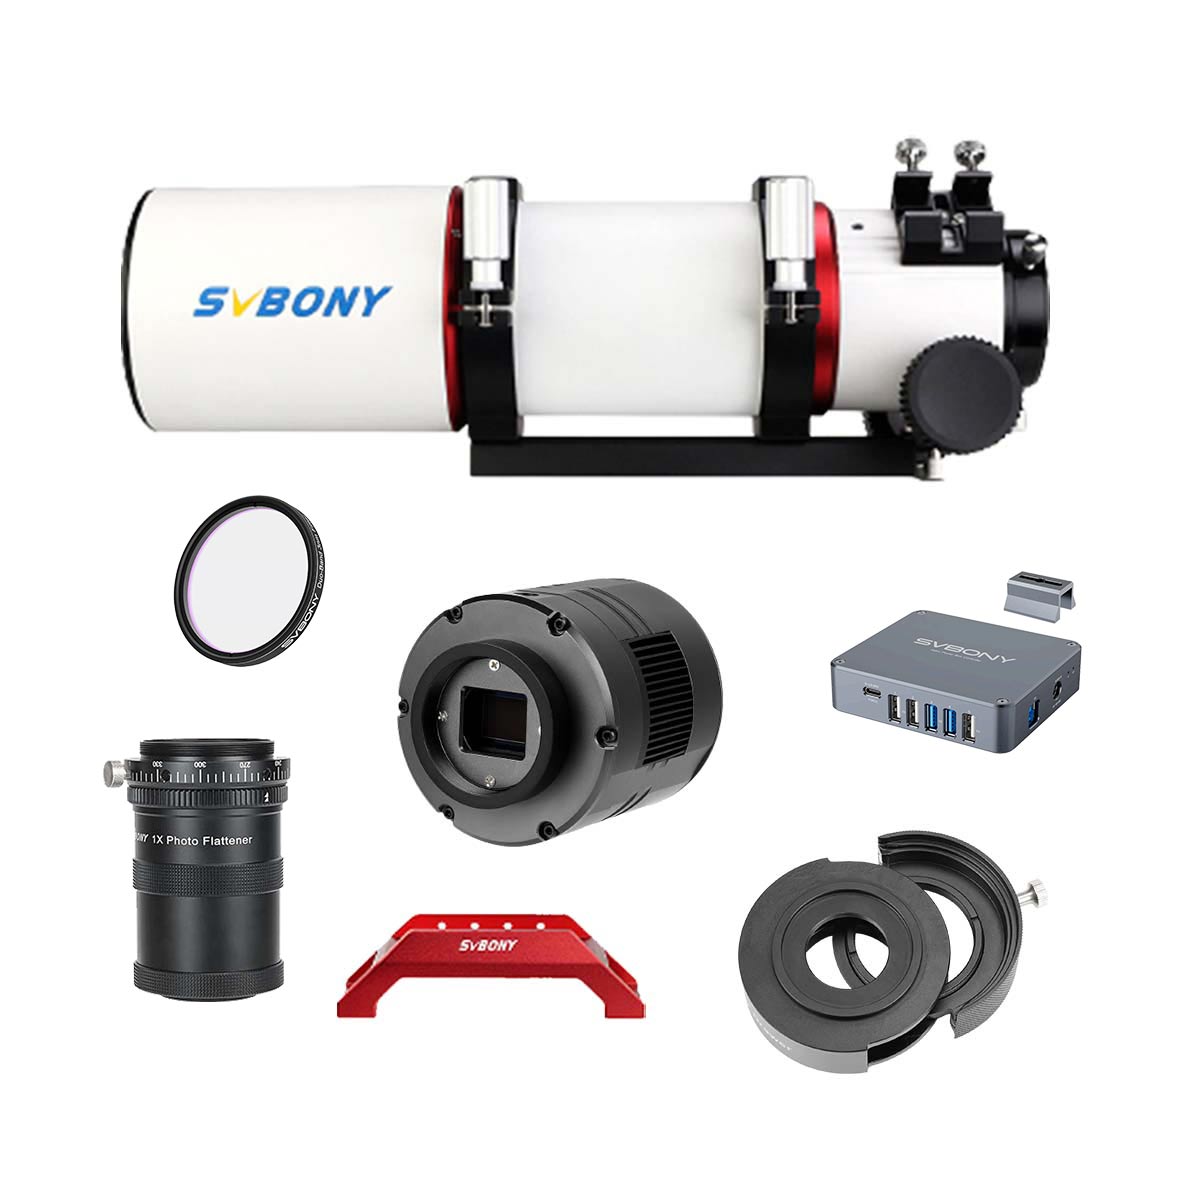
OAG Off-Axis Guider Ideal for Long Focal Length Imaging SVBONY SV238
- Large prism design delivers a wider field of view, ensuring higher guiding success rate;
- Adjustable prism height for precise alignment with different cameras and telescopes;
- Dual helical focuser enables fast and stable locking of focus, preventing star blur caused by poor guiding;
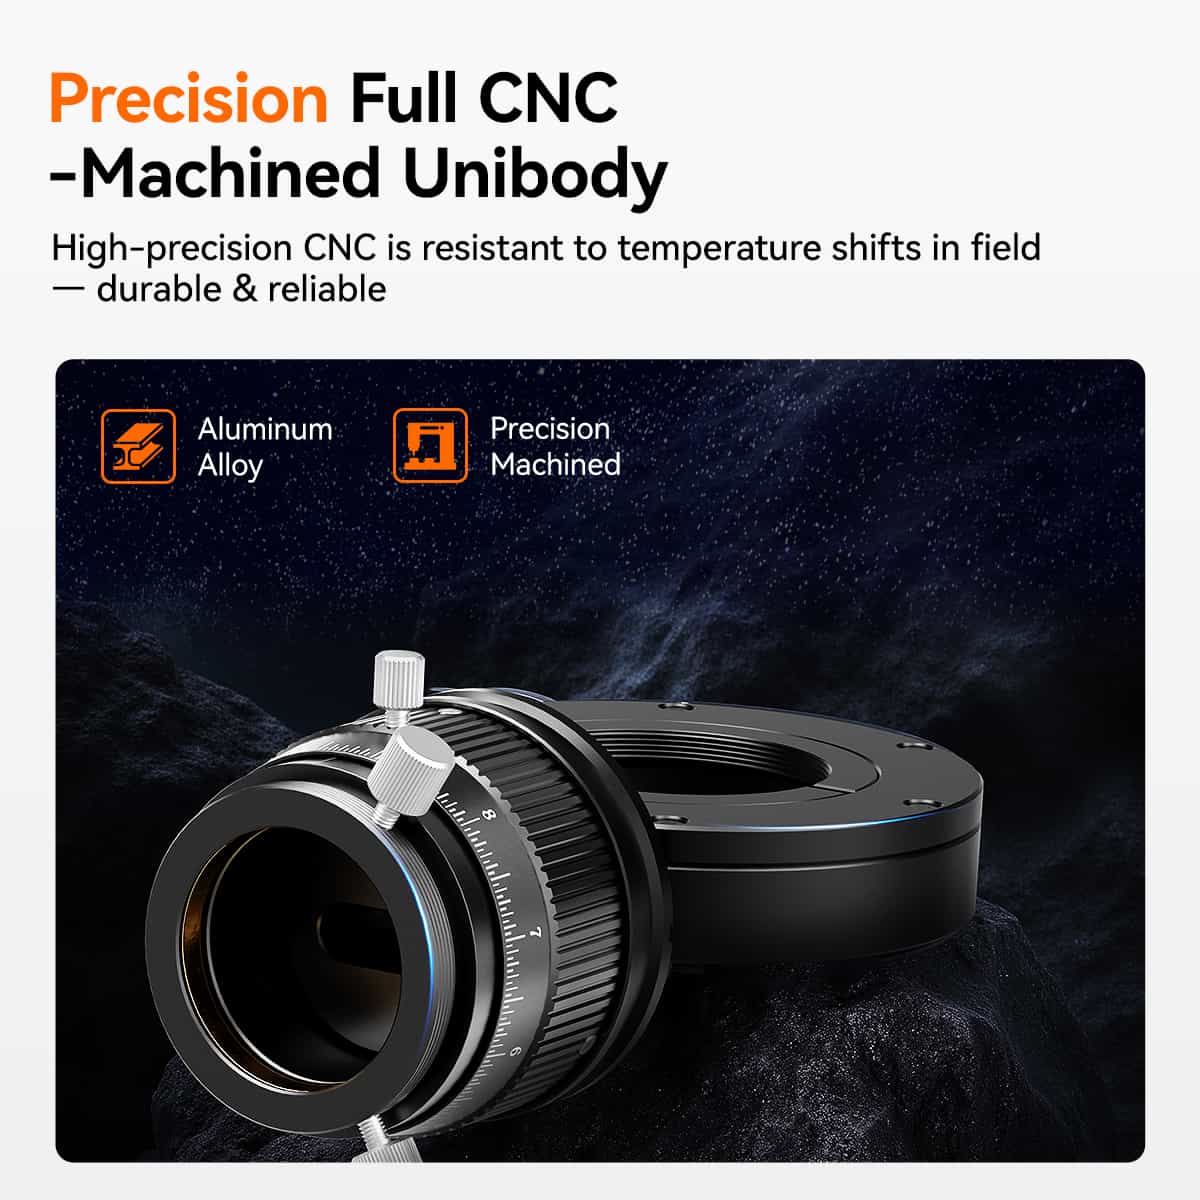
- CNC-machined construction offers robust durability, resistant to outdoor temperature changes and deformation;
- Compatible with APS-C and smaller sensors;
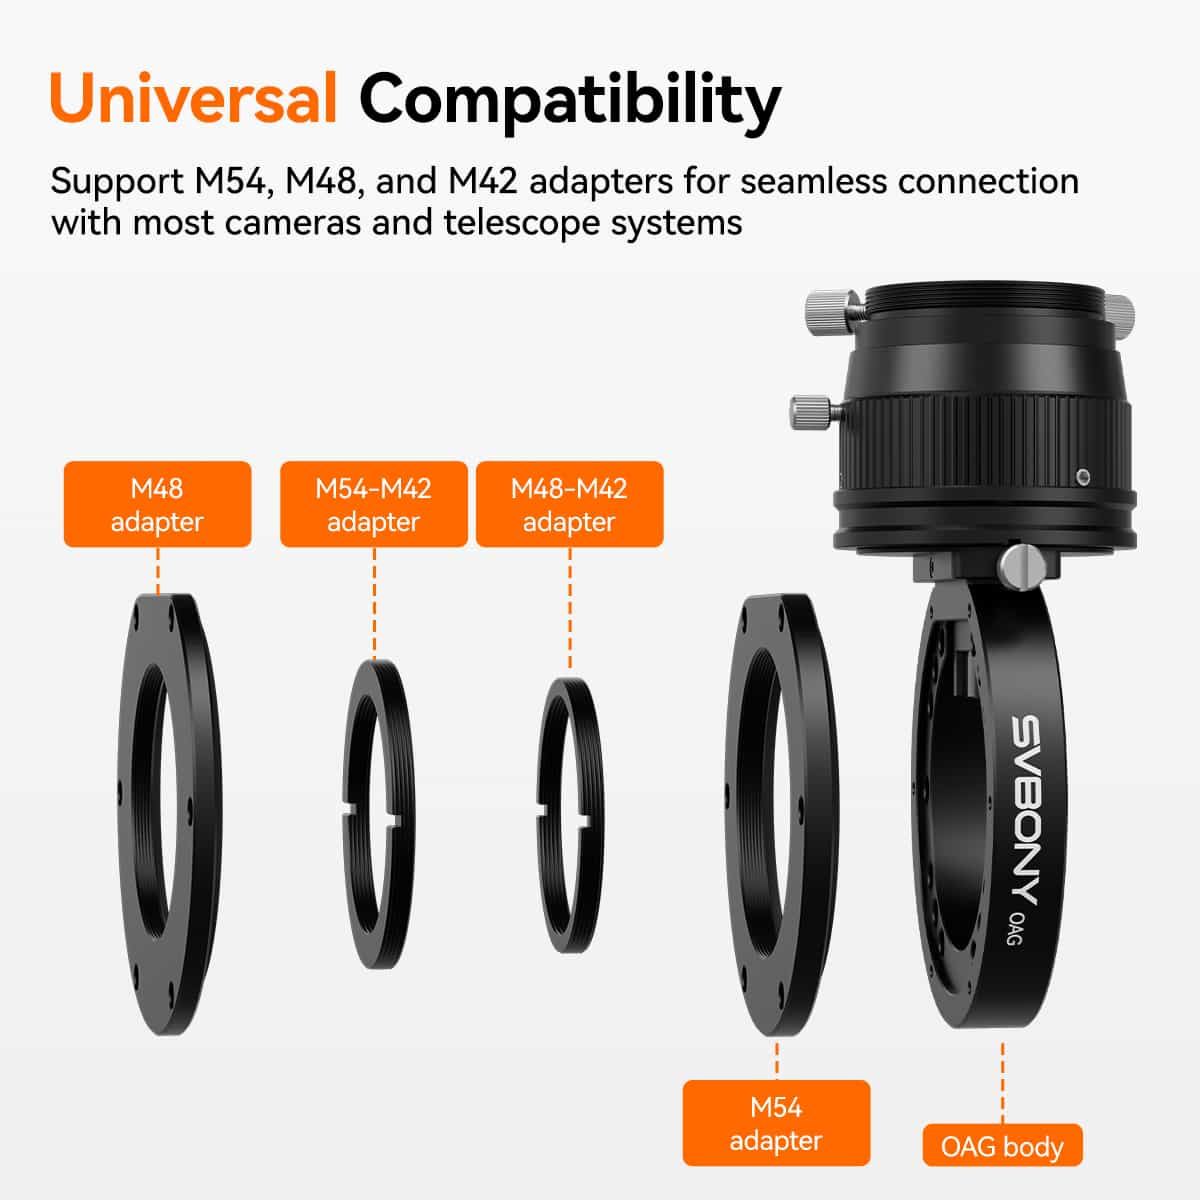
- Supports M54, M48, and M42 filter threads, allowing broad compatibility and fast setup.
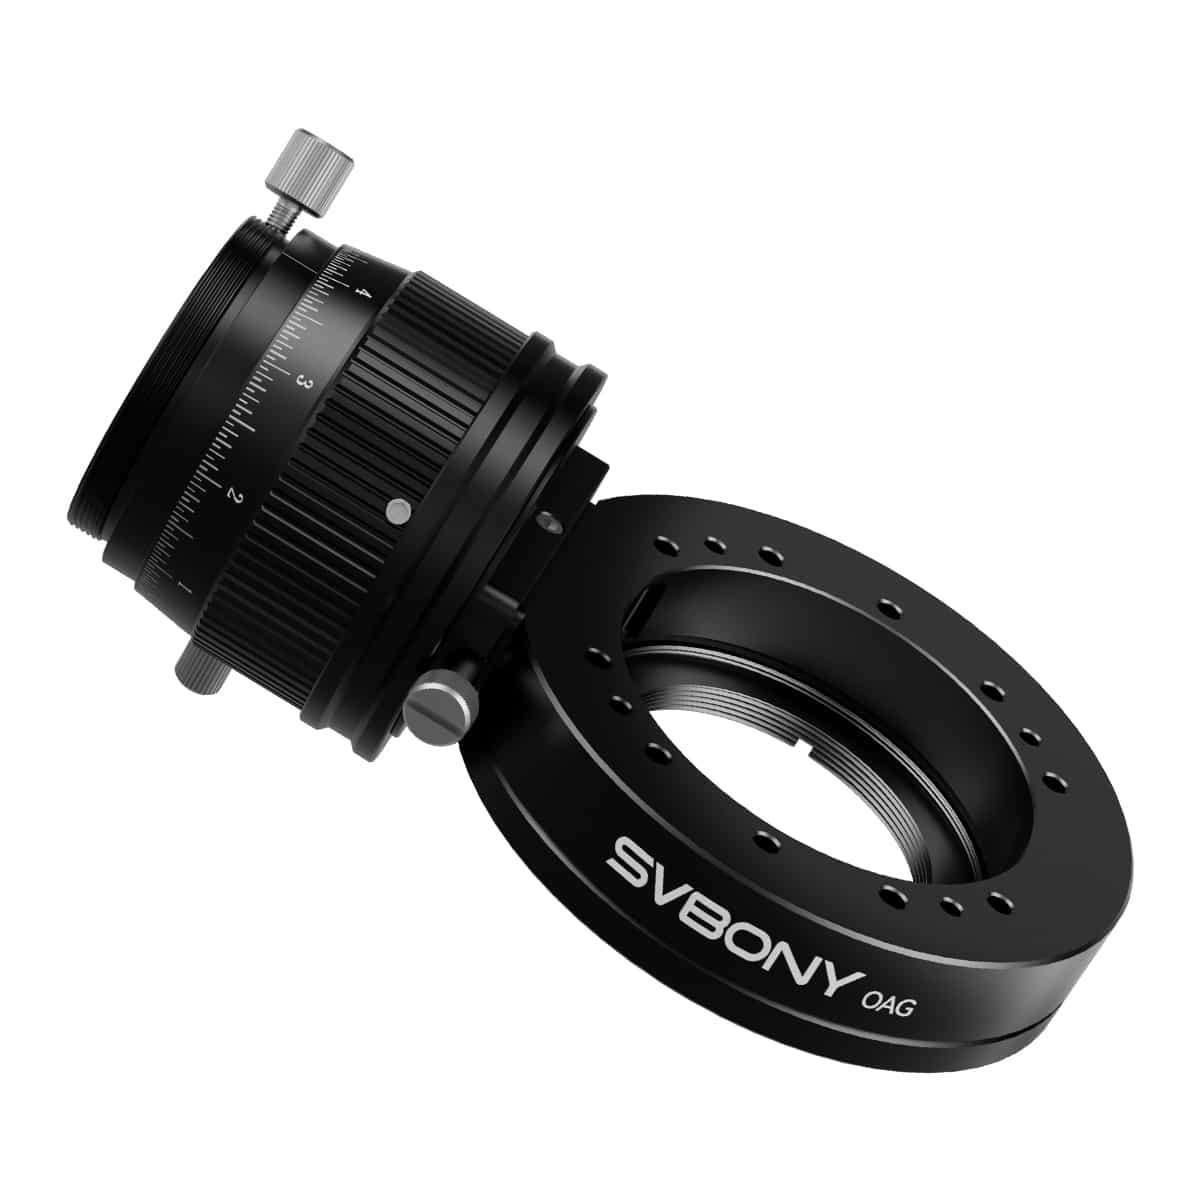
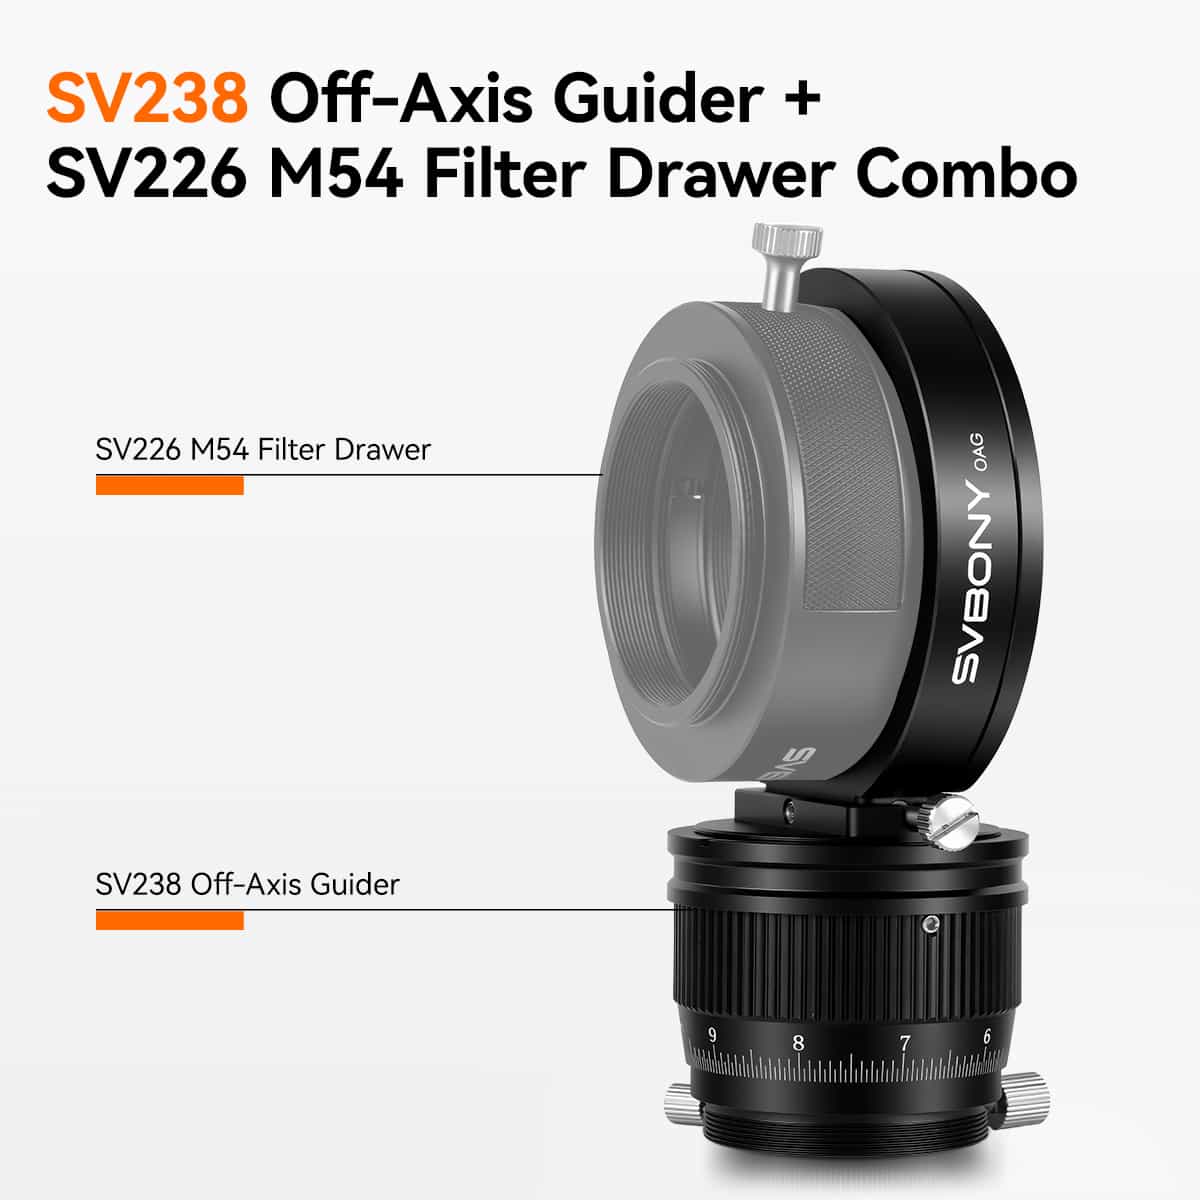
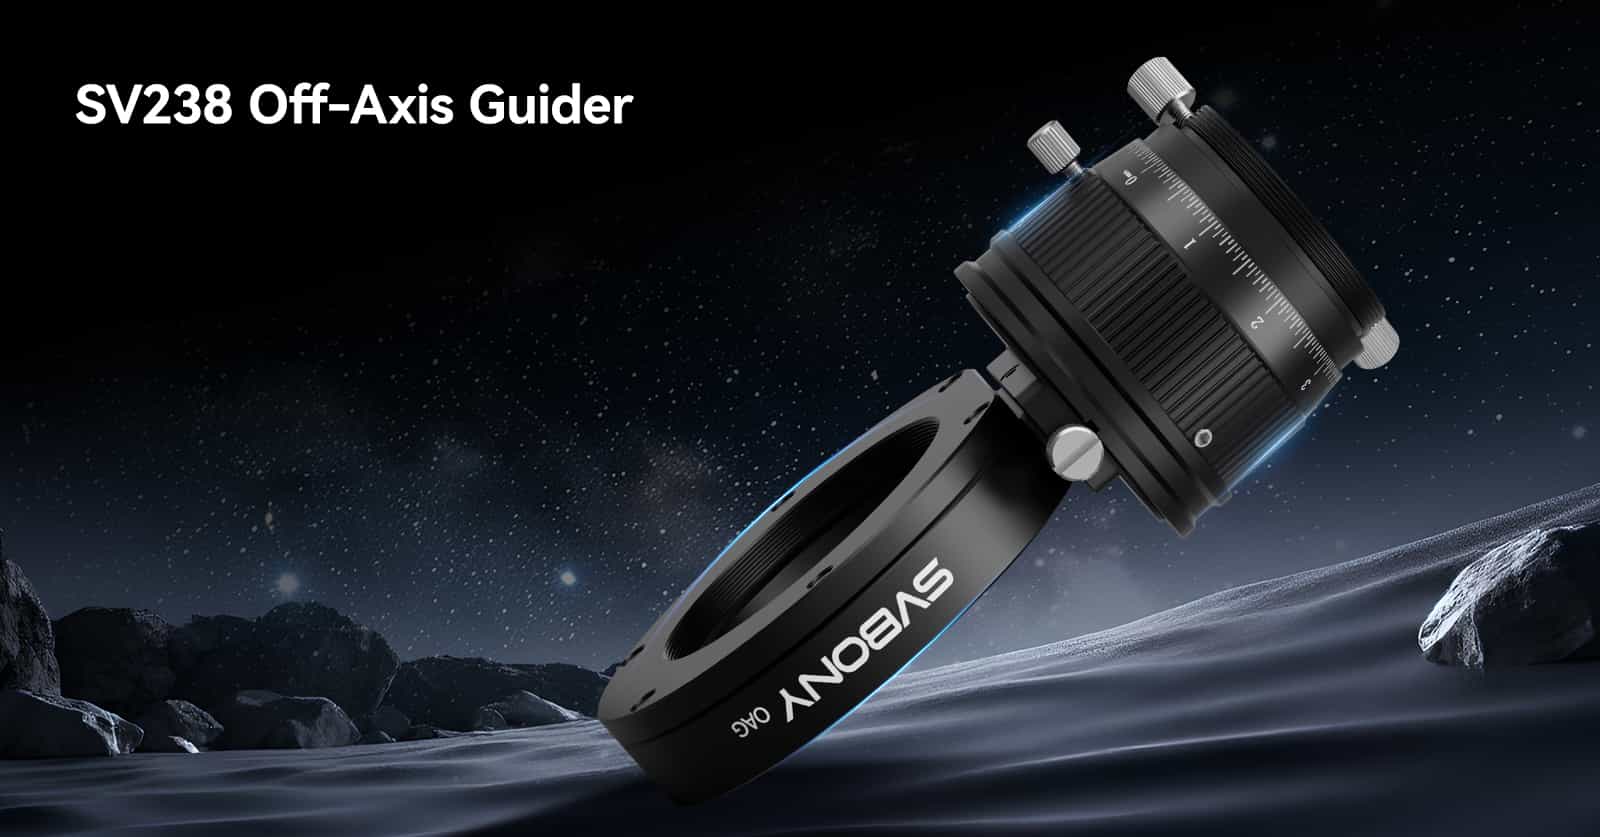
SV238 Off-Axis Guider
The OAG is an essential astroimaging accessory for long focal length telescopes that require the most accurate guiding possible. The SV238 OAG uses a prism to intercept a small portion of the telescope’s focal plane (outside the field of view of the main imaging camera) to locate a guide star. Any movement seen by the guide star will be the exact same movement seen by the imaging camera. Guiding this way will correct for tracking errors, as well as opto-mechanical errors or flexure. The result: better astroimages with pinpoint round stars.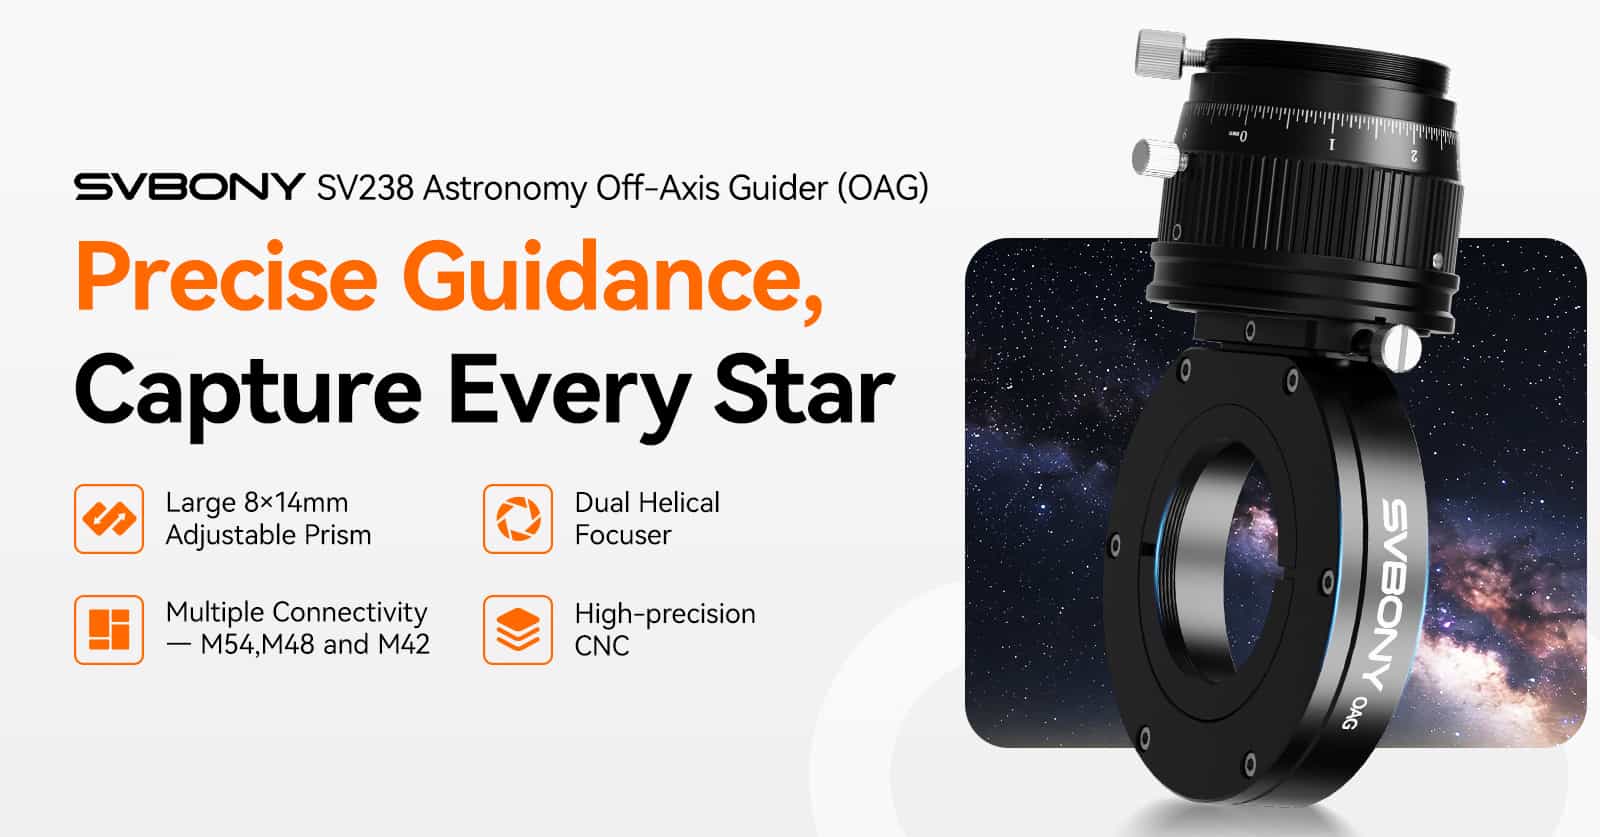
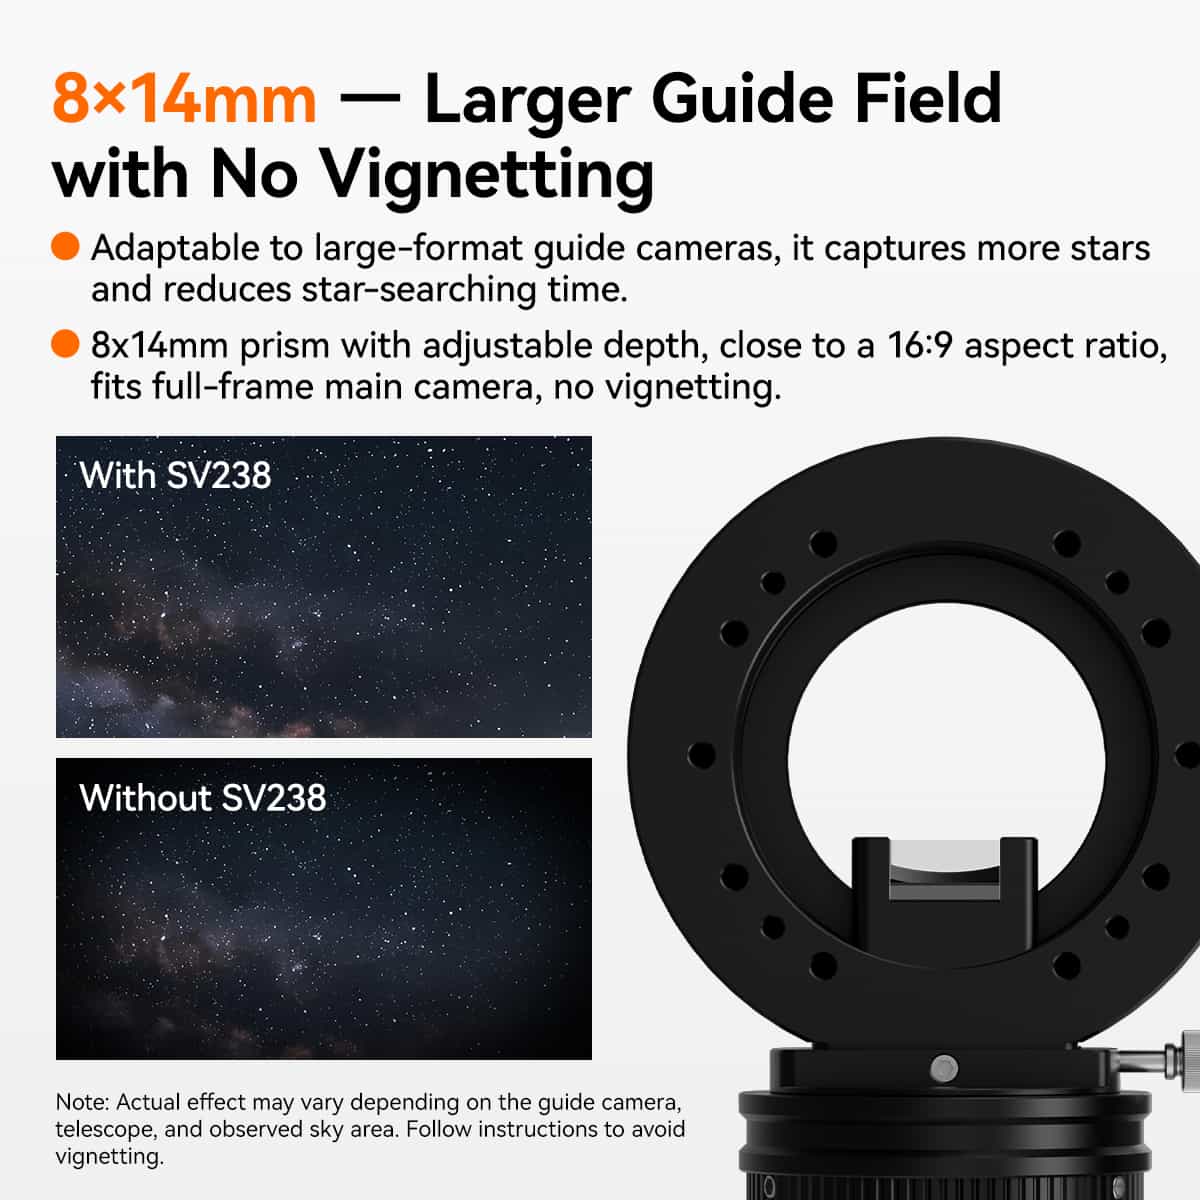
Large 8×14mm prism
SVBONY SV238 OAG off-axis guidescope captures more starlight and provides a wider field of view. It can easily find the right guide star even in sparse star fields, ensuring a higher guiding success rate and stable performance.
Adjustable Prism Height
This OAG features precise prism height adjustment for flexible alignment with various cameras and telescopes. Fine-tune the prism position to capture bright guide stars and avoid ghosting in the primary camera, ensuring clear, stable images under any conditions.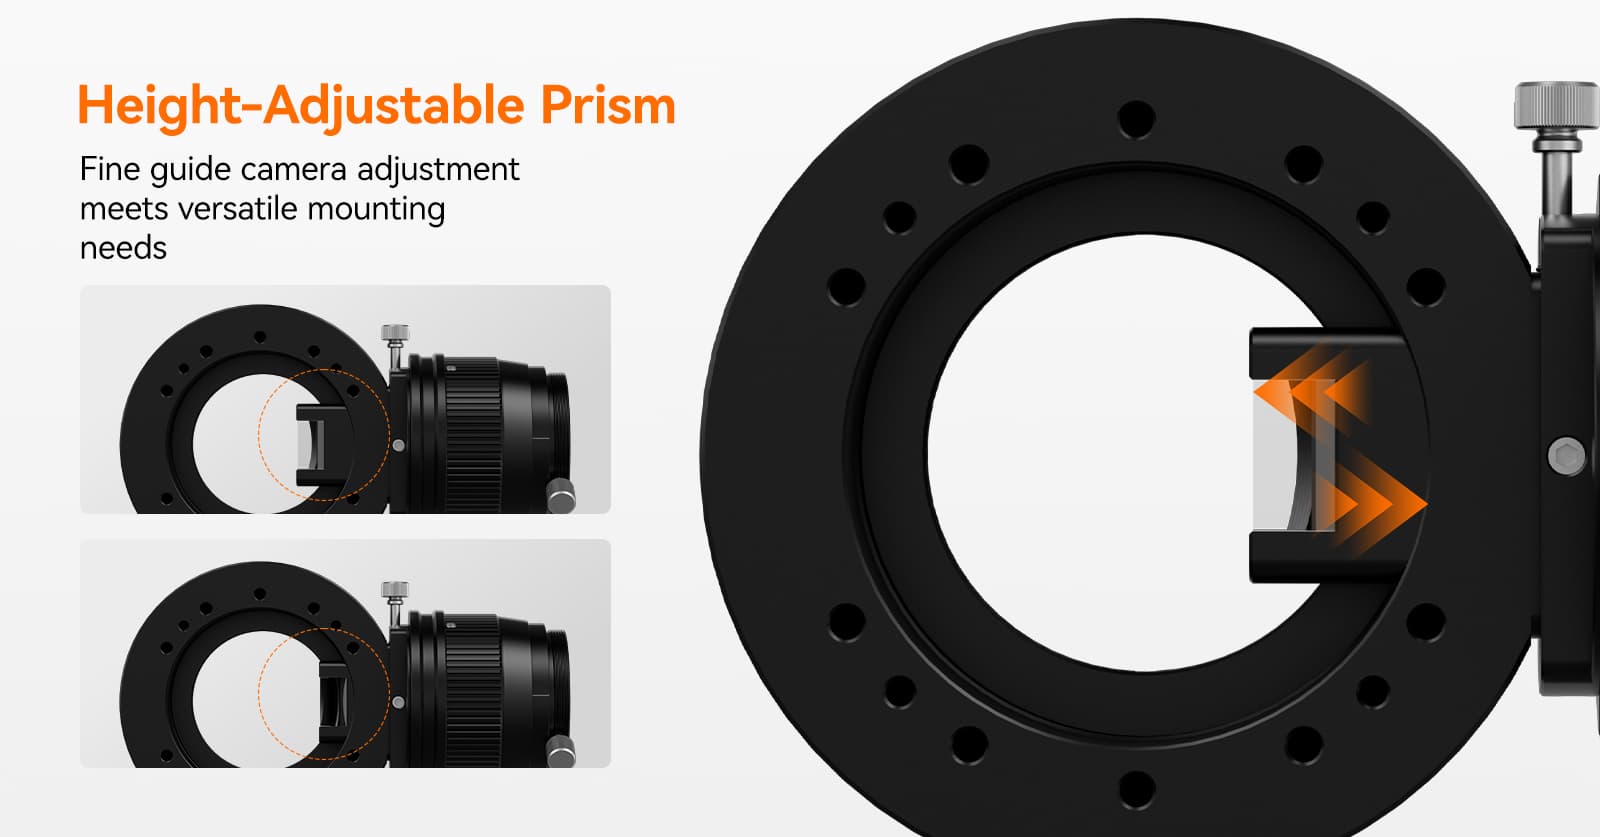
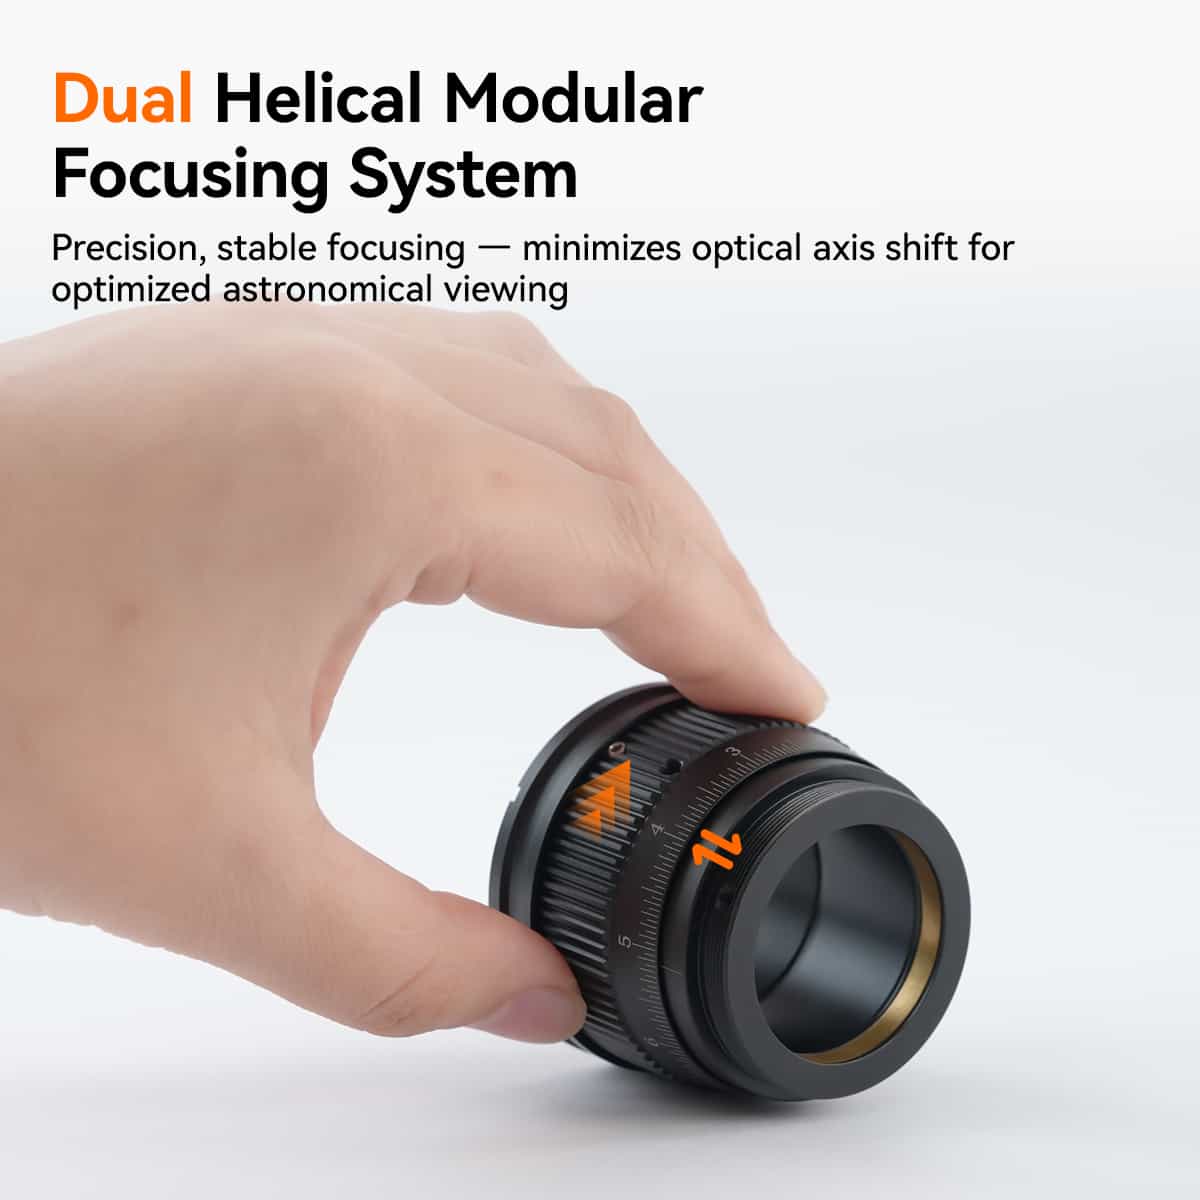
Dual Helical Focuser
A dual helical focuser on the OAG allows ultra-fine, backlash-free focusing of the guide camera, ensuring pinpoint guide stars and accurate long-exposure tracking.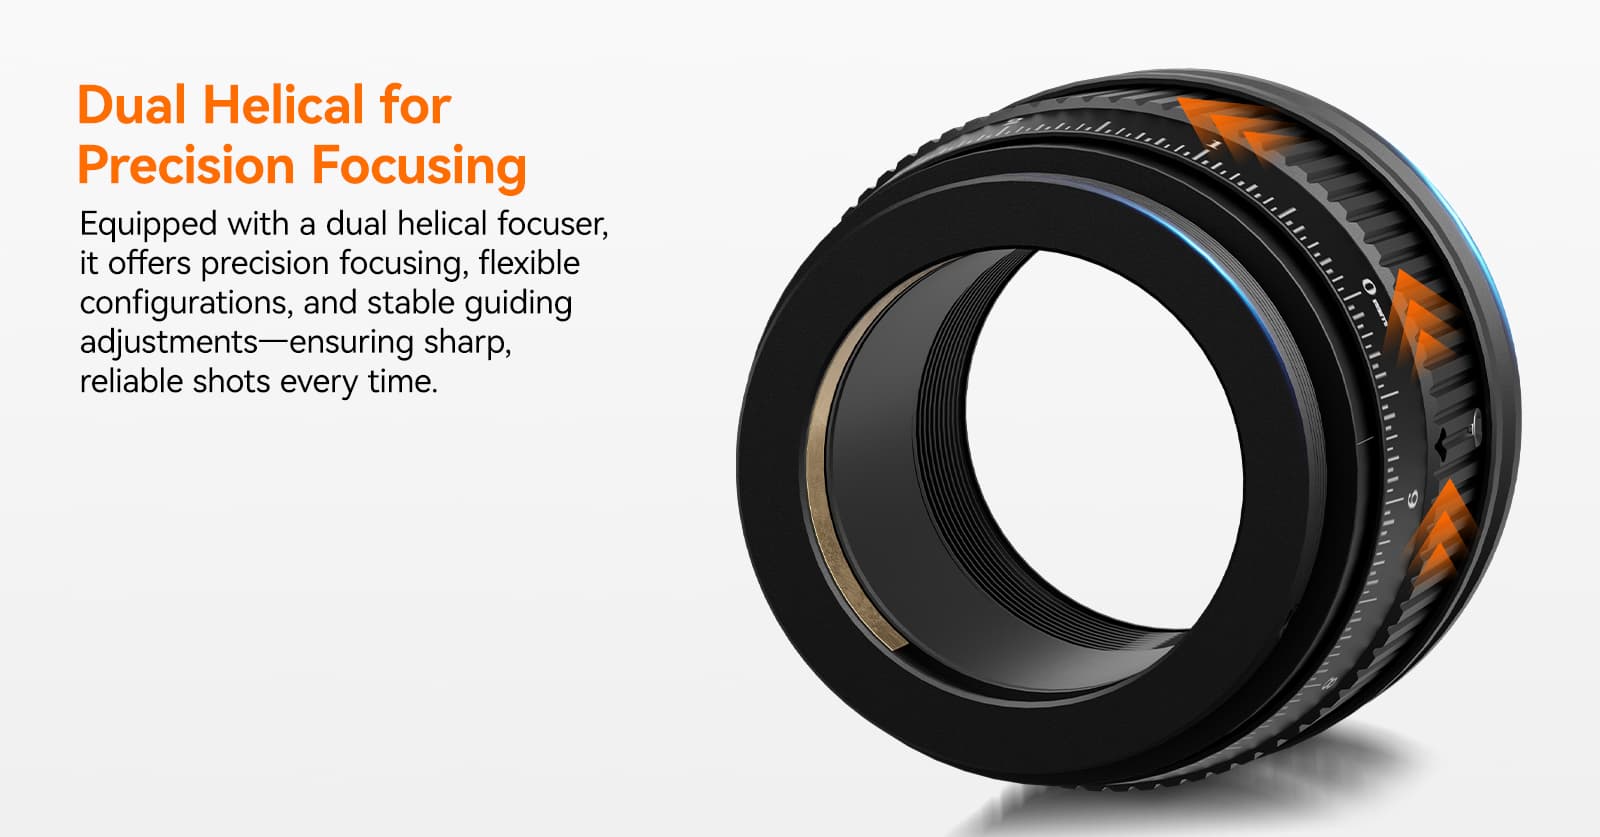
CNC-Machined Unibody
It withstands outdoor temperature shifts without deformation, delivering stable performance for astrophotography in all conditions.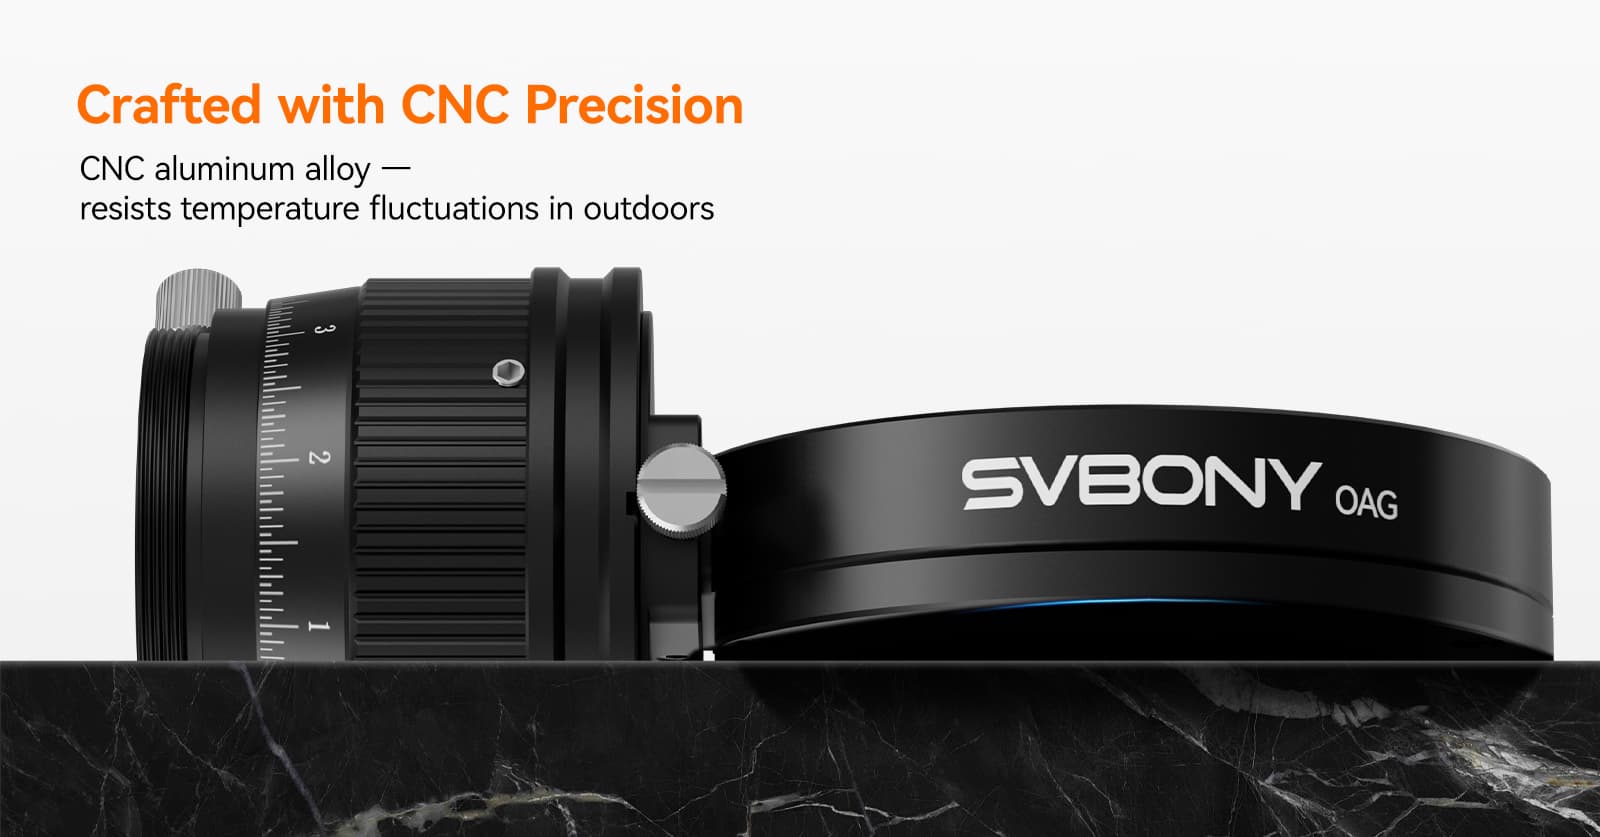
Wide Thread Support
M54, M48 & M42 adapters let you connect effortlessly to the majority of cameras and telescopes without extra adapters.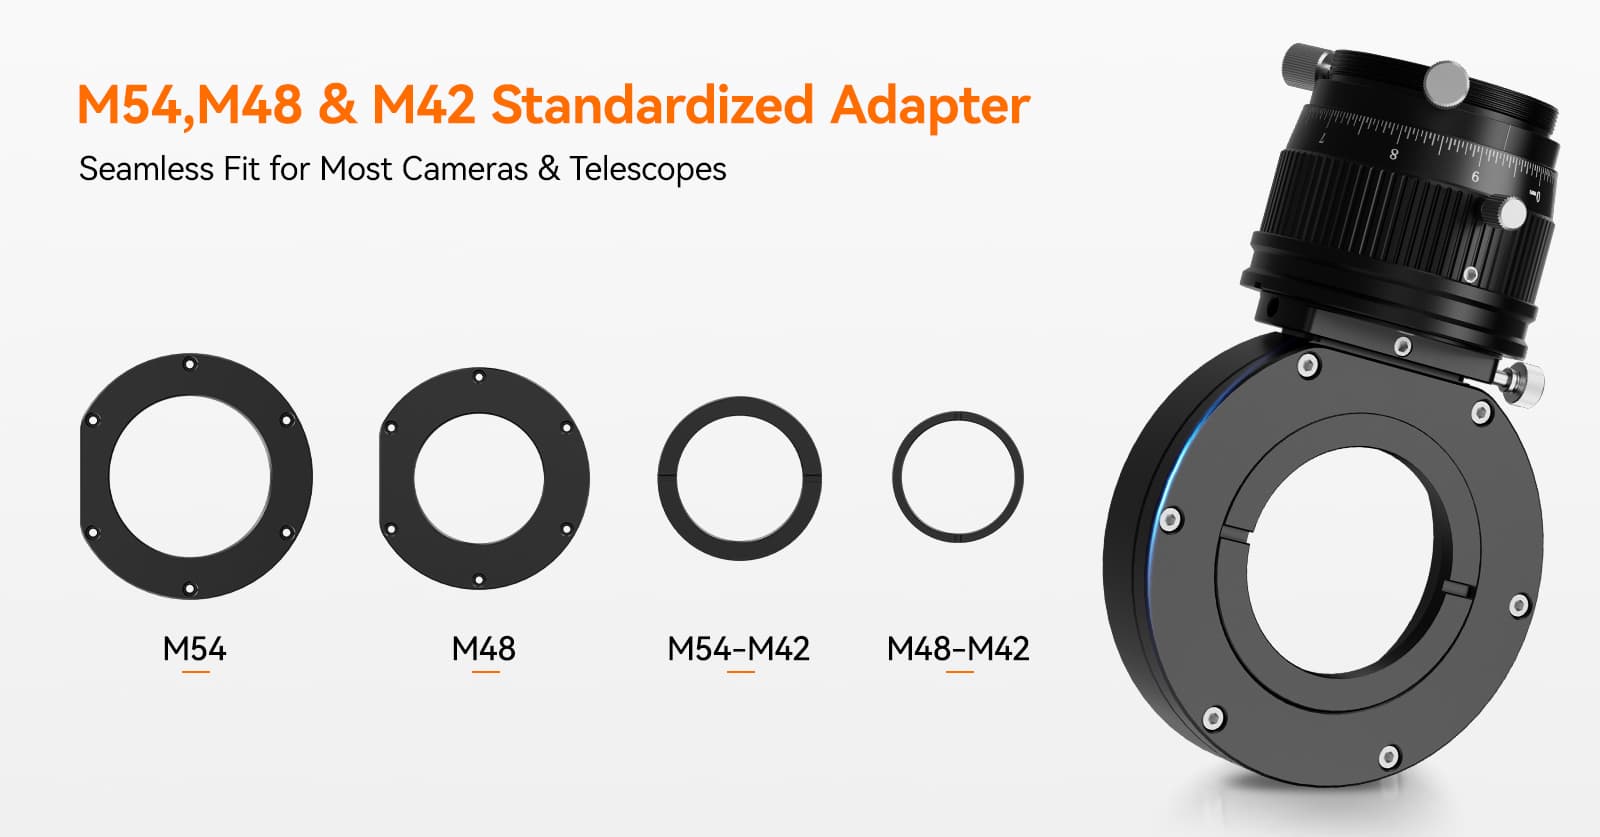
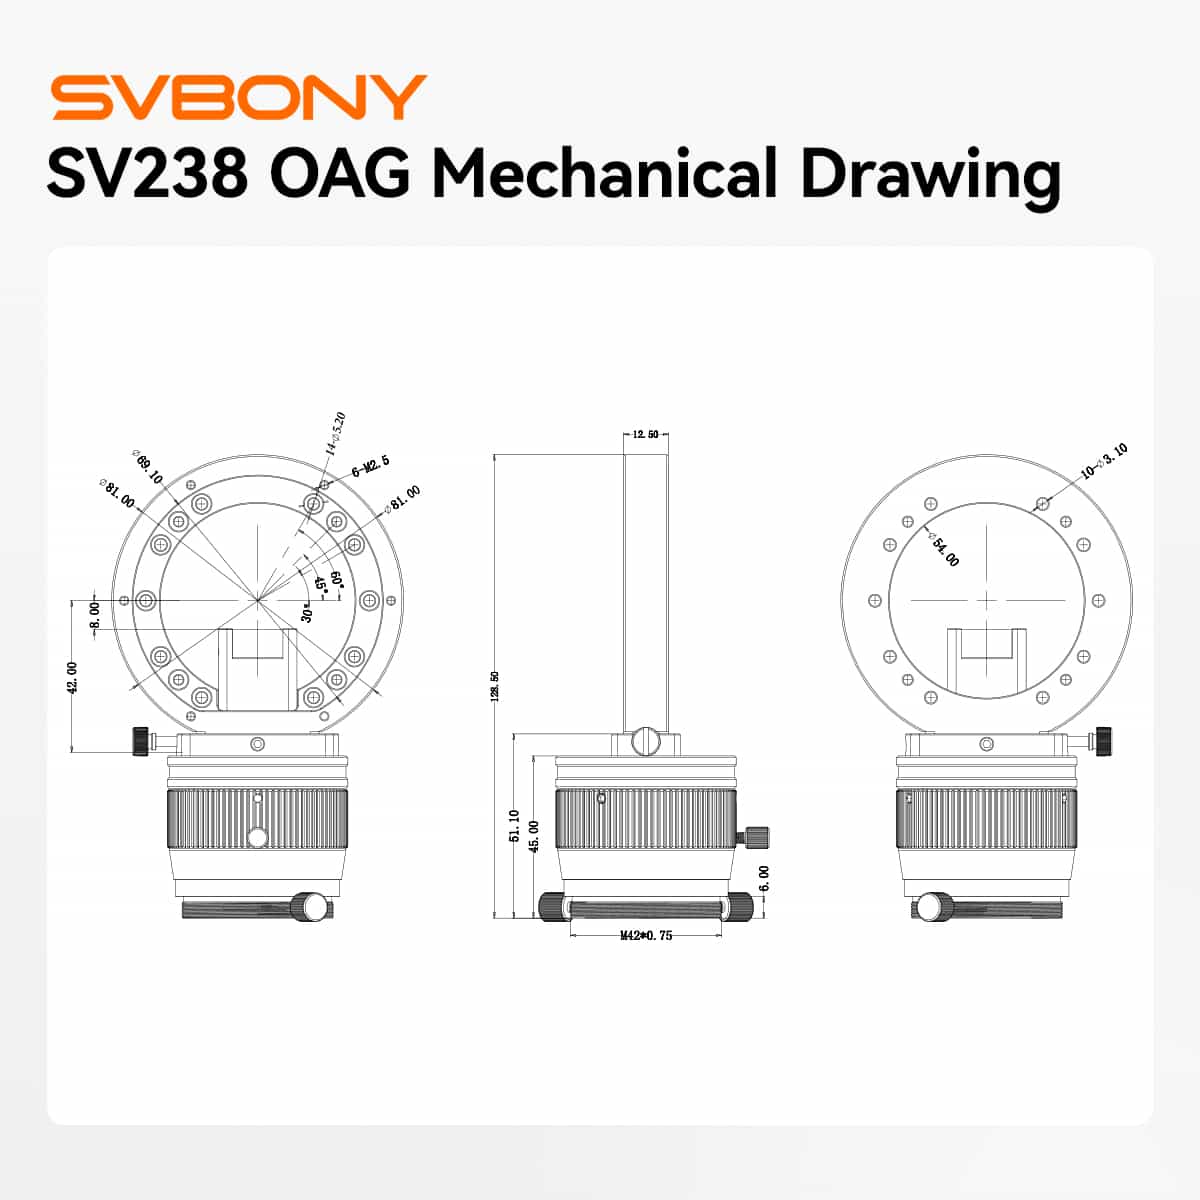
| Prism Size | 8 × 14 mm |
| OAG body thickness | 12.5 mm |
| M48×0.75 | 4 mm |
| M54×0.75 | 5 mm |
| Telescope Interface | M54 / M48 / M42 (including M48-M42 adapter) |
| Main Camera Interface | M54 (Internal Thread) |
| Guide Camera Interface | M42 × 0.75 (compatible with most guide cameras) |
| Prism Height Adjustable | Supported |
| Applicable Camera Sensors | Up to APS-C |
| Recommended Guide Sensor Size | 1/3"~1/1.8" |
| Adapters Included | M48, M54-M42, M48-M42 |
Q&A:
Q1: The main camera is in focus, but the guiding camera is always out of focus. What should I do?A: The key is to align the imaging planes of the two cameras.
Procedure:
1.First, focus only on the main camera to achieve precise focus.
2.Loosen the guiding camera's locking ring and use the sliding/rack mount to slowly extend or retract it until the star points become smaller and more solid.
3.If necessary, slightly adjust the height of the prism (by inserting or retracting a small amount).
4.Finally, "lightly lock—fine-tune—finally lock" to avoid rebound. It is recommended to mark the extension of the guiding camera for easy resetting next time.
Q2: Can't find a guide star/the star is too faint, especially during narrowband imaging. What should I do?
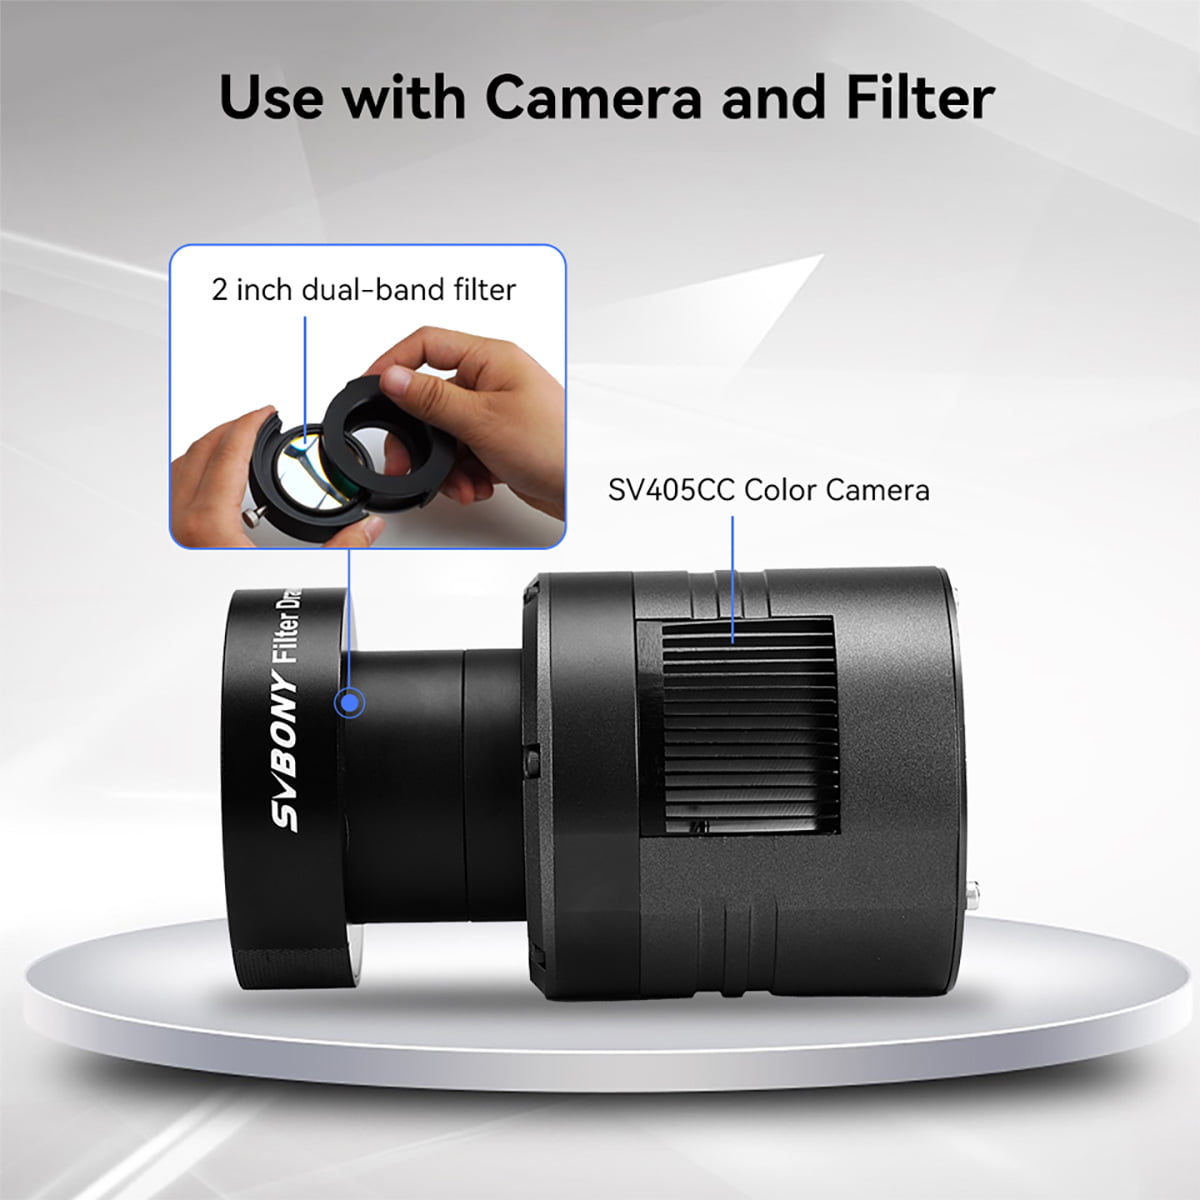
A: First, confirm that the OAG is placed before the filter wheel/filter (so that guiding does not pass through the narrowband filter).
Then:
1.Rotate the OAG (changing quadrants often helps to find a brighter star).
2.Slightly raise the prism (until a dark corner appears, then retreat).
3.Set the guiding camera exposure to 1–3 s, moderately increase the gain, or use 2×2 binning.
4.In urban light pollution, choose a brighter target area.
5.Check if the lens cap/cover is not removed and if the focal plane is close enough.
Q3: Shadows/uneven dark corners appear in the main image. Is it because the prism is blocking the light?
A: Very likely.
Solution:
1.Retract the prism by 0.5–1 mm.
2.Slightly rotate the OAG to change the light intake position.
3.Full-frame cameras are more sensitive; if dark corners still exist, consider an OAG with a larger aperture/prism or upgrade the camera port to an M54/M68 diameter.
4.Also, check if the back focus is correct (incorrect back focus can also exacerbate edge issues).
Q4: Is there a recommended "first-time setup" checklist?
A:
1.Confirm the interface and thread pitch (M42/M48/M54) and target back focus.
2.Assemble in the order of "telescope → field flattener/focal reducer → OAG → filter wheel → main camera."
3.Focus the main camera.
4.Adjust the height of the guiding camera and prism to achieve simultaneous focus.
5.Rotate the OAG to select a brighter star field.
6.Calibrate the software, set the exposure to 1–3 s, and enable multi-star guiding.
7.Test shoot the corners to check for dark corners and star point shapes, make fine adjustments, and then start long exposures.
Q5: I always get confused about the assembly order: where should the OAG be placed? Are there any exceptions?
A: The general order is: telescope → (focal reducer/field flattener) → OAG → (filter wheel/drawer) → main camera.
Reason: The guiding camera sees the corrected image field and is not obstructed by the main camera's filter.
Exceptions: Ultra-short back focus systems (such as RASA/HyperStar) may not fit a conventional OAG and may require a dedicated ultra-thin model or omitting the OAG; in individual cases where a field flattener requires strict back focus, follow the manufacturer's linkage diagram.
Q6: The guiding is always "drifting/unstable," and it's not a software issue. What else should I check?
A: Prioritize hardware checks:
1.Ensure all threads are fully tightened and not "loosely tightened."
2.Check if cables are pulling on the guiding camera (use cable clips and leave some slack).
3.Check for radial clearance in the OAG/camera's sliding mount (apply moderate pre-tension).
4.Check the balance and backlash of the equatorial mount.
5.Check the stability of the tripod/wedge/ground. On the software side, start "conservatively": set exposure to 1–3 s, use multi-star guiding, set RA/DEC aggressiveness to medium, MinMo > 0, and calculate calibration step size based on focal length/pixel size.
Q7: How do I choose an OAG for a full-frame camera + fast system + filter wheel?
A: Select an OAG with a large aperture (larger prism/opening) and a large diameter thread (M54/M68), and minimize the number of unnecessary adapter rings. This reduces dark corners and leaves back focus space for the filter wheel/tilt plate. If the edges are still tight, consider using a thinner filter wheel/drawer or "subtract" from the optical train.
Q8: What are the compatibility points for different telescope systems (SCT/RC/Newton/RASA)?
A:SCT: The main mirror moves to focus, changing the focal length; refocusing is required after changing accessories. For long focal lengths, an OAG is highly recommended.
RC:The long focal length image field requires precise alignment. An OAG is extremely cost-effective but must strictly meet the target back focus for field flattening/focal reduction.
Newtonian: The focal point extends outward, so be cautious with accessory stacking; pay attention to the secondary mirror's obstruction and focusing travel.
RASA/HyperStar:The space behind the mirror is extremely short, and the light beam cone is steep, generally not suitable for conventional OAGs. If it must be used, select a dedicated ultra-thin OAG and strictly follow the official back focus requirements.
Leave a Reply
Customer Reviews
There are no customer reviews yet
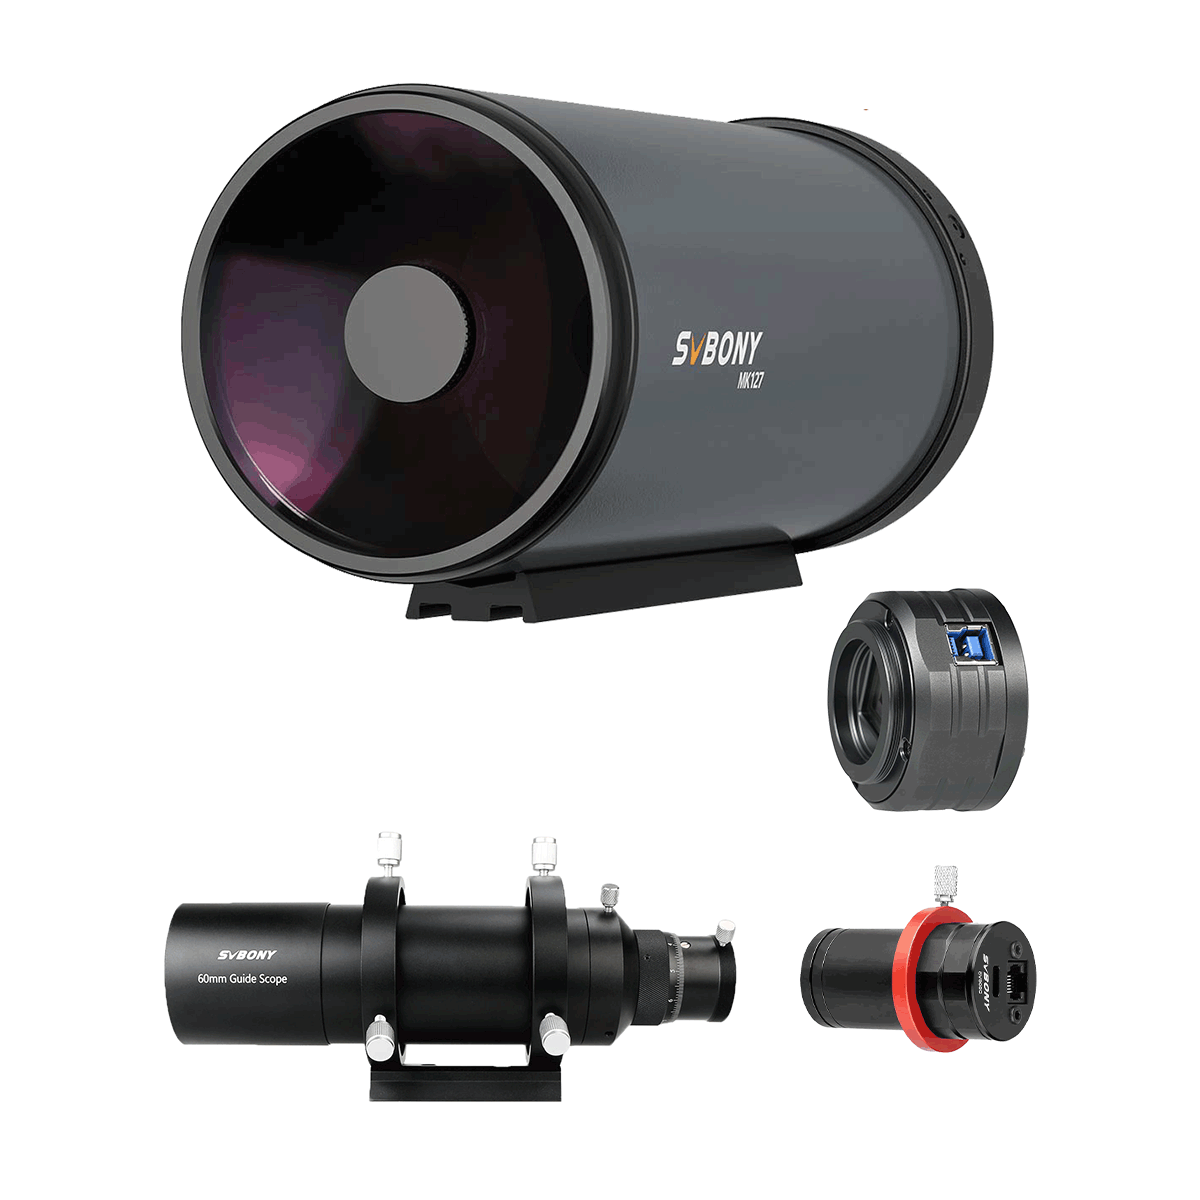
Related Products
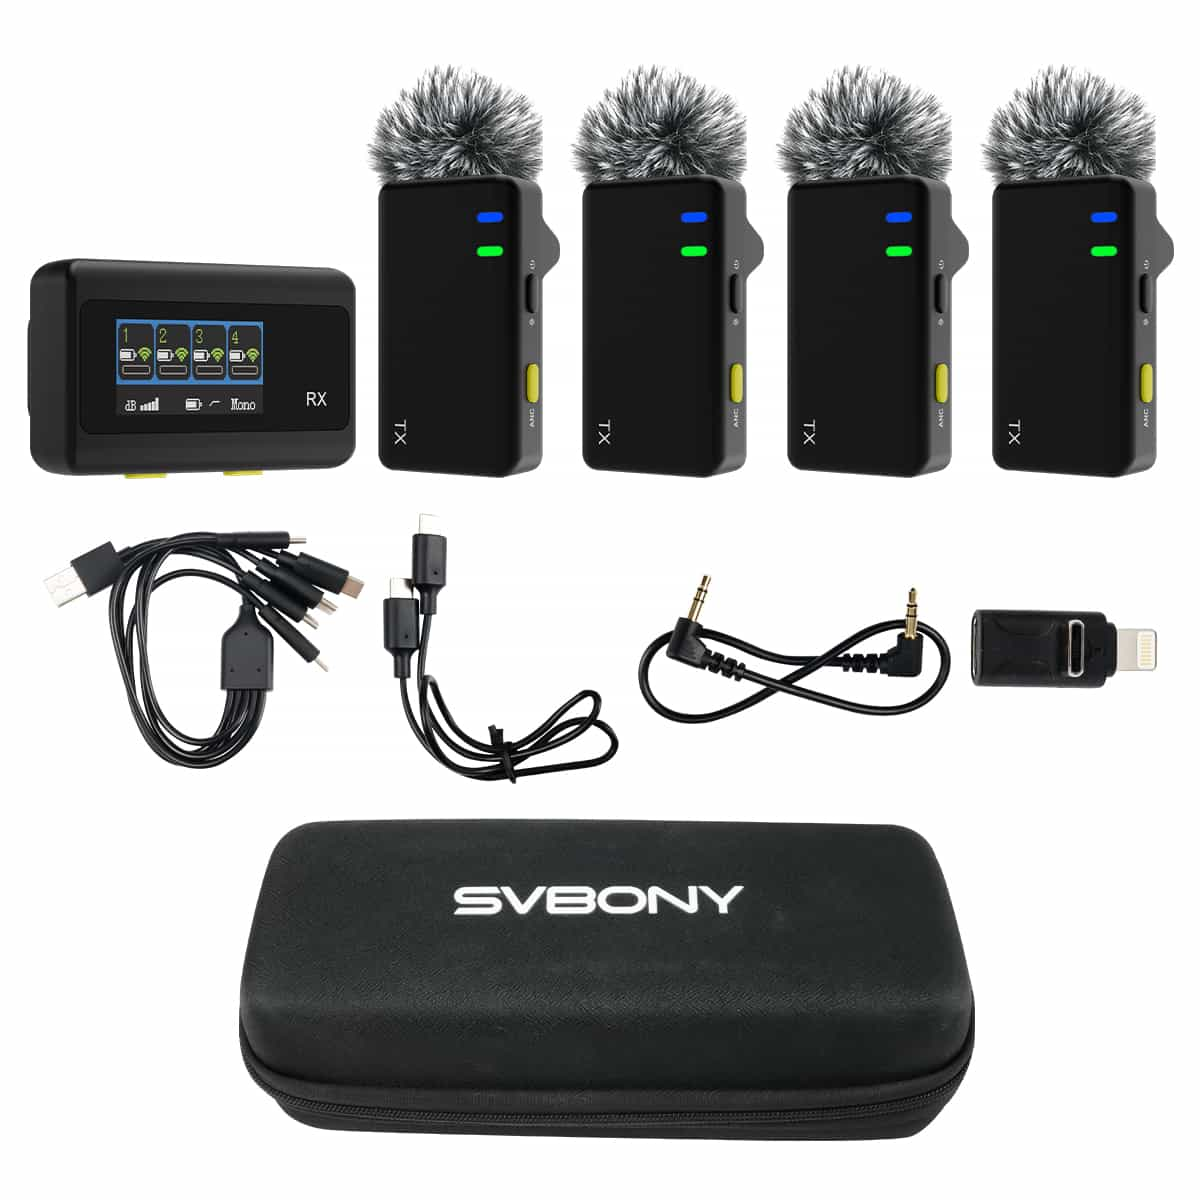
66


Recently Viewed
3