SVBONY SV510 Travel Solar Scope 60mm review
SVBONY SV510 Travel Solar Scope 60mm review
Hi everyone,
Today, we are honored to share with you a review article written by star-hunter.ru for SVBONY SV510 Solar Scope. The following text and related pictures are provided by star-hunter.ru. We would like to express our gratitude for their strong support of SVBONY brand.
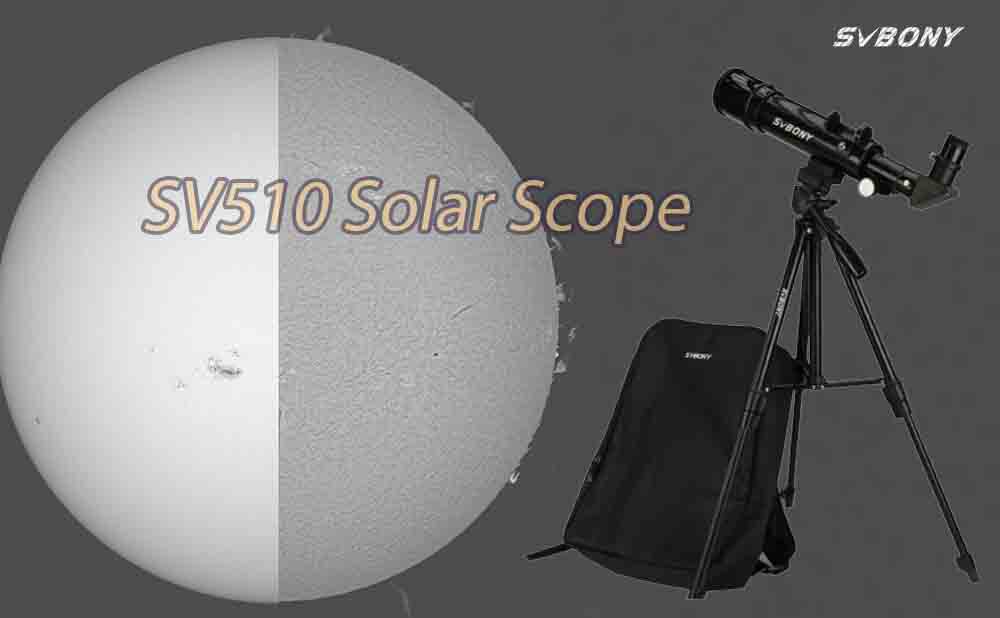
I received an interesting solar telescope for testing – SVBONY SV510 Travel Solar Scope 60mm. This is a small lens telescope with a 60 mm objective lens and a built-in full-aperture solar filter. It is ONLY suitable for observing and capturing the Sun. As a lover of the Sun, I was very interested in this device, and the Svbony company kindly provided it to me for research.

SVBONY SV510 Travel Solar Scope 60mm
Specifications
| Brand | SVBONY |
| Item Name | SVBONY 60mm solar telescope |
| Model | SV510 |
| Optical Design | Refractive |
| Aperture | 60mm |
| Focal length | 400mm |
| Focal Ratio | f/6.6 |
| Objective lens type | Achromatic doublet, air-spaced |
| Optical coatings | Fully Coated |
| Solar Filters | ISO certified polymer material , full aperture, permanently attached |
| Viewfinder | Zero power Solar Safe Finderscope Type |
| Diagonal | 1.25″ 90-Degree Mirror Diagonal |
| Eyepiece | 1.25″ K20mm Eyepiece |
| Net weight | 1985g |
| Package weight | 2085g |
| Package Size | 440*290*130mm |
The telescope comes in a small, lightweight cardboard box. Inside is another box!
.jpg")
Inside is another box!
In the box:
– telescope tube with installed solar finder and protective covers
– diagonal mirror
– 20 mm eyepiece in case
– tripod in bag
– backpack for storage and carrying
– user manual in English

Backpack Contents
Materials:
tube body – metal
hood and caps – plastic
filter frame – plastic
filter material – polymer film with a mirror coating
lens frame – plastic
dovetail mounting plate – metal
Focuser base, focuser tube, focuser handles – plastic
Focuser visual back – metal.
The focuser travel is 98 mm, there is a slight lateral play.
The diagonal mirror is made partly of plastic (body), partly of metal (skirt and visual back). There is a metal strip inside the visual back to protect the eyepiece skirt from scratching the clamp screws. The eyepiece is a simple kelner with a focal length of 20 mm, but is fully coated (the color of the coatings is purple), however, with a sufficiently large field of view (measured – 56 degrees) for this class of eyepieces.
The finder is very easy to use: point the telescope at the Sun and align the bright spot with the central mark. There is no need to look anywhere, look from the side. The finder is coaxial with the tube, no adjustments are provided.

Finder
And, the most interesting thing is the lens. It is hidden behind a film filter that is glued into the lens frame. You can remove the hood, but you couldn’t unscrew the front part of the lens because the threads are sealed with varnish. The light diameter of the filter is approximately 53 mm.

Filter
I was wondering if there was any coating on the lens. I looked into the focusing tube, shined a flashlight inside and found a small diaphragm there. In the distance you can see the lens with white and blue highlights, but it is visible partly due to the diaphragm.

Focuser aperture
I assembled a simple stand from a flashlight and a transparent ruler to test the working aperture. A diagonal mirror without an eyepiece is inserted into the focuser, the focuser is in the focusing position at infinity. I hold the ruler close to the lens, the lens hood is removed. If you look into a diagonal mirror, you will see a lens and a ruler. This way you can see if the aperture is fully operational.
Aperture test
A test with a flashlight and a ruler showed that only about 35mm of the aperture was working, the rest was being cut off by the diaphragm in the focuser and possibly the focuser tube itself.

Distance between lines – 1 mm
What a surprise!
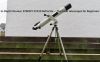
Yes, the telescope comes with a simple aluminum tripod without fine tunes. It is light and unstable, but for quick observations of the Sun or for hand-held shooting through a smartphone, it is quite enough. With this tripod, I recommend observing the Sun at a low altitude above the horizon (for example, in the morning or evening).

Tripod folded
This telescope is begging for something more load-bearing and stable. Moreover, there is a mounting plate on the pipe.
Testing on the Sun
I quickly and easily pointed the telescope at the Sun using the finder scope, looked through the eyepiece, focused and saw a yellowish-orange disk with sunspots. The image seemed very clear to me. The brightness is comfortable, I did not notice any problems with vision after the observations. Next, I installed the SVBONY SV215 Zoom Eyepiece. With an 8 mm focal length of the eyepiece, the entire disk of the Sun was placed in the field of view, but the brightness of the image had already dropped noticeably.
I took the photo using my smartphone through the eyepiece. The clouds that ran across the disk of the Sun were a little disturbing. I’ll try to take some more pictures on a sunny day.

I am sure that when shooting through an astro camera the result will be much better.
ATTENTION! All modifications are at your own peril and risk; I do not encourage anyone to climb inside the telescope and modify the design. Moreover, this may lead to loss of warranty on the purchased equipment and (or) vision.
What to do?
a) Observe as is, do not interfere with the design of the telescope. The telescope is quite suitable for quick observations and copes with its task.
b) But the working aperture is only 35 mm… Ideally, you need to remove the focuser and knock out this stupid diaphragm with a screwdriver. If it turns out that the end of the focuser tube also causes aperture, then you can saw it off. In this way, it will be possible to increase the resolution by 1.5 times and the brightness of the image by 2.25 times, that is, it will be possible to use higher magnification for observations.
c) remove the filter altogether, measure the working input aperture, and, if it is really 60 mm, install another full-aperture filter with a larger diameter. This way you can gain a little more detail and maximum magnification.
Yes, it’s unlikely to be possible to focus with a Herschel wedge, since the focusing power reserve is already small, and the wedge eats up a lot of the optical path.
d) I found one simple SAFE way to fully implement the aperture (53 mm) during visual observations – installing a non-telecentric Barlow lens between the telescope and the diagonal mirror. This will require the focuser to be pulled out further from the telescope. The diaphragm, which cuts off part of the working aperture, will also move further away from the lens. I have measured the working aperture with this configuration (telescope > Barlow lens > diagonal mirror > eyepiece) to be 52-53mm. Great! When using 2x Barlow lenses and a 20 mm eyepiece, the solar disk still fits into the field of view, the brightness is comfortable, and there is much more detail. So if you have a non-telecentric Barlow lens, you don’t have to remove the diaphragm. There is no need to modify anything, use the telescope as is, just use the Barlow lens in front of the diagonal mirror.

Diagonal mirror inserted into a Barlow lens


Measuring the aperture after installing a 2x Barlow lens. The diameter of the circle on the left is 6 mm.
Is this telescope suitable for solar astrophotography?
I think yes. The focal length of the telescope is small (400 mm), so with a sufficiently large sensor (for example, Sony imx178) you can completely squeeze the disk of the Sun into the field of view. Moreover, when using an astronomical camera, almost the entire working (52 mm) aperture of the telescope becomes available. Here, the long focuser stroke helped focus with the astronomical camera mounted directly into the focuser without additional extensions. For daily monitoring of the Sun with an astronomical camera or via a smartphone, the SVBONY SV510 Travel Solar Scope 60mm telescope is quite suitable. For shooting with a Continuum filter, I think so too. But, the telescope is not suitable for photography in calcium, because the yellow aperture filter cuts out all ultraviolet light.

Sun, February 9, 2024, 10:30.
Equipment:
-SVBONY SV510 Travel Solar Scope 60mm telescope
-Sky-Watcher AZ-GTi mount
-Baader Solar Continuum filter
-QHY5III178m astronomical camera.
Stacking of 500 frames from 3003. False colors.
Source video: https://youtu.be/hb1untR4JT8

Equipment

Working aperture of the telescope when installing an astronomical camera.
Is the focus offset enough for shooting through a DSLR camera with a T-adapter and T-ring?
Yes.

Т-adapter + Т-ring Canon EOS + Canon 550D
The resulting image without processing.
Are prominences visible through this telescope?
No. To observe prominences and the chromosphere of the Sun, a chromospheric telescope or a chromospheric filter is required.

Svbony SV510 vs Coronado PST H-alpha 40 mm
Image comment: The lack of color is due to the use of a monochrome camera when shooting. In visual observations, the color of the Sun when observed through the SVBONY SV510 Travel Solar Scope 60 mm is yellowish-orange. When observed through the Coronado PST H-alpha 40 mm Chromosphere Telescope, it is a reddish carrot color. Apparent color may vary between observers due to individual vision.
Will the solar corona be visible through this telescope during total solar eclipses?
No, since the corona is very weak, and the filter built into the telescope significantly attenuates the radiation.
Will the granulation of the Sun be visible through this telescope?
No, the aperture is too small, and even with aperture. However, when photographed through an astronomical camera, hints of granulation can be obtained.
SUMMARY
Despite the shortcomings found, the telescope is quite suitable for its main task – observing the Sun, annular solar eclipses, as well as partial phases of solar eclipses. That is, it will show the disk of the Sun with spots. The telescope is safe for observing the Sun – this is good for educational purposes. Yes, the telescope initially has a hidden diaphragm. However, simple non-telecentric Barlow lens installed between the telescope and a diagonal mirror will help solve this problem without destroying with the design of the telescope. When shooting through an astronomical camera mounted directly into the focuser, the entire aperture (52 mm) also works. I would probably also paint the telescope a different color (for example, orange, like the color of the Sun in the eyepiece), and write SVBONY SOLARSCOPE in capital letters. And it will be more fun, and its sunny orientation will clearly stand out.