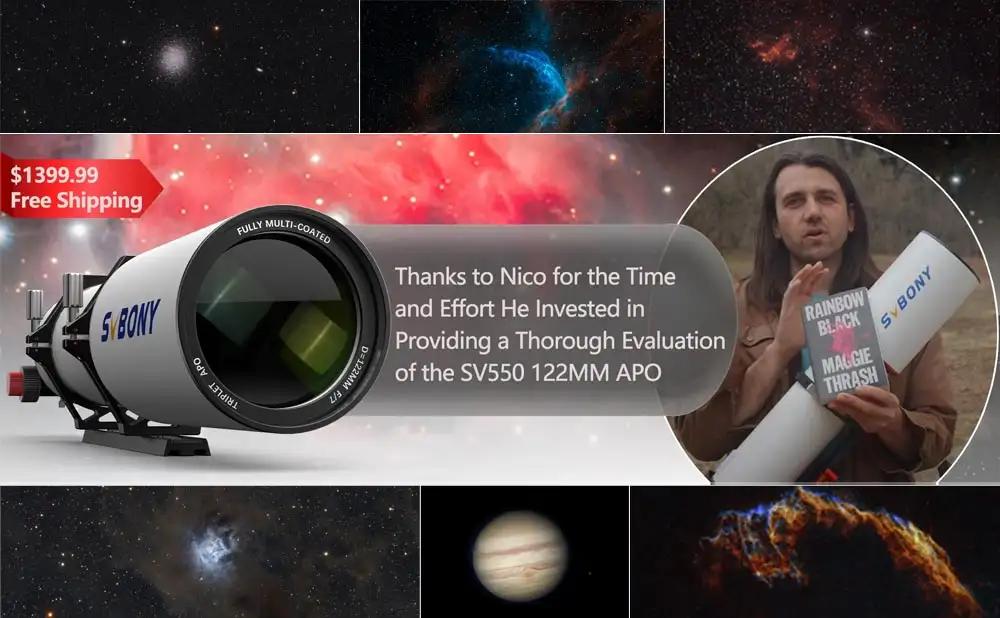
The Latest Reviews for SV550 122 APO
The Latest Reviews for SV550 122 APO
Hello everyone! Would you like to know the latest information about the SV550 122MM? Let me slowly share it with you.
The following article is shared from the Japanese Astronomy Editorial Department, and we would like to express our sincere thanks and respect to them.
Do you have an apochromatic telescope? What material is it made of? Astronomers are, after all, enthusiasts for equipment. After all, what you care about are the specifications.
I. Introduction before use
In general, apochromatic telescopes use fluorite or Super ED glass FPL-53, as well as ED glass FPL-51. There are significant differences in the correction of axial chromatic aberration (*) for each telescope, and it is said that one piece of fluorite glass material is equivalent to the material of two ED glass materials.
(*) Phenomenon where color fringing occurs when the focal position changes according to the wavelength of light.
Especially for telescopes composed of two lenses (doublet telescopes), there is a clear difference between fluorite material and ED glass material. In fact, for two lenses, the design freedom for correcting aberrations is limited, and there are "differences that cannot be bridged no matter how hard you try (*)".
(*) By designing the two lenses to be spaced further apart, more advanced aberration correction can be achieved, such as in the Takahashi FOA-60, but this increases manufacturing and adjustment barriers and costs.

"FPL-51 Triplet > FPL53 Doublet." On the product page for SV550 122MM, it is mentioned as a "challenging" instrument.
However, what happens when the objective lens is composed of three (or two) elements? The SVBONY SV550 122MM we are introducing this time is a triplet design with a surface that is not perfectly smooth. It utilizes a lens made of FPL-51 glass material, with the claim that adding one more lens will be "superior to the two-element lens with FPL-53".
To be honest, I was initially skeptical about this. At the same time, I wanted to know if SVBONY has an affordable and high-visibility astronomical telescope, so I decided to take a closer look.
1.1 Appearance of SV550 122MM
-
- 1.1.1 Packaging

Author 天文リフレクションズ
The SV550 122MM is packaged in a rectangular soft case. The dimensions of the packaging box (the cardboard box for storage) are 83 x 33 x 25 centimeters. Although not small, the telescope has an F7 focal ratio and a somewhat short focal length of 854mm, making it a size that is easy to carry around.
Inside the soft case, there is a polystyrene foam partition to securely hold the telescope tube. While it may not provide the same level of security as a hard case, it is deemed sufficient for storage and transportation needs.

Author 天文リフレクションズ
Regardless of its size, whether large or small, when you purchase a telescope, the concern is that it is made only of cardboard and foam plastic partitions. Customizing your own case might be a significant obstacle, especially for beginners, but having a suitcase that doubles as "packaging material" for transporting such products would be greatly welcomed.
1.1.2 Objective Lens
View of the objective lens with the sunshade retracted. Naturally, the lens surfaces are fully multi-coated. There is no axial adjustment mechanism; instead, the mechanical precision of the parts ensures the optical axis, which has become the mainstream for refractor telescopes in recent years (*).

Author 天文リフレクションズ
(*) As the aperture increases, the lens unit equipped with an axial adjustment mechanism itself becomes larger, thereby increasing both cost and weight. One design philosophy includes the adjustment mechanism to achieve optimal performance, but with the advancements in CNC machining, maintaining a certain level of quality is now possible without the need for an adjustment mechanism.
The dew shield is sliding and can extend significantly, as shown in the image above. This type of extendable dew shield is excellent as it allows you to reduce the storage length. The surface of the telescope tube features the common white matte finish seen in SVBONY telescopes. It is not prone to fingerprints, providing a pleasant tactile experience.
However, as will be explained later, due to its larger diameter, even with the extended dew shield, measures to prevent dew are essential.
1.1.3 Telescope Tube Weight

Author 天文リフレクションズ
The telescope tube (including the dew shield) has a weight of 6.44kg. It is generally suitable for mounting on medium-sized equatorial mounts such as the Vixen SX series. It is slightly lighter than the Takahashi TSA120, which utilizes a triplet design, and shares specifications similar to the SV550 122MM (*). This is the fate of triplet telescope tubes, but due to the three lenses in the objective, the weight at the front end is roughly the same as that of a two-element lens, making the front end heavier.
(*) According to the catalog value, the weight of the TSA120 telescope tube is approximately 6.7kg (without the dew shield, with a 7x 50mm finder). The actual weight of the Takahashi 7x 50mm finder in my possession is 590g, making the weight of the telescope tube alone 6.1kg (the dew shield weighs only 340g), making it lighter. By the way, the Vixen SD115SSII with a 115mm aperture has a telescope tube weight of only 4.4kg.
In the above image, the center of gravity is around the fist. When you attach a camera, eyepiece, and finder, the center of gravity will move slightly closer to the eyepiece, but it's essential to note that it is "front-heavy" (*).
(*) When lifting the telescope tube by gripping the dovetail or an optional handle, if you don't hold onto the center of gravity, the objective side may hit the floor.

Author 天文リフレクションズ
Including the telescope tube strap and dovetail. The inner side of the telescope tube strap is affixed with a thin felt pad. The texture and rigidity are average, but it is sufficient for practical use.
At the top of the telescope tube strap, there is an M6 threaded hole. The distance between the screw holes on the center left and right is actually 37.7mm. I would prefer a spacing of 35mm, which is common for astronomical equipment.
1.1.4 Focuser and Eyepiece
The focuser is a rack-and-pinion type. It comes standard with a dual-speed focuser, allowing for precise focusing. The focusing travel is approximately 87mm, which is quite generous.

Author 天文リフレクションズ
The clamp for the eyepiece rotating mechanism is located on the left side of the red ring in the image on the left.
As for the finder foot, there is a Vixen standard dovetail slot on the eyepiece as standard, but if you purchase an additional one, you can install it at a position 90 degrees away. Please note that a finder is not included in the standard configuration.
The eyepiece features a rotating mechanism. Its structure is robust without any gaps, but the rotation is a bit stiff, requiring considerable force to make it turn. It is better than a simple scrolling mechanism, but I hope it could be smoother in operation.

Author 天文リフレクションズ
A large number of light-shielding baffles are arranged on the inner surface of the large-aperture telescope tube, significantly preventing internal reflections. Depending on the product, this area may have a matte coating or fine striped structure, but the best solution is to include light-shielding baffles.
Ideally, when looking from the eyepiece side towards the objective side (upper-right image), everything except the objective should appear "dark," and in this regard, this telescope can be considered top-tier.
The screw at the end of the drawtube is M63 and comes with a 2-inch sleeve insert adapter.
1.1.5 Main Accessory - Field Flattener
(*) The product model for the field flattener in the SV550 series is "SV209," but this is a different product. Please do not make a mistake.

Author 天文リフレクションズ
A dedicated field flattener (0.8x reducer) is available as an optional accessory. When in use, the focal length becomes 683.2mm at f/5.6, transforming it into a considerably bright photographic lens despite the long focal length, complemented by the power of the 122mm aperture. Priced at only $195, it may seem a bit high for SVBONY's products, but it is much more affordable compared to similar products from other companies.

Author 天文リフレクションズ
It also exudes a solid and luxurious feel, and the lens surfaces are, of course, fully multi-coated. The internal anti-reflective treatment is also robust, as I will explain later, ensuring excellent peripheral light intensity and image quality.
The mounting standard on the camera adapter side is M48, but attention should be paid to the back focus. The official specification is 55mm from the M63-48 adapter. For this shooting, I used the William Optics RedCat51 EOS mount camera adapter (actual optical length: 10.4mm), which has a length of approximately 55mm.
SVBONY SV195T Ring (*) Adapter [For CANON EOS Camera Width 48MM]
This product is compatible with the optical path length of 11mm and M48 screw camera adapter sold by SVBONY.

Author 天文リフレクションズ
(*) The "T-ring standard" originally used the M42 standard for the T-mount adapter used by Tamron. The "M42 * 0.75" screw standard is referred to as "T2". However, as M42 is a bit small for ensuring a full-size image circle, the M48 ring is called the "full-size large T-ring" and is now sold as the "T-ring". There are two types: M42 and M48. It is important to note that "T-rings are not limited to M42".
Flat field image taken with SV122MM + SV209 0.8x Field Flattener + EOS 6D. There are no apparent vignetting, and the histogram width is relatively narrow, indicating sufficient peripheral illumination. For simple configurations like telescopes with two or three lenses, using a 1x to 0.8x field flattener (reducer) is more cost-effective than forcefully pursuing brightness (focal length reduction rate). It provides a good balance in terms of peripheral light intensity and peripheral image.
The lens side of the "M63-M48 adapter" included with the SV209 can accommodate a 48mm diameter filter. However, if the filter frame is too thick, it may not fit correctly. I was able to install Optolong's "L-eNhance" (frame thickness 5mm) shown in the image above.

Author 天文リフレクションズ
2.Operation for SV550 122MM
2.1 Comparison between FSQ106ED & FC76DCU

Author 天文リフレクションズ
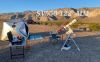
Left: SV550 122MM mounted on the Porta II telescope and FSQ106ED mounted on the SXP equatorial mount. Right: FC76DCU mounted in the Porta II.
The time is around noon, and the comparison includes the use of a single fluorite lens on the two-element Takahashi FC-76DCU (focal length 570mm) and the use of two Super ED lenses on the four-element FSQ-106ED (focal length 800mm, with a x1.6 extender). Both telescopes are considered top-notch in terms of performance and are rated as first-class in terms of aperture.
I mainly attached a Radian 3mm eyepiece and compared the magnification of SV550 at about 280x, FSQ106ED at about 267x, and FC76DCU at about 190x.
SV550 122MM (focal length 854mm) is mounted on the Porta II, although slightly overloaded. I visually compared the signs and lights of an apartment about 1 kilometer away. The visibility on that day was relatively stable. The extension amount of the drawtube is about 90mm, which is sufficient, but if you want to observe directly, you will need an extension tube.
2.2 Not Much Difference from FPL-53 Doublet
Firstly, regarding the comparison between SV550 122MM and FC-76DCU, when using the same eyepiece, there is a significant difference in magnification due to the difference in focal length. But even before correcting for chromatic aberration, I felt they were not directly comparable. My impression is that the 122mm and 76mm apertures "see the world differently." If you look at stars with the same pupil diameter, you might get a different impression, but I keenly realized that "aperture is the key to justice" in visual observation.
The comparison between FSQ-106ED and SV550 122MM reveals the characteristics of both. The Sun reflects on the fixed light "nut" and turns into an artificial star, but if you compare the color blur at the focus position and the image inside and outside the focus, it is indeed true. Axial chromatic aberration has been corrected better in the FSQ106ED.
Well, considering that the FSQ-106ED uses two FPL-53 lenses, this is somewhat natural. I checked the same comparison with the FC-76DCU, but honestly, I couldn't discern a difference. Whether it is "better than FPL-53" or not, it seems that there is "not much difference".
2.3 Under the same budget conditions, which one to choose?

Author 天文リフレクションズ
Comparison image of SV550 122MM (left) and FSQ-106ED (right). The same image was processed by adjusting the magnification to match. After a 2/3-stop correction, the brightness appears slightly exaggerated, but in actual viewing, there seems to be subtle differences.
It is also worth noting that when asked which one looks better between FSQ-106ED and SV550 122MM, besides the differences in chromatic aberration correction, honestly, I feel that SV550 122MM looks better. I suspect the main reason for this is the difference in brightness (*), but it seems that the difference in aperture is also effective here.
(*) The difference in brightness is the difference in F-values when using the same eyepiece. SV550 122MM is F7, and the specifications of the extender for FSQ-106ED are F8.49:64≒1:1.3, which makes the brightness of SV550 122MM increase by about 30%.
This comparison completely changed my evaluation of "FPL-51 triplet." If there is "not much difference" in performance, the only difference is the price. If "FPL-51 triplet" is cheaper than "FPL-53 doublet" (*), it means that the cost performance will be higher than that price. If you could get a larger aperture telescope for the same price, would you be more satisfied with the FPL-51 triplet? Validating this assumption is one of the purposes of this review.
-
3. Photography with SV550 122MM
3.1 Short Exposure M42 Image

Author 天文リフレクションズ
SV550 122MM with SV209x0.8 Flattener (683.2mm f/5.6), EOS6D (astronomy modified), no filter, ISO1250, 5 seconds, 250 frames, darks/flats applied, 2x Drizzle, BXT.
The camera image sensor is more sensitive to a single wavelength (blue) light than the human eye, making the effects of axial chromatic aberration more pronounced. Visually, I feel there isn't much difference between SV550 122MM and a 2-element FPL-53, but how does it perform in photography?
Firstly, I captured a short exposure broadband image of the Orion Nebula from my balcony. The Orion Nebula is very bright, and even in urban areas, it can be easily captured with a short exposure. SV550 122MM is a "dark" telescope with an F-number of 7, but using the separately sold dedicated flattener (actually an x0.8 reducer), you can achieve a "moderate" brightness with an F-number of 5.6 and a focal length of 683.2mm.
From this result, I can hardly see the blue fringing, which is a pass. SV550 122MM seems to be quite cool as a photographic telescope!
-
-
3.2 Difference between 2-element and 3-element in Bahtinov Mask Diffraction Image
-

Author 天文リフレクションズ
Comparison of Bahtinov mask images. Left: SV550 122MM (FPL-51 3 elements) + EOS6D (astronomy modified) Right: SV503 102MM (FPL-51 2 elements) + ASI294MC + UV/IR cut filter.
To roughly check the state of chromatic aberration correction, we compared diffraction images using a Bahtinov mask (manufactured by William Optics, transparent). In low-order diffraction images (first and second orders) created by the Bahtinov mask (*), the focus position varies with color, manifested as the bending of light stripes.
(*) In high-order diffraction images, the nth and n+mth order diffraction images overlap, causing color mixing and averaging, approaching white stripes. Additionally, with a Bahtinov mask with a wide slit, low-order diffraction images become more star-shaped, and white is crushed, making it difficult to see differences in focus position due to color.
The two-element SV503 with FPL-51 that we evaluated earlier (upper image, right) shows slightly bent rays in both single wavelength and long wavelength, while the three-element FPL-51 SV550 (upper image, left) shows a slight curvature. From this image, it can be said that a triplet lens can better correct chromatic aberration than a doublet lens.
-
-
3.3 The "BXT After" world that can correct optical system aberrations
-

Author 天文リフレクションズ
Left) Image immediately after stacking (middle). Right) BXT AI4 applied to the left image with default parameters. The diameter of the star images is about half of what it originally was. Please note that the original image underwent 2xDrizzle processing, so the star image diameter on the original image would be half of that.
By the way, the above images were processed using the recently popular "BlurExterminator (BXT)", resulting in a significant reduction in star image diameter and correction of surrounding artifacts. In the sense of evaluating the original performance of the optical system, presenting images with applied BXT is considered inappropriate. However, in the "BXT After" world where residual aberrations can be corrected with software, the assessment axis of astronomical digital telescopes does shift slightly.

Author 天文リフレクションズ
Left) Image immediately after stacking (corner). Right) BXT AI4 applied to the left image with default parameters.
In fact, in this configuration, the optical path length of the camera adapter is not suitable, and the back focus is not optimal. Therefore, the star images at the very edge may be slightly longer than they should be, and the focusing effect is not optimal. However, at this level, I think the telescope is sufficient for astrophotography even without BXT. After BXT processing, the image becomes an almost perfect representation of the stars.
How does the SV550 122MM perform in the "BXT After" world? After taking this photo, I changed the camera adapter to bring the back focus back to the original design specifications and then took the next photo.
-
4. Using SV550 122MM for Deep Space Photography
4.1 Broadband Imaging - M42 Orion Nebula

Author 天文リフレクションズ
Orion Nebula M42. SVBONY SV550 122MM + SV209x0.8x Flattener (683.2mm f/5.6) EOS6D SEO-SP4 No filter ISO2500 3 minutes x 60 images, ISO400 20 seconds x 20 images, total exposure 180 minutes, dark/flat applied, Vixen SXP equatorial mount, autoguiding, 2x drizzle, saturation recovery/BXT
The performance of SV550 122MM is quite good, but the back focus is not ideal, so I can't say it has fully demonstrated its true potential. Additionally, a true evaluation of axial chromatic aberration is challenging unless you shoot in dark conditions and emphasize it to the extreme using "deep space" photography. So, I took a closer look at M42 in the field, and the example above is what I captured.
To be honest, I'm not satisfied with this image at all. If there's one thing that stands out to me, it's the broken rays around bright stars, resembling a Nazi swastika. Well, this level of fracturing is normal and might be within your preference.
-
-
4.2 Verifying Images of the Same Size
-

Author 天文リフレクションズ
Comparison of the center and four corners of the Orion Nebula M42 at the same magnification before BXT processing. Stacked with 2x Drizzle and color-matched using SPCC, reduced to 1/2 and only color balance correction and saturation emphasis applied. In the original image, the central part of M42 is completely saturated, so we used images slightly off-center.
This is the "original image" of M42 with SV550 122MM before BXT processing, which was the example in the previous section. We preserved the original image as much as possible, cropped the four corners and the center, and emphasized with a horizontal correction. Saturation was also strongly emphasized to highlight chromatic aberration and color comet-like artifacts.
At first glance, the star images from the center to the four corners are almost uniform, with no apparent drift, indicating very good imaging conditions. When viewed visually, there is a slight magnification chromatic aberration, radial comet-like artifacts, and star enlargement at the outermost periphery due to field curvature, but it is still acceptable.

Author 天文リフレクションズ
After SPCC, BXT AI4 is applied with all parameters set to default values.
When BXT is applied to this image, star images become smaller and almost perfect. There is little to complain about. Well, it's truly a good era.
-
-
4.3 Narrowband Photography
-

Author 天文リフレクションズ
Veil Nebula (NGC6960) in the constellation Cygnus. SVBONY SV550 122MM + SV209x0.8x flattener (683.2mm f/5.6) EOS6D SEO-SP4 L-eXtreme filter ISO2500 3 minutes x 28 images, total exposure 84 minutes, Vixen SXP equatorial mount with autoguiding, darks/flats applied, 2xDrizzle, BXT.
I also attempted narrowband photography. In the case of a telescope with residual chromatic aberration, a major concern is whether the focus positions for red Hα (wavelength 656 nm) and blue-green OIII (wavelengths 496 nm and 501 nm) match, but for the SV550 122MM, both seem to match, and they complement each other well.
The "focal length of 683mm" effectively depicts the filamentous structure of this network nebula. Although a flat configuration with 8cm or 10cm class refractors could be used at this focal length, the 122mm aperture provides a richer light volume in comparison, and narrowband allows for the creation of works in a relatively short time.

Author 天文リフレクションズ
Heart Nebula (NGC1805). SVBONY SV550 122MM + SV209x0.8x flattener (683.2mm f/5.6) EOS6D SEO-SP4 L-eXtreme filter ISO2500 3 minutes x 30 images, total exposure 90 minutes, Vixen SXP equatorial mount with autoguiding, darks/flats applied, 2xDrizzle, BXT.
Another narrowband capture, featuring the Heart Nebula located in the constellation Cassiopeia. Being a large diffuse nebula, when captured at a focal length of 683mm, the intricate details of the dark lanes become more pronounced, showing a clear departure from the results obtained at the 300-400mm level.
Using the SV550 122MM for deep space photography requires the establishment of a stable system to prevent guideplate drift due to its longer focal length. This makes it unsuitable for beginners, but with determination, it can indeed enhance the portrayal of celestial objects. It's a surprising experience, offering a completely different world compared to small short-focus telescopes.
-
5. Shooting Planets and the Moon with SV550 122MM
5.1 Capturing Jupiter

Author 天文リフレクションズ
Jupiter. The photo on the left was taken on December 4th, and the one on the right was taken on November 26th. SVBONY SV550 122MM prime focus (aperture 122mm, focal length 854mm) with Celestron 2.5x Barlow lens, ASI678MC camera. Stacks were created using Autostakkert with videos captured through ASIAIR, no ADC (Atmospheric Dispersion Corrector), and no derotation processing.
Since the aperture is 122mm, I also took photos of planets and the moon. I'll do my best in advance, but my skills in planetary/moon photography are still at a basic level. If you are an intermediate or advanced photographer, you should be able to achieve better results than these.

Author 天文リフレクションズ
However, it's the best Jupiter I've seen. I have tried using the SVBONY SV550 122MM to capture various planets and satellites. From a beginner's perspective, there are two key points to achieve "good results". Firstly, "capture photos of the planet's surface with a large number of pixels". There is a significant difference between the ASI678MC with a pixel pitch of 2μ and the ASI294MC with a pixel pitch of 4.6μ. On the other hand, if you use a large-pixel camera, you can achieve better results by magnifying the image with a Barlow lens that has a higher magnification.
Another option is to increase the frame rate of video capture. So far, I have been saving videos to the memory of ASIAIR, limited to around 40fps. When I connected a high-speed external SSD and used it, I was able to increase the speed to around 100fps. To minimize the impact of atmospheric turbulence, you want to use as fast a shutter speed as possible. However, if the frame rate is low, you won't be able to ensure an adequate number of shots (= intensity), and there is a limit to the emphasis in post-processing, so I put it away (*).
(*) There is room for improvement, such as installing an Atmospheric Dispersion Corrector (ADC) to correct chromatic aberration caused by atmospheric dispersion and implementing derotation processing for long-time imaging of rapidly rotating objects like Jupiter.
-
-
5.2 Moon and Venus Photography: The Joy of Allander
-

Author 天文リフレクションズ
Left) Venus. Captured on November 26th. Venus is a very bright celestial body, making it easy to photograph because you can use very fast shutter speeds. Right) Lunar surface. Captured on November 26th. Regardless of the lunar phase, there are many "famous spots" on the Moon, and even simple photography can reveal a lot.
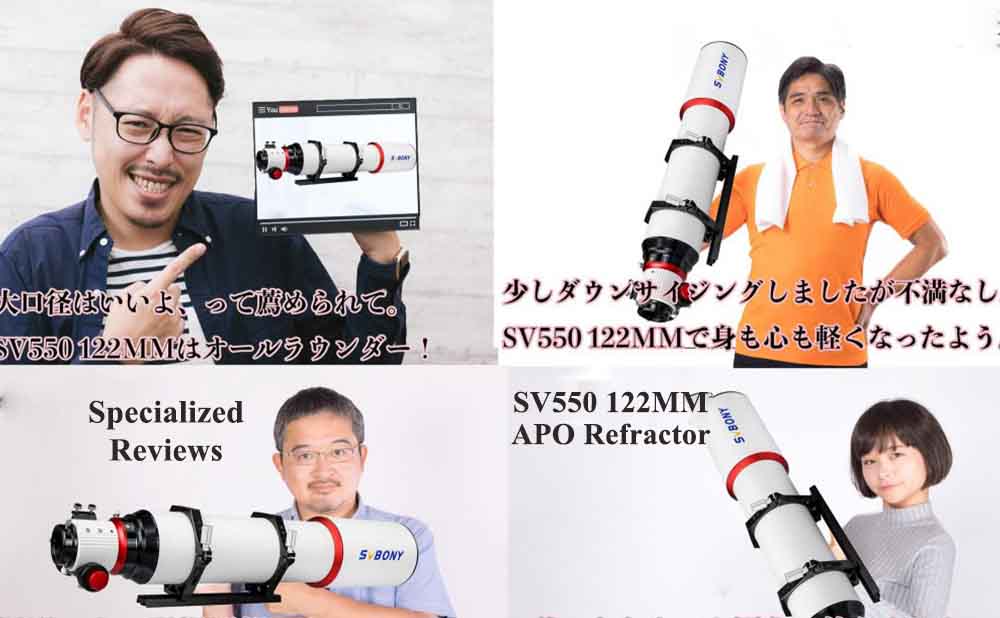
While there are other types of equipment (such as large-aperture reflector telescopes) more suitable for dedicated planetary and lunar photography, a high-performance apochromatic telescope with a diameter of 122mm demands small aperture refractors and has unique high potential. Furthermore, when used for visual observation, the SV550 122MM offers high contrast and ease of operation that only refractors can provide. I truly enjoy the versatility of the SV550 122MM as an "all-around player".
6. Power of Visual Observation with SV550 122mm Aperture

Author 天文リフレクションズ
Observing the Orion Nebula M42. The field of view of the XWA20mm eyepiece is 100 degrees, with a magnification of approximately 42 times. The pupil diameter is about 3mm. A nebula that looks like spread wings stands out against the dark background, and such a wonderful sight can only be achieved with a 122mm "medium aperture" telescope.
In fact, the power of a high-performance apochromatic refractor with a diameter of 122mm is likely most useful in visual observation. Apochromatic refractors provide a wide field of view, high contrast, stable image quality, and convenient viewing, making them suitable for visual observation. However, in the case of 6-10cm apertures, the range of observable celestial bodies is limited, and the brightness is also restricted. With a 122mm aperture, you can appreciate various nebulae, star clusters, double stars, and more in larger, brighter, and more impressive images (*).
(*) When observing through large multi-mirror telescopes with an aperture exceeding 30 cm, you enter another realm. However, for an "all-rounder," I find that a 12cm aperture refractor telescope is the best for visual observation.

Author 天文リフレクションズ
Observing M45 Subaru. The stars appear like sparkling blue gems filling your field of view. Large, dispersed star clusters like this are ideal targets for refractor telescopes.
At the end of this review, I was able to engage in a whole night of visual observation using the SV550 122mm. To make the most of the large Dobsonian, manual nudging techniques are essential, but with the SV550 122mm, you can employ "automatic nudging" Photographers may also want to use an eyepiece instead of a camera, experiencing the pleasure of the original light on the retina. Enjoy the beautiful scenery! While it may not look like a photograph, there's something special about experiencing the raw light on the retina.
The video from the observation will be released later. Stay tuned!
7. Advantages of using SV550 122mm
7.1 Image Processing

Author 天文リフレクションズ
I have cropped out the "Running Man Nebula" from the imaging evaluation images mentioned in the previous section and arranged them side by side. The left side is before BXT, and the right side is after BXT.
Can SV550 120MM compete in the "serious astrophotography" field? (Can I take photos worthy of entry into astronomy magazine photography contests?) The answer to this question is "certainly". The SV550 122MM is also an excellent astrograph.
However, in the world of astronomical equipment, compared to "ultra-high-performance" telescopes that use more expensive glass materials and combine multiple elements with non-spherical surfaces, SV550 120MM is simply "not as good" (*).
(*) Although it may be a matter of field curvature or focusing, the star images from the SV550 122MM give the impression that both intermediate stars and faint stars are slightly larger. (When compared to past images of a four-element refractor from a certain company, they are actually the same.) In this regard, it's not like the "pinpoint" images of a yellow-refractor or a recently released high-performance refractor from Company B.
But it is. If you apply tools like BXT, which correct imaging errors (including blurring due to diffraction) and further exploit the performance of the optical system, the difference between "high-performance" and "ultra-high-performance" becomes almost invisible. It can be as minimal as possible.
Given this situation, should you choose an "ultra-high-performance" telescope or a "(medium) high-performance" telescope? That's up to you. As a prerequisite for achieving this, mastering image processing in astronomical photography is crucial.
7.2 Essential Telescope Handles

The upper rail has a Vixen standard finder dovetail.
The weight of the SV550 122MM telescope tube is 6.44 kg. Intuitively, this weight means that one person can easily install and uninstall it on the mount, but some caution is needed when holding it with one hand. Therefore, we strongly recommend installing a telescope handle.
The image above shows the genuine SVBONY telescope handle, weighing 161 grams, and priced at $39.99. Later, I regretted that I should have borrowed it as well (*). Depending on whether there is such a "handle," the sense of security when installed on the equatorial mount will be completely different. Considering the initial unboxing and transportation, I think this handle can be considered a standard accessory.
(*) I attached an Arca-Swiss plate to the top and used it as a top plate and telescope handle.
7.3 Taking Sufficient Anti-Dew Measures

Author 天文リフレクションズ
Left) 20:00, before the start of shooting. I thought I had taken enough precautions by using a dual-filter configuration. (Center) At midnight, dew attached to the entire lens surface. I increased the number of warmers to four and wrapped them in a sleeping bag for insulation. After about 30 minutes, the dew finally disappeared. Right) At 1 o'clock, I wrapped a cloth around the heater to keep it warm as much as possible. After that, I safely completed the observation until morning.
As mentioned above, the engine cover is quite deep, and it can be expected to prevent dew, but on Japanese nights, especially in spring and autumn, the late-night cold and high humidity will mercilessly bring dew. One of the drawbacks of the 122mm diameter is the uneven distribution of the heater's heat. Even with two heaters installed, fogging still occurs on overcast days. It is best to prepare multiple heaters with sufficient heat output and, if possible, consider wrapping them in cardboard covers or silver pads for insulation.
7.4 All-Rounder
The biggest attraction of the SV550 122MM is its large diameter of 122mm, which is the upper limit for an easily operable refractor. With this aperture, you will never feel that it is not enough for a refractor. The F-value "7" is versatile, suitable for both visual and photographic purposes. You will be able to use it for various purposes without any complaints.
7.5 Easy to Use Even for Beginners
The first refractor telescope recommended by Tenrif for beginners is a small 80mm diameter short focal length apochromatic refractor, which is both affordable and easy to operate. However, I believe you will eventually find yourself thinking, "I want a larger aperture!"
Therefore, if you are sure that you want to enjoy astronomy for the long term, choosing the SV550 122MM as your first might be a good idea. The SV550 122MM with a telescope tube weighs 6.44kg. It can be easily installed on a medium-sized mount, so if your budget is around $3000 (*) (including the mount), you can consider purchasing it.
(*) Of course, there are sharper mounts, so there are cheaper and more expensive configurations.
7.6 The Last Small Telescope

SV550 122MM is a very versatile "all-rounder." The editor-in-chief of Tenrif didn't say, "This will be my first choice when I'm reborn!"
Conclusion
Is the FPL-51 triplet better than the FPL-53 doublet? I wrote this review with such an image in mind, but when I opened the lid, it wasn't a "dream" but a "reality." A properly designed and manufactured "FPL-51" triplet is not inferior to the "FPL-53" doublet (*).
(*) What exactly is it? Although I cannot comment on this at the level of this article, I can confidently say that they have "almost the same performance" and are "more cost-effective in certain situations."
Certainly, in addition to optical performance, there are some differences in specifications, such as the greater weight of the lens part of the triplet, leading to a heavier front end. One thing I can say clearly is that choosing equipment based on conditional thinking, such as "this telescope is not good because it is FPL-51" or "this telescope is good because it is FPL-53," is incorrect.
For SV550 122MM, the impact of the "breakthrough price" is extremely significant. As a high-performance apo refracting telescope with a 120mm caliber, it can be said to be an easy-to-operate telescope for amateur enthusiasts at the limit caliber, all for just $1499.99.
(*) As the diameter increases, the cost-effectiveness advantage of the FPL-51 triplet may become more apparent.
Although it's affordable, it looks good, and the photos taken with it are also good. SV550 122MM brings such a choice to astronomy enthusiasts. How will you use it?
So, here's to everyone having a delightful astronomical life!
Learn more details about the reviews, pls switch to this video https://www.youtube.com/watch?v=_TaCNNBOWp0